Generate XRHandShape Assets from Hand Recordings
Once you have recorded hand data on your XR device, you can import and process these recordings within the Unity Editor to create custom XRHandShape assets.
Import and Process Recordings in Unity
Open the XR Hand Capture Window
In Unity, navigate to: Window > XR > XR Hand Capture
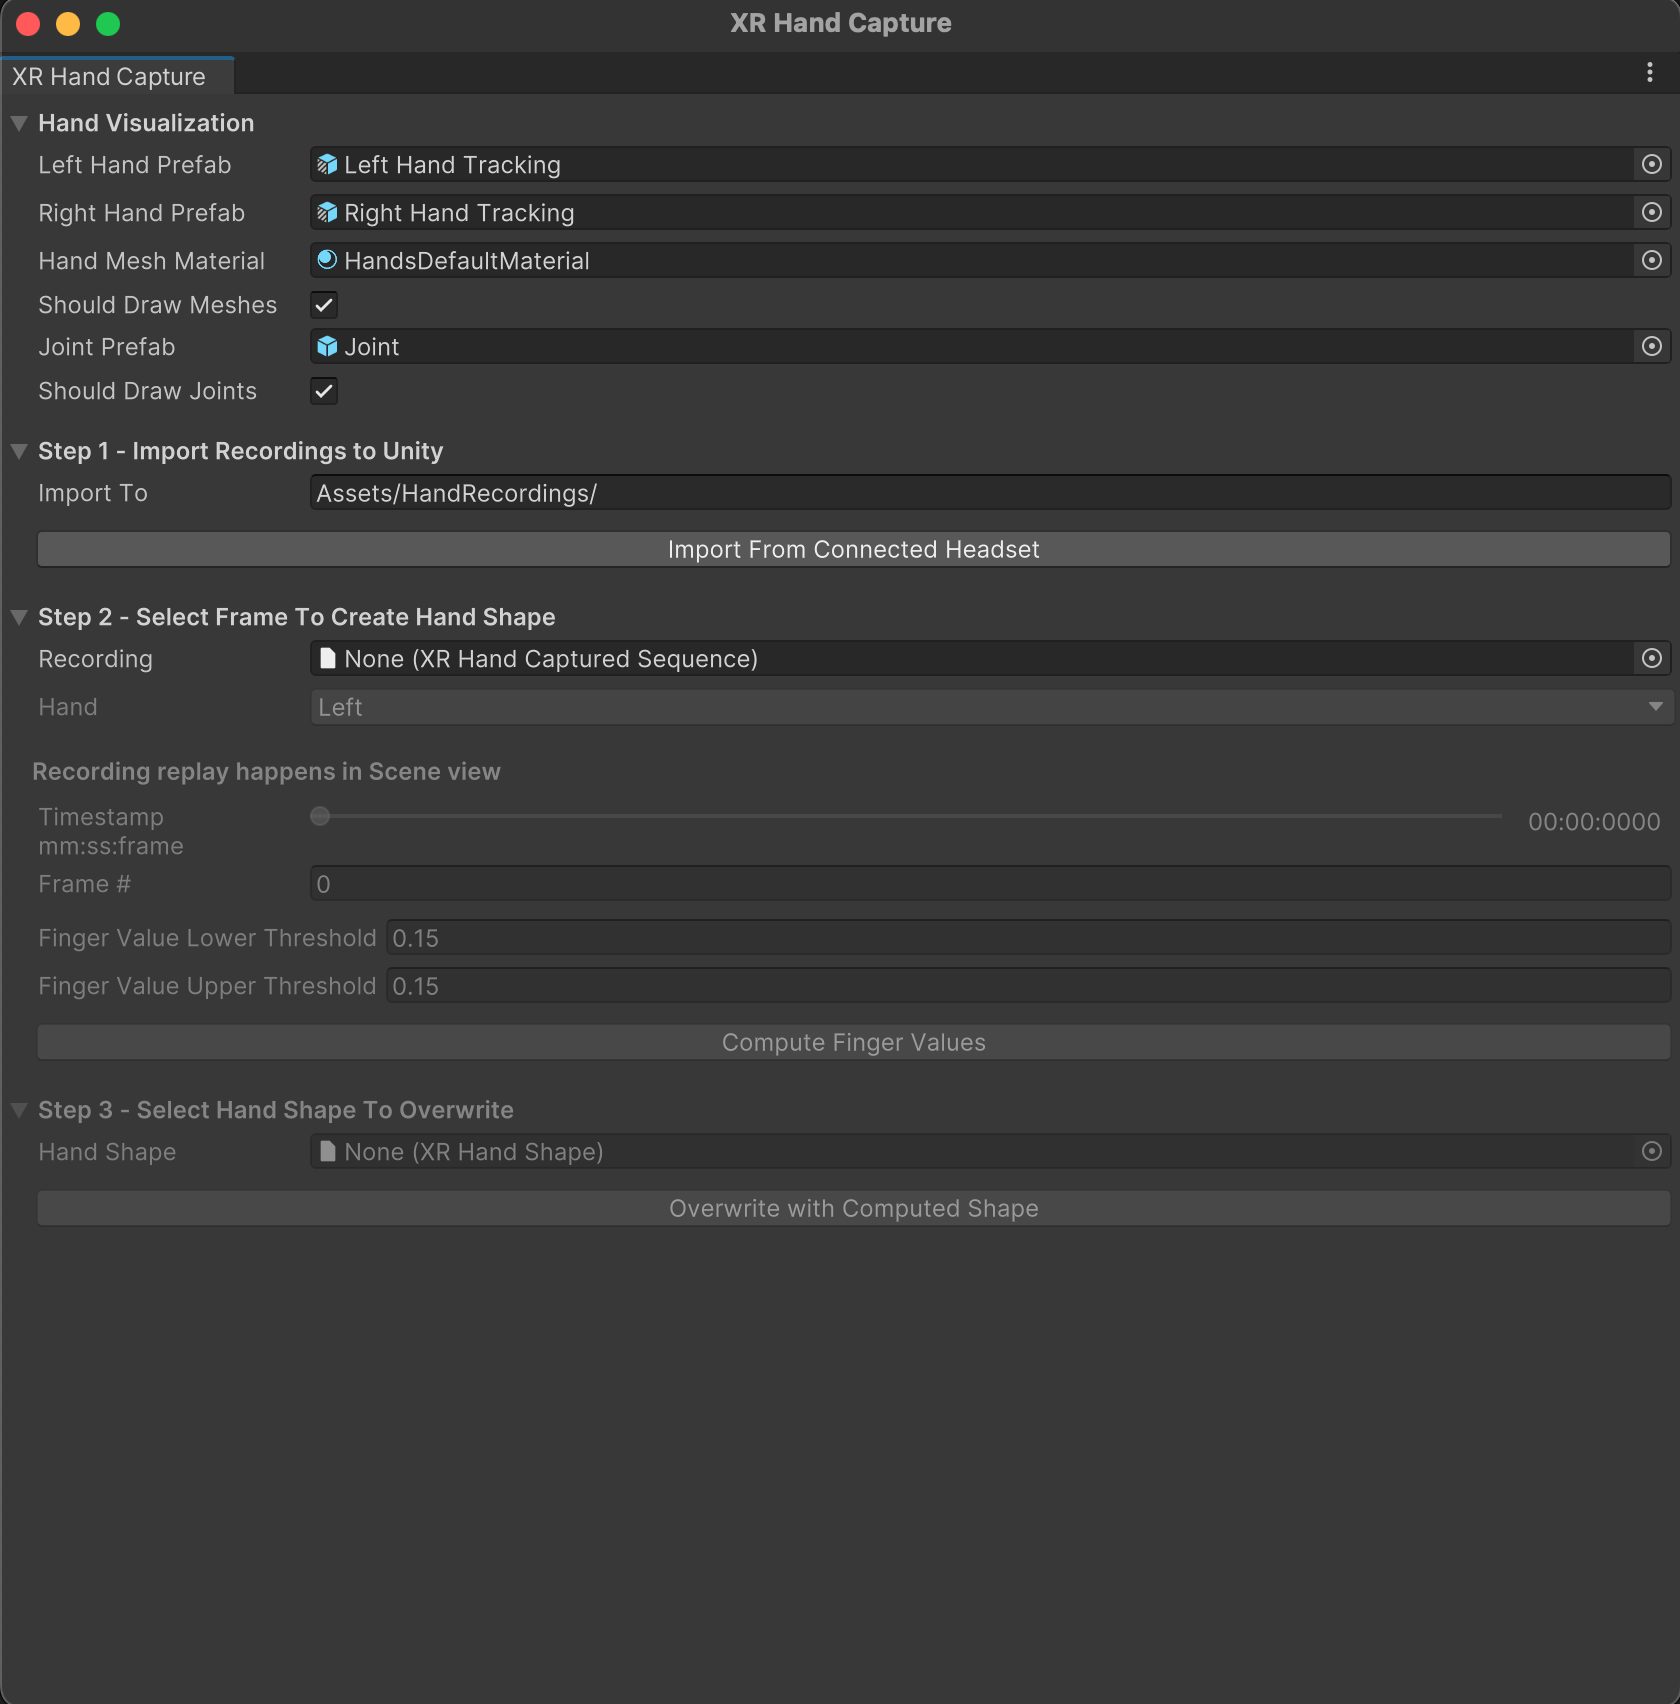
Hand Visualization Settings
The hand visualization fields are pre-populated with default settings to render hands in the scene view during playback. You can use these defaults without making any changes.
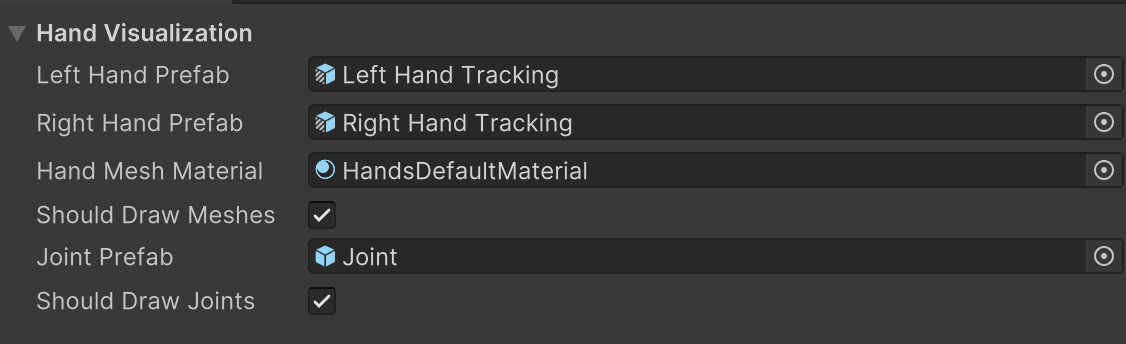
- Left Hand Prefab: Uses the
Left Hand Trackingprefab from the Hand Visualizer sample by default. - Right Hand Prefab: Uses the
Right Hand Trackingprefab from the Hand Visualizer sample by default. - Hand Mesh Material: Uses the
HandsDefaultMaterialfrom the Hand Visualizer sample by default. - Joint Prefab: Uses the
Jointprefab from the Hand Visualizer sample by default. - Should Draw Meshes: When enabled, hand meshes are rendered in the scene view during playback.
- Should Draw Joints: When enabled, hand joints are rendered in the scene view during playback.
Import Recordings to Unity

Connect your XR device to the development machine.
Note
Currently, the XR Hand Capture window will not recognize your XR device unless the Build Target is set to Android.
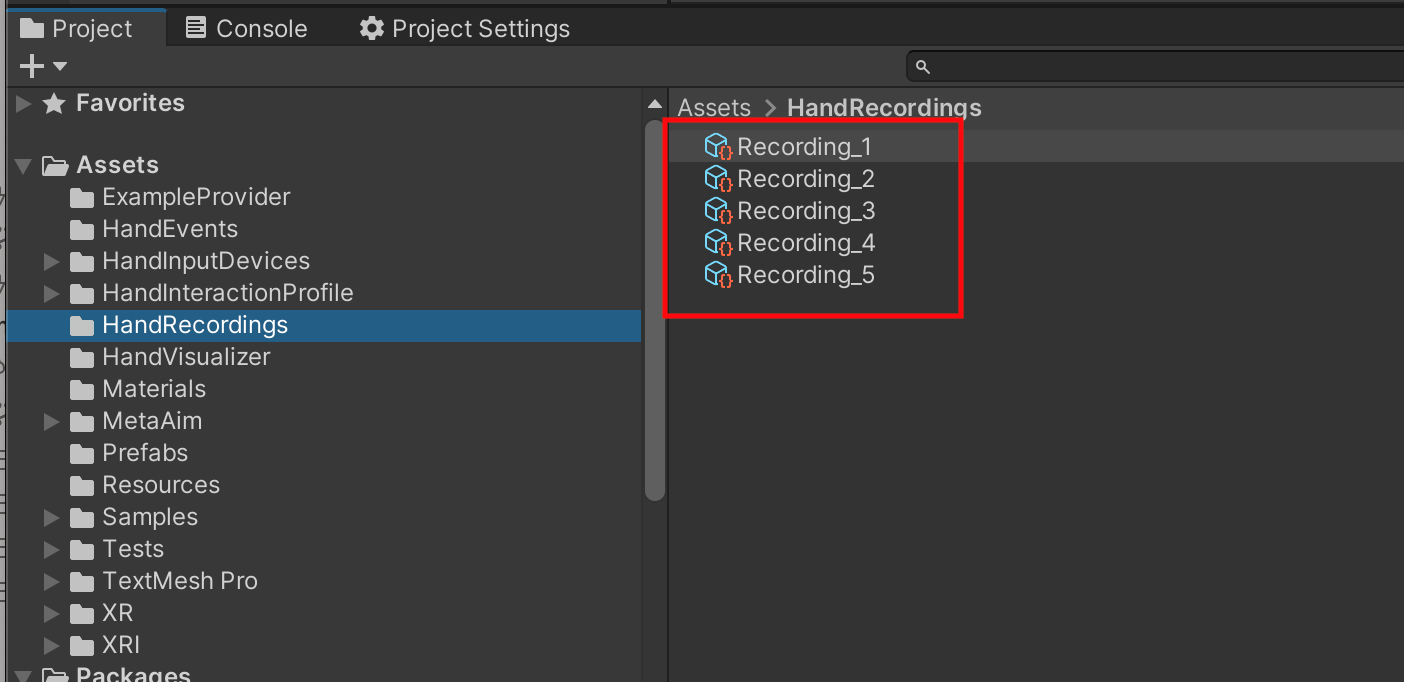
In the XR Hand Capture Editor window, click Import From Connected Headset to import all recordings from the connected device.
Imported recordings are saved to Assets/Hand Recordings by default. If the folder does not exist, it will be created automatically. You may change the save path if desired.
Tip
To avoid duplicate imports, delete imported or unwanted recordings from the headset using the delete icon in the recording app. If a recording with the same name already exists in the save path, a suffix will be appended to the new recording to differentiate it.
Select Frame to Create Hand Shape
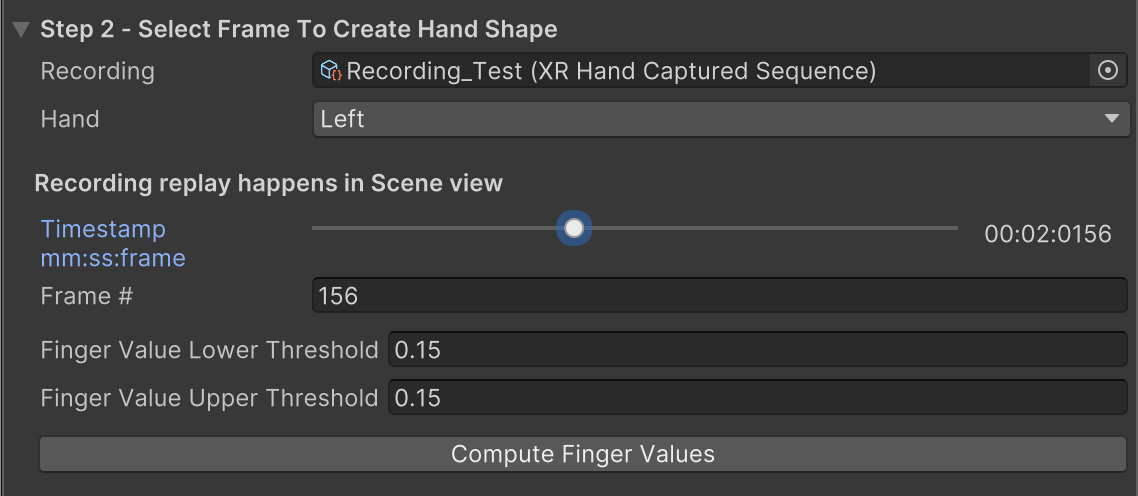
Choose a recording from your imported list. Further steps will be unavailable until a recording is selected.
Use the timeline slider to browse through frames and locate your desired hand pose. The captured hand will be displayed in the scene view.
Tip
If you can’t see the playback hands in the Scene view, it may be because the view is zoomed out or focused elsewhere. To quickly locate the hands, open the Hand Capture sample scene, select the XR Origin Hands, and press F to focus the view on it.
Select Left or Right hand for shape extraction.
Click Compute Finger Values button to analyze the selected hand pose:
- Expand the foldout to view and adjust XRHandShape properties.
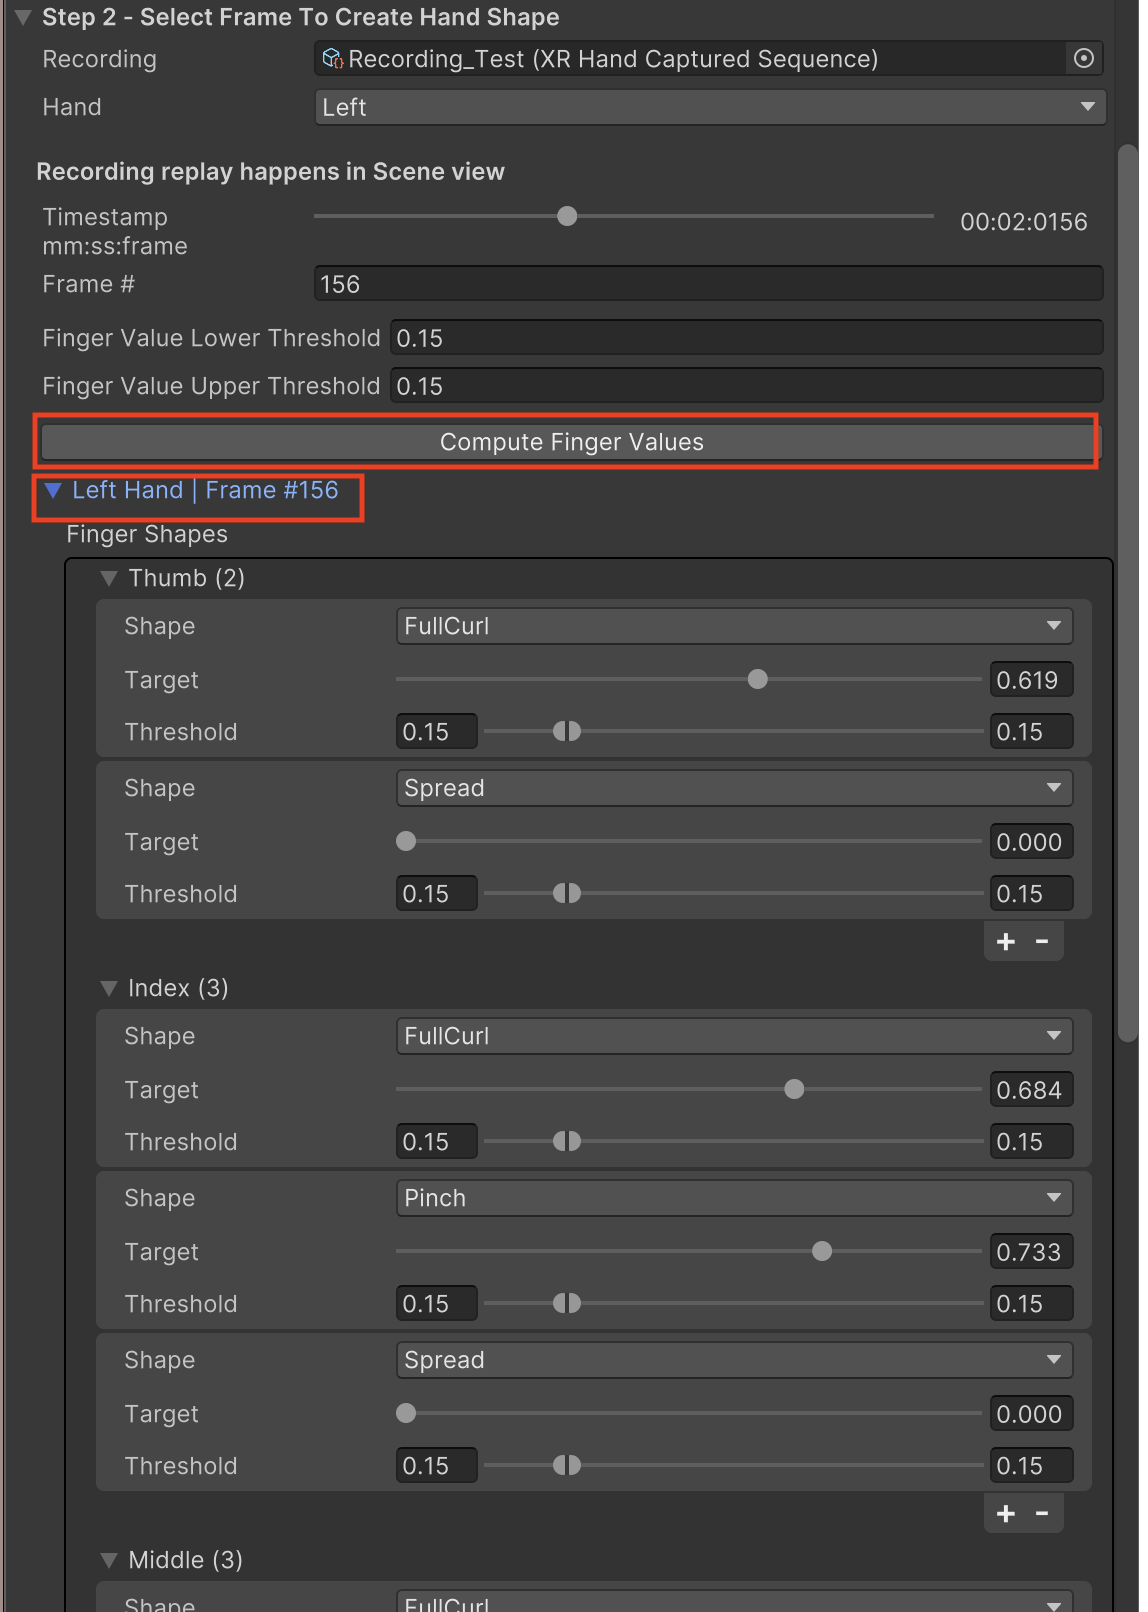
- Fine-tune finger shape target values and thresholds for gesture recognition.
- Add or remove finger shape targets as needed.
- Expand the foldout to view and adjust XRHandShape properties.
Default finger shape target threshold value is 0.15 (higher values allow for more lenient gesture recognition).
Save or Overwrite Hand Shape Asset

Select an XRHandShape asset to save the newly computed hand pose data.
Tip
To create a new XRHandShape asset, go to
Assets > Create > XR > Hand Interactions > Hand Shapein the Editor Assets menu. For more details, refer to the XRHandShape asset documentation.Click Overwrite with Computed Shape to save the hand shape data into the selected XRHandShape asset.
Test Your Generated XRHandShape Assets
To test your newly created XRHandShape assets, use the Hand Shape Debugger in the Gestures sample.
For setup instructions, please refer to the Hand Shape Debugger documentation.