SensorSDK installation
This section describes the installation process, from initial requirements to having a project ready to use SensorSDK.
Hardware requirements
DXR support
For using and developing lidars based on path-traced components, you need:
- DirectX 12
- An Nvidia graphics card with DirectX Ray tracing (DXR), such as:
- Any RTX card
- GTX 1060 6GB
- GTX 1070
- GTX 1080Ti
- Titan XP
Note
SensorSDK also supports camera-based lidar emulation without DXR. For more information, see the Camera-based lidar.
Software requirements
OS
- Windows 10
- Ubuntu 18.04, 20.04 or CentOS 7 (No DXR/path tracing support)
macOS is not officially supported, but might work by using Vulkan (no DXR/path tracing support). Please let us know if your application requires macOS support or path tracing support on Linux.
Send requests and questions at sensorsdk-support@unity3d.com.
Unity Editor
Render pipeline
- High Definition Render Pipeline (HDRP)
Request a license
To access SensorSDK, you must have a Unity Industrial Collection (UIC) subscription.
Assign a seat
Note
This section is only available for Unity ID Managers.
After you get a UIC license, you must assign a seat to use the SensorSDK package. Do the following:
- On the Unity ID page under My Account, select Organizations.
- Select your organization name from the Organizations list.
- Select Subscriptions & Services from the organization sidebar.
- Under Subscriptions, select Manage seats for the Unity Industrial Collection.
- Select the desired member, then select Assign seats.
After assigning the seat, you can verify you have the license under My Account > My Seats.
Create a project
To create a new SensorSDK project in Unity Hub:
- From the Projects tab, select New.
- Choose the required Editor version.
- Under Templates, select 3D (HDRP). If you don't have the template, download it from the Unity Hub.
- Enter the project name and location.
Important
SensorSDK requires version 2022.1.0b13 or higher of the Unity Editor.
Fix HDRP + DXR
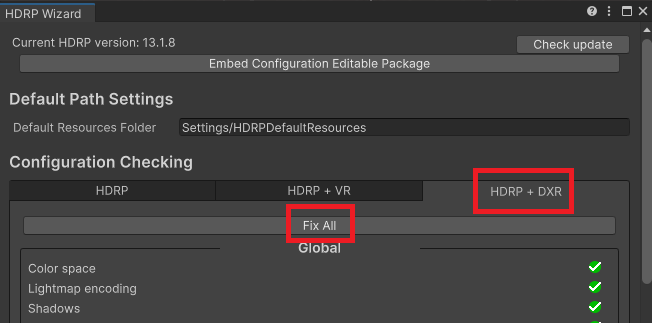
SensorSDK requires DirectX 12 for path tracing support. Use the HDRP wizard to fix the relevant settings.
Warning
SensorSDK requires you to fix all HDRP + DXR settings. If you do not fix the HDRP + DXR settings, SensorSDK might not work.
When loading a project for the first time, the HDRP Wizard window appears. Under Configuration Checking, select the HDRP + DXR tab, then Fix All.
If the HDRP Wizard doesn't appear, do the following:
- Select Window > Rendering > HDRP Wizard.
- Under Configuration Checking, select the HDRP + DXR tab, then Fix All.

- Select Restart Editor.
Install SensorSDK
After setting up your project, you can download the package from the Unity Package Manager.
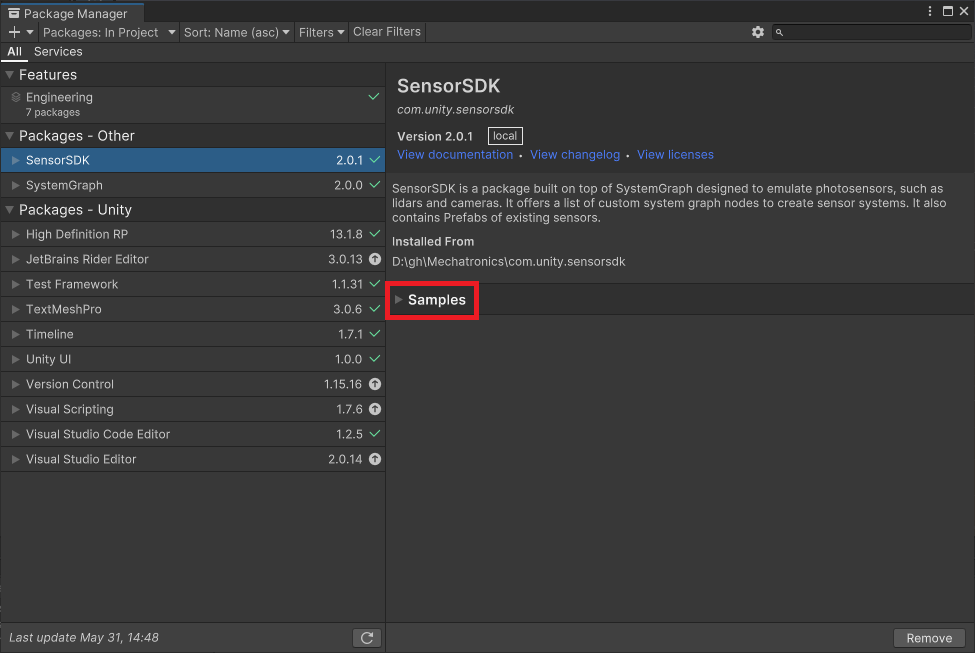
- In the Editor toolbar, select Window > Package Manager
- In the Package Manager window menu, select Package: Unity Registry.
- Use the search window to find SensorSDK.
- Select the SensorSDK package, then select Install.
Import sensor library
To import a specific sensor library to your project:
In the Editor toolbar, go to Window > Package Manager
In the Package Manager, select the SensorSDK package.
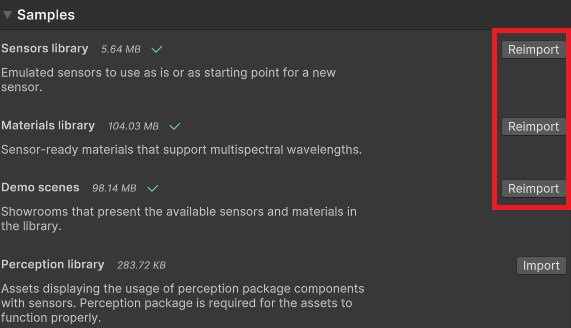
Expand the samples tab to display the import libraries.

Import each of the samples listed:

Note
To use the samples in the Perception library, you need to install the Perception package. These samples demonstrate Lidar segmentation.
After all samples are imported in the Project Assets Folder:
- Go to Project tab in the Unity editor.
- Navigate to Assets > Samples > SensorSDK
- Find the latest samples under the appropriate version number.
Note
When updating the SensorSDK package, it's recommended to reimport the library to make sure you receive bug fixes and that the sensor is still compatible with the new version of SensorSDK.
Start using SensorSDK
For more information on using sensors in your project: