Pushing the build to the UDP console via Cloud Build
In the Editor, enable Cloud Build through the Unity Services window (see documentation on Cloud Build implementation).
You can upload your game build to the build history of your Project, and push it to UDP either via the Editor, or via the Unity Cloud Build Developer Dashboard.
Upload and Deploy via the Unity Editor
Step 1 - Upload your UDP build:
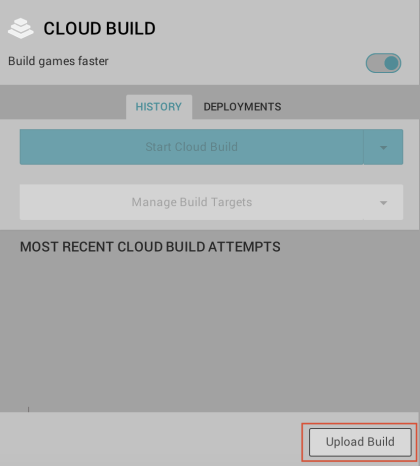
In the Cloud Build Services window, if you haven't uploaded any build before, select Upload Build.
In FILE, choose the APK of your UDP build, enter a useful LABEL, and set the PLATFORM field to Android.
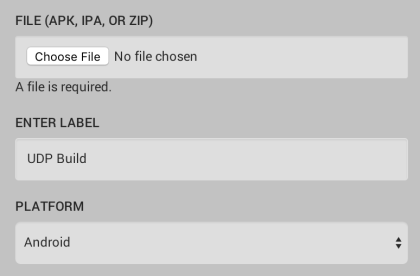 Select UPLOAD , and let it complete the upload process.
Step 2 - Push your build to UDP
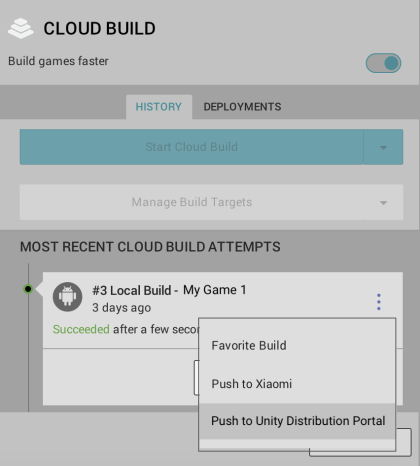
In the Cloud Build Services window, locate the desired build from the build History timeline and select Push to Unity Distribution Portal. Verify that you want to push, and that the action completes.
Upload and Deploy via the Unity Cloud Build Developer Dashboard
Step 1 - Upload your UDP build
In the Unity Developer Dashboard, navigate to your Project’s Cloud Build > History.
Select Upload, then select your APK file.
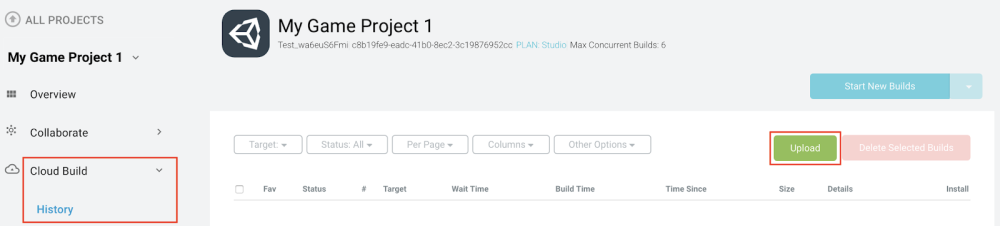
Uploading a build via the Cloud Build Developer Dashboard.
Step 2 - Push the build to UDP
From your Project’s Cloud Build History,
Click the arrow next to Download .APK file to expand the drop-down menu, then select Push to Unity Distribution Portal.
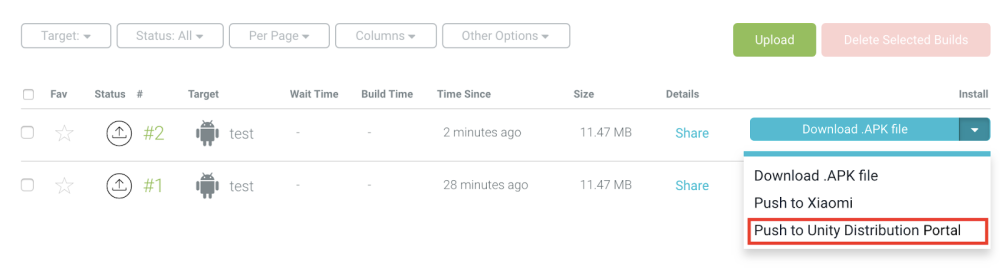
Pushing a hosted build to UDP via the Unity Cloud Build Developer Dashboard.