Installation
Automatic Installation via Unity Editor
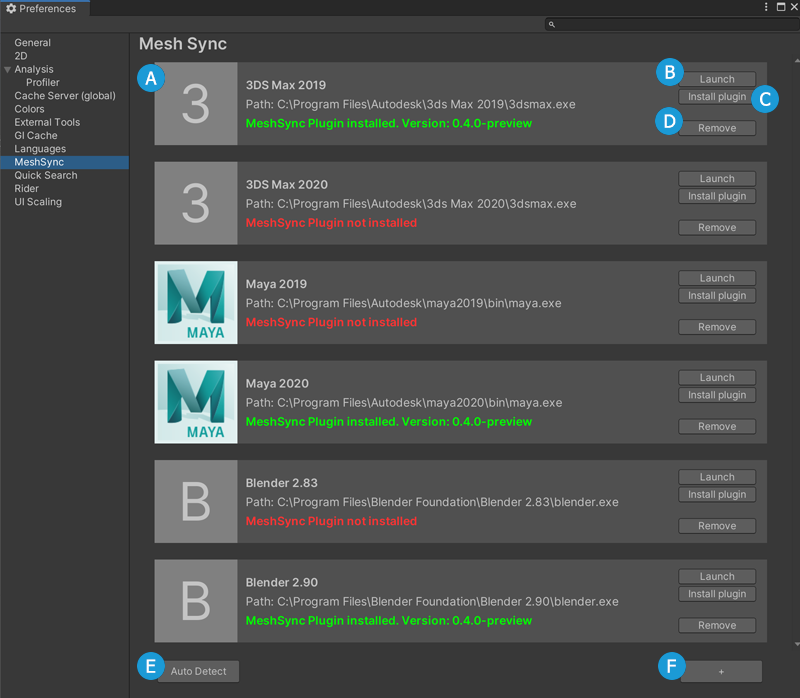
MeshSync's Preferences page
provides easy installation on several DCC tools.
Alternatively, we can also install the plugins manually.
Manual Installation
Preparation
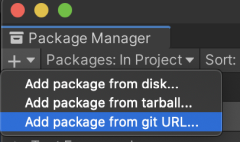
First, get MeshSync DCC Plugins package in a Unity project.
- Open Package Manager.
- Click the + button, and choose Add package from git URL.
- Type in
com.unity.meshsync.dcc-plugins.
Maya
- Open
Packages/MeshSync DCC Plugins/Editor/Pluginsfolder using a file explorer and uncompress the appropriate zip file for Maya. Copy the uncompressed files:
- Windows:
IfMAYA_APP_DIRenvironment variable is setup, copy the modules directory there.
If not, go to%USERPROFILE%\Documents\mayain Windows Explorer, and copy the modules directory there. - Mac:
Copy the UnityMeshSync directory and UnityMeshSync.mod file to/Users/Shared/Autodesk/modules/maya. - Linux:
Copy the modules directory to~/maya/<maya_version>
- Windows:
Start Maya, then go to Windows → Settings/Preferences → Plug-in Manager.
- Activate MeshSync DCC plugin by checking Loaded under MeshSyncClient.
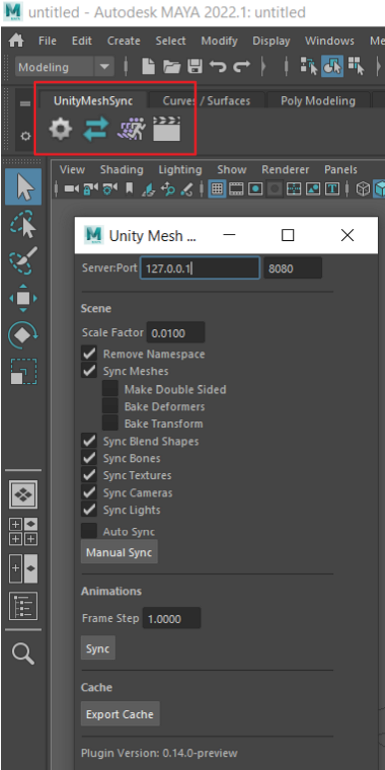
- Notice that UnityMeshSync should now be available on the shelf UI.
Click on the gear icon to open the settings menu and start playing around with MeshSync.
3ds Max
- Open
Packages/MeshSync DCC Plugins/Editor/Pluginsfolder using a file explorer and uncompress the appropriate zip file for 3ds Max. - Start 3ds Max
- Copy MeshSyncClient3dsMax.dlu that corresponds to the used version of 3ds Max into
one of the following directories:
- (Recommended) A custom directory for plugins that has been added in 3ds Max by the following menu:
- 3ds Max 2019 and earlier: Customize → Configure System Paths. Then select 3rd Party Plug-Ins tab.
- 3ds Max 2020: Customize → Configure User and System Paths. Then select 3rd Party Plug-Ins tab.
- The plugin path under the installation directory, e.g:
C:\Program Files\Autodesk\3ds Max 2019\Plugins
- (Recommended) A custom directory for plugins that has been added in 3ds Max by the following menu:
- Restart 3ds Max
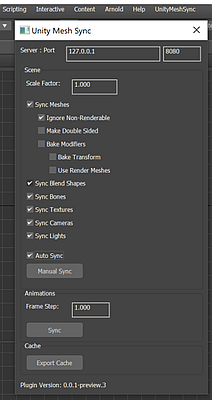
- Confirm that "UnityMeshSync" has been added to the main menu bar. The settings window can be opened by clicking "Window". > If we change the menu bar, "UnityMeshSync" will be added under Action, which > still allows us to access MeshSync features.
MotionBuilder
- Open
Packages/MeshSync DCC Plugins/Editor/Pluginsfolder using a file explorer and uncompress the appropriate zip file for MotionBuilder. - Start MotionBuilder.
- Add a path for custom plugins by clicking on Settings → Preferences → SDK menu.
- Copy MeshSyncClientMotionBuilder.dll that corresponds to the used version of MotionBuilder into the custom plugin path.
- Restart MotionBuilder.
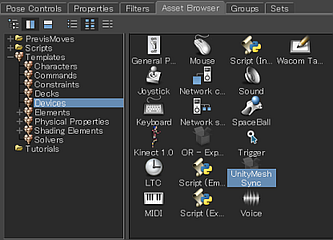
- Confirm that "UnityMeshSync" is added in the AssetBrowser under Templates → Devices folder.
- Add "UnityMeshSync" to the scene.
- Start playing around with various MeshSync settings and features by selecting Devices → UnityMeshSync in the Navigator.
Blender
- Open
Packages/MeshSync DCC Plugins/Editor/Pluginsfolder using a file explorer and uncompress the appropriate zip file for Blender. - Start Blender
- Go to Edit → User Preferences
- Click "Install" at the top right of the window, and select the appropriate blender-x.xx.zip file.
Confirm that "Import-Export: Unity Mesh Sync" is added to the Add-ons tab.
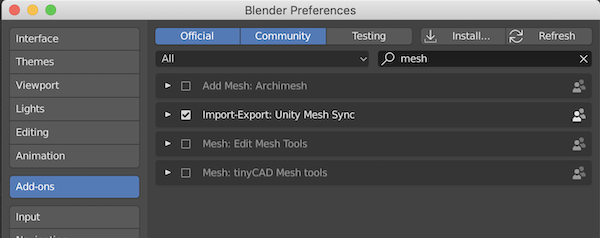
Check "Import-Export: Unity Mesh Sync" to enable it.
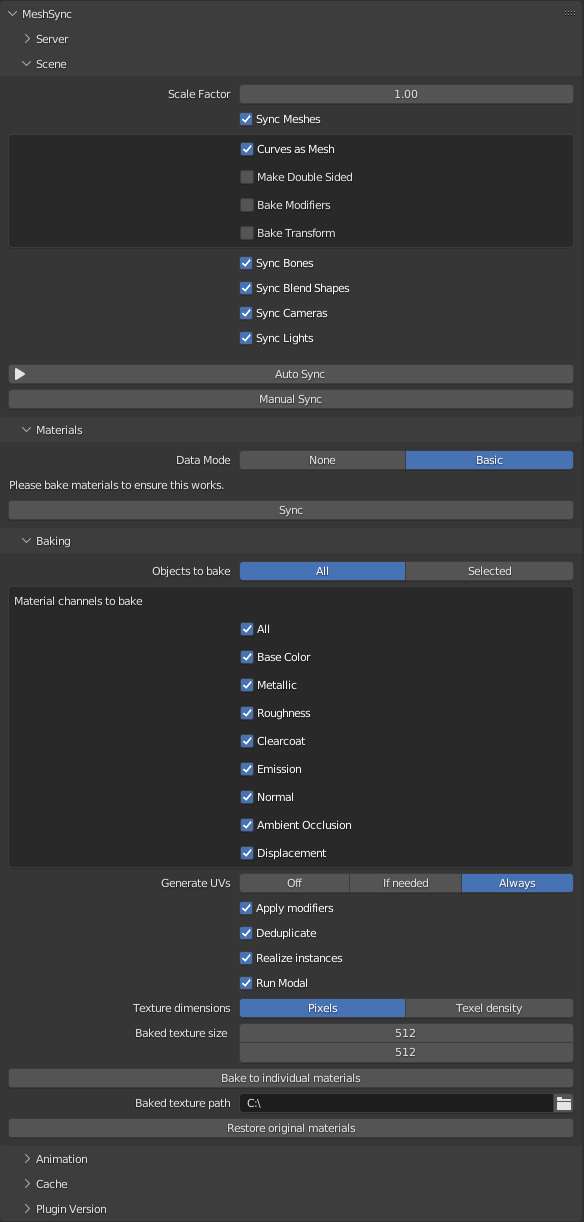
- Confirm that MeshSync panel is added.
Caveat
When installing a Blender plugin, the older version has to be uninstalled first if it exists.
Steps to uninstall:
- Select "Import-Export: Unity Mesh Sync" from the Add-ons menu.
- Click "Remove" button.
- Restart Blender.
On Mac OSX, delete the installed plugin files in the following folder:
~/Library/ApplicationSupport/Blender/2.xx/scripts/addons/MeshSyncClientBlender
Unity Project Setup via DCC tools
We can install MeshSync on a Unity project through DCC tools. This install method is designed for users who are not familiar with the Unity Editor or the Unity Package Manager.
Currently, this install method is available only for Blender. For other DCC tools, see MeshSync's installation page.
Blender
Install the Blender add-on:
- Download the installer add-on.
- Install the add-on.
- On the add-on preferences, click on Install.
Unity Editor setup
In the add-on preferences, click on the Auto Detect button to detect the location of the Unity Hub and the Unity Editor.

Unity project setup
- In the add-on preferences, click on the Select or Create Project via Unity Hub
- Unity Hub will open. In the hub, select or create a project.
- If MeshSync is not setup for the selected project, follow the instructions on the add-on preferences panel to install it.

Sync
- Click on Auto Sync or Manual Sync.

The Unity project will be launched with the Blender scene synchronised.