Getting started with MARS
This guide describes how to create a simple AR application using MARS, and introduces some MARS-specific terminology (for a full list of terms, see the Glossary). This example application looks for a surface of a minimum of 30x30cm and places a sphere on top of it.
The guide assumes no previous experience with MARS and doesn't require you to write any code.
Installation
You can install MARS through the package manager.
For device builds (Android, iOS, Magic Leap, Hololens), you need an additional package: com.unity.mars-ar-foundation-providers. This package depends on com.unity.xr.arfoundation@2.1.8, and will include that version in your project by default. You also need at least one additional XR plugin package, depending on the target platform(s). For recommendations around package versions and project configuration, see the documentation in the MARS AR Foundation Providers package.
MARS also includes optional support for Post Processing, which improves rendering of the simulation in the editor.
See the Graphics page for more information on graphics support in MARS.
The MARS Content samples are automatically imported into the Assets folder when you install MARS. These include our built-in simulation environments, templates, and example content. It is highly recommended that you keep these files in your project and track them in version control when using MARS. You can re-import or update the samples to the package version using the Package Manager UI.
A second set of more advanced templates (including the Game and Training templates), along with other optional assets are in the MARS samples pack. This can be installed from the Package Manager window.
Creating your app
Overview of the MARS UI
Before you start, take a moment to understand the MARS UI. MARS adds its own sub-menus under Unity's Window and GameObject menus. It also introduces several new items to the Project view's Create menu.
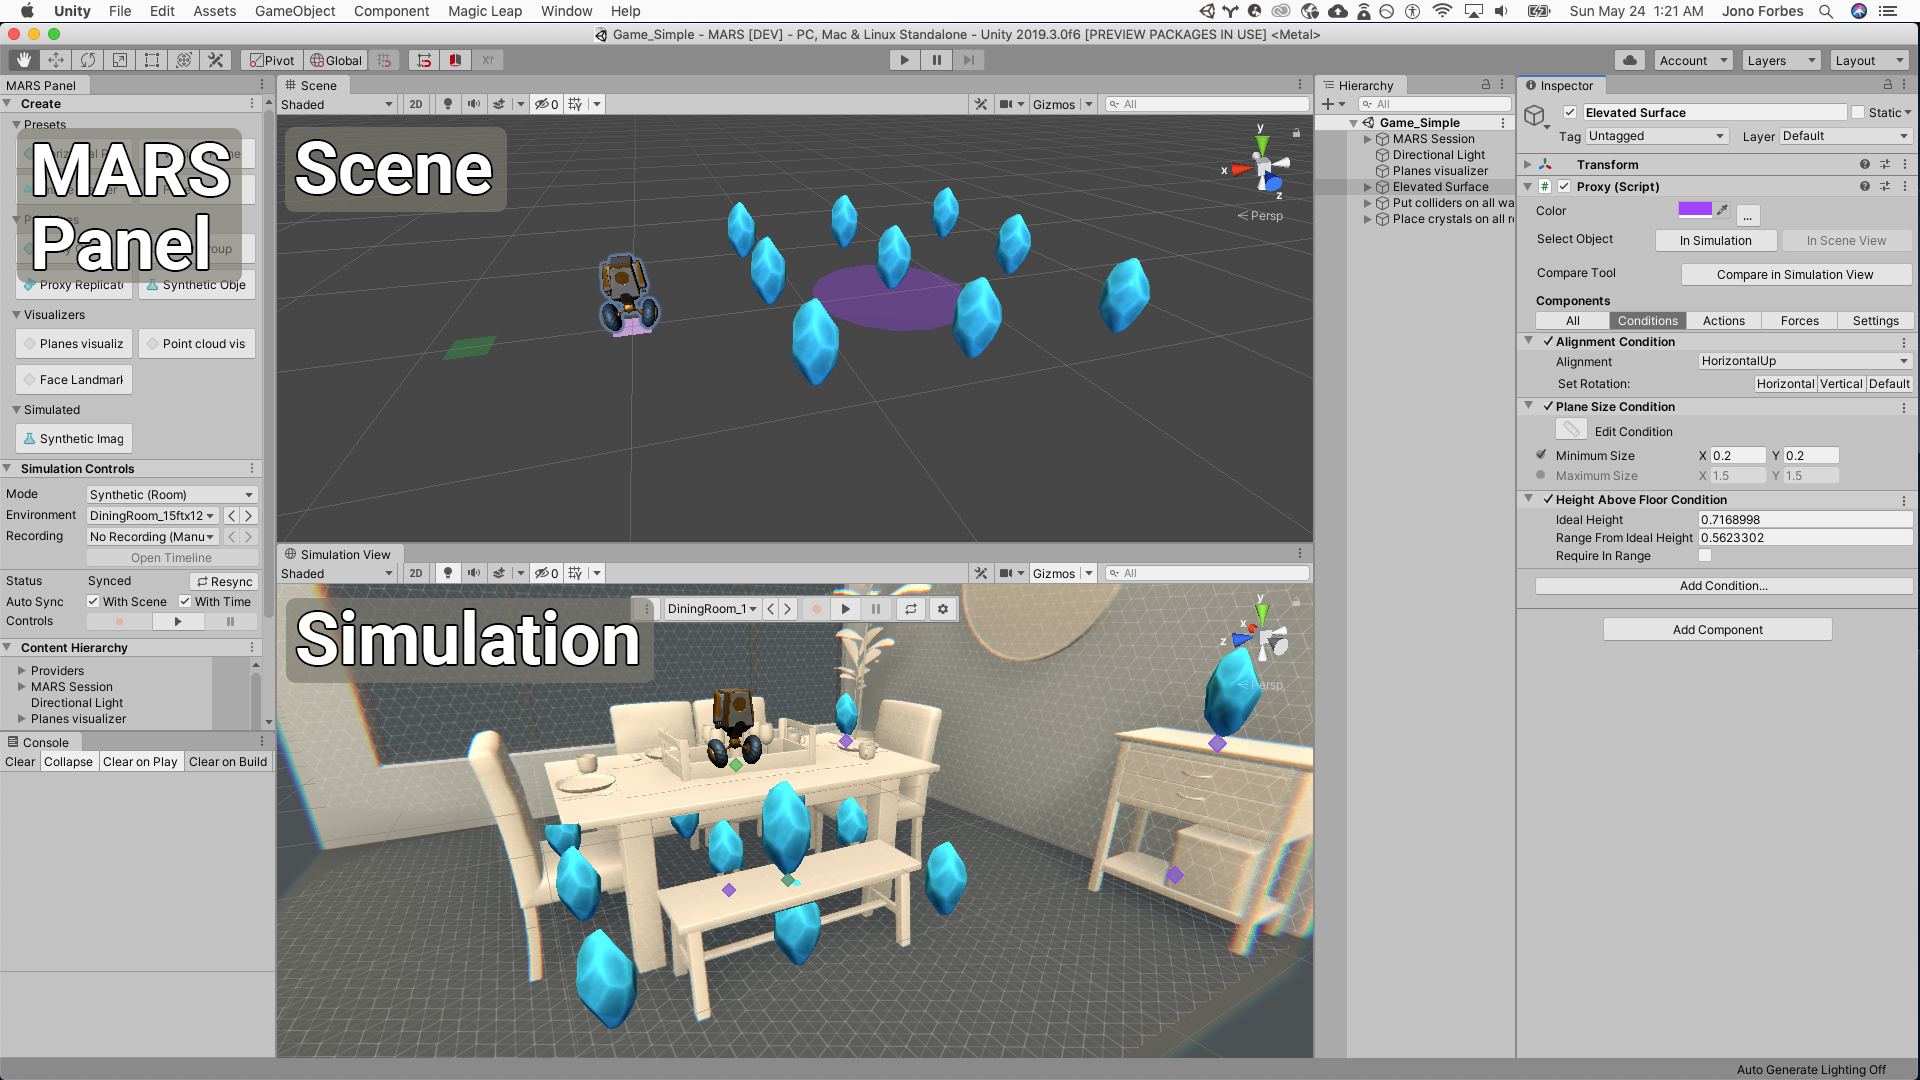
The two primary areas in the MARS workflow are the Simulation and Device View, and the MARS Panel. As a best practice, you should keep both of these views open while using MARS. When creating apps, you'll be using both of them.
If either of these views isn't open, you can open them from Unity's main menu: Window > MARS > MARS Panel, or Window > MARS > Device view.
Setting up the MARS Device and Simulation views
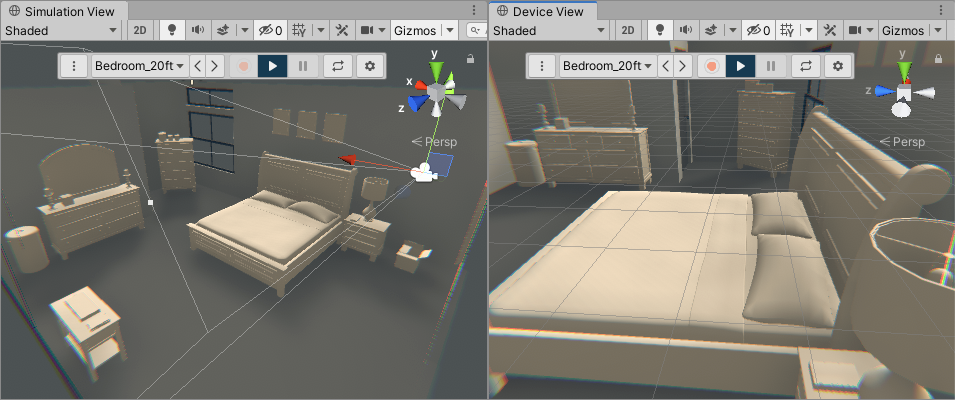
To get the most out of MARS, use a combination of the MARS Device view and Simulation view, either side-by-side or one above the other. The Device view simulates the view from a device that moves around in the physical world. The Simulation view shows the entire Scene where your MARS app is being executed.
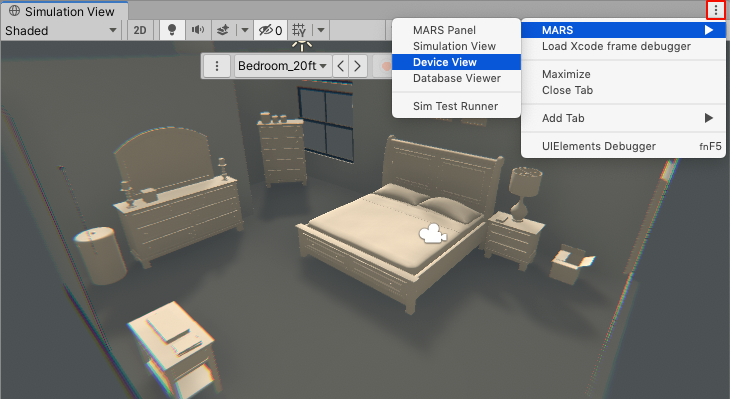
To open the Simulation and Device views at the same time, open one of the views from Unity's main menu (Window > MARS > MARS Panel, or Window > MARS > Device view). Then, click the three dots button to open the other view.
Finally, drag the window to have one next to the other.
Setting up your first Proxy
A Proxy is a GameObject in your Scene that represents a real-world object that your app can detect and use as an anchor, such as a table, a face, or a cat. MARS uses Proxies as placeholders where you can anchor content that displays in the real world when a set of conditions are met.
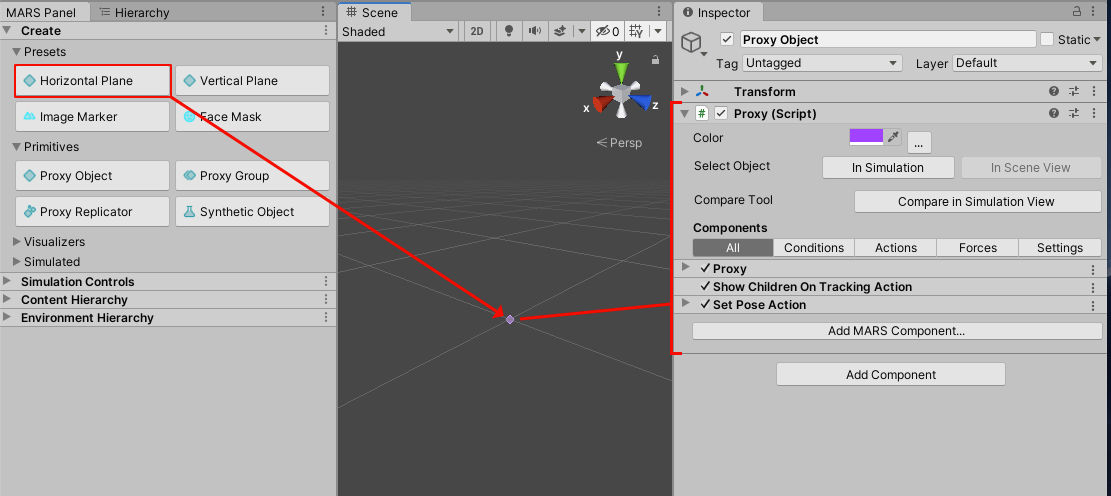
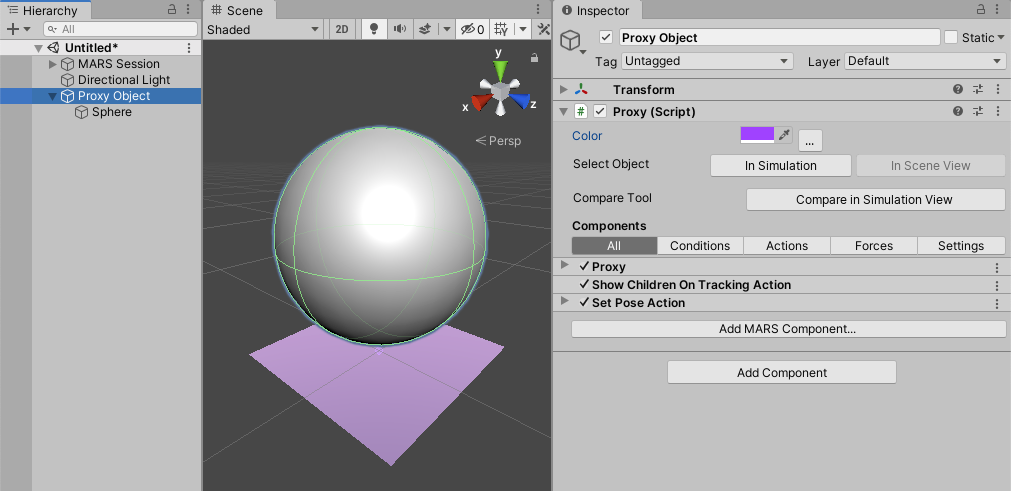
Click the Proxy Object button in the MARS Panel to create a new Proxy. The new Proxy displays in your Scene as a diamond-shaped gizmo.
For more information about Proxies and other MARS Objects, see the MARS concepts page.
Attaching content to your Proxy
Add a sphere as a child GameObject of the Proxy GameObject you created. Any child GameObject of a Proxy displays at the Proxy's detected location in the environment. Child GameObjects are deactivated and don't display on start and on match loss. MARS activates them and displays them when it finds a match.
Adding a plane size condition
Now that you have a basic Proxy GameObject to anchor your content, you need to describe what kind of real-world object your Proxy GameObject represents. To do this, you add conditions.
A condition is a component that defines a single property of a real-world object, such as size or color. Conditions don't have a typical inspector in the UI; instead, you work with them in the Entity Inspector. Each condition contains a trait and a method to evaluate how well a single instance of that trait's value type matches a value you specify. Think of conditions as the rules that need to be met in the environment for MARS to match and place your Proxy. Typically, you need to attach multiple conditions to a Proxy to build a complex definition of a real-world object. Conditions should go from general to specific; for example, you start by adding a plane condition, then define the size and orientation for that condition to match.
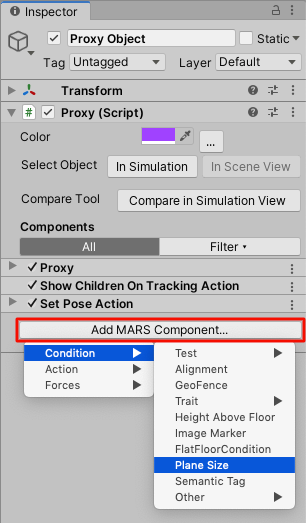
Add a Plane Size condition to your Proxy. This ensures that your Proxy only displays when MARS finds a surface of a certain size. To add the condition, in the Proxy Inspector, click the Add MARS Component button, then select Condition > Plane Size.
This attaches a Plane Size condition to your Proxy. You need to configure the condition to have a size of the detected surface of at least 30x30cm. To do this, disable the Maximum Size property, and set the Minimum Size property to 0.3 for X and Y. This ensures that the sphere you added fits on the surface.

Testing your app in a simulated environment
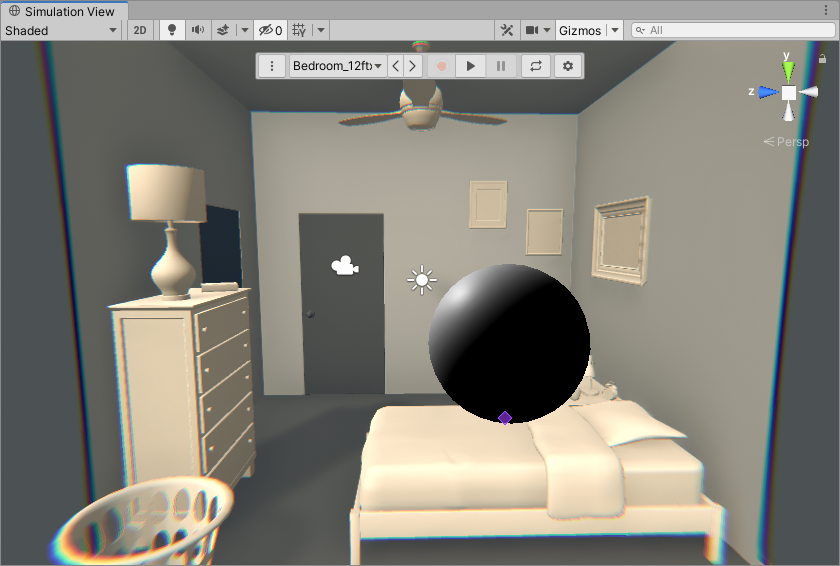
Before you test your content on an actual device, you can use the MARS Simulation feature to iterate and make sure your Proxy behaves as it should.
Open the Simulation view from Unity's main menu (Window > MARS > Simulation View). The Simulation view demonstrates how your Proxy GameObject matches against a simulated surface in a virtual environment. For more information, see documentation on the Simulation View.
Building your app
Now that you have everything set up and tested in the Simulation View, it's time to build the project to your AR device. You need to compile it to your selected build target. The process for this depends on the platform your app targets, and Window > MARS > Build Settings Check will provide supported package versions that may be required. For more information, see Unity's documentation on Build settings.
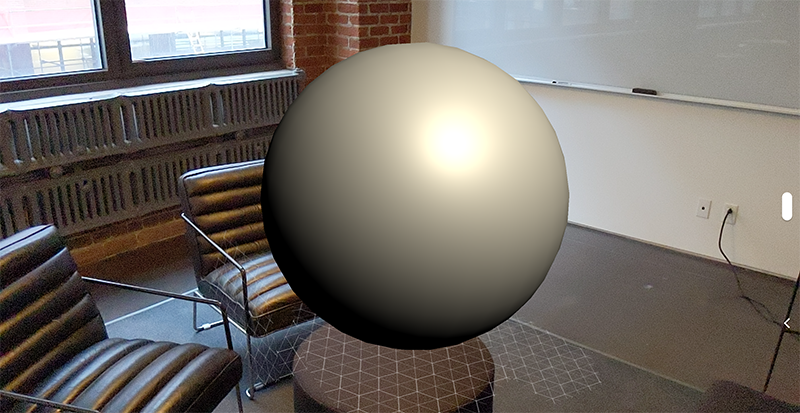
When your app runs, if MARS finds a surface of at least 30x30cm, it places a sphere on top of it.
Additional features
This tutorial only describes the basics of working with MARS. To learn more about other MARS features, and about the methods and processes for each feature, see the following guides:
- Mars UI overview
- MARS concepts
- Working with MARS
- Basic face tracking
- Image marker tracking
- Simulation environments
For more advanced topics, see: