Setting up Unity Cloud Content Delivery for your Project
You can automatically export your Unity Forma builds to Unity Cloud Content Delivery so that they can be accessed by others in your organization quickly.
Before you start
Before you start, make sure that you have a valid Unity ID account and subscription (or trial subscription) to Unity Cloud Content Delivery.
Setup and Build
You can configure Exports from Unity Forma to Unity Cloud Content Delivery automatically or manually.
Automatic
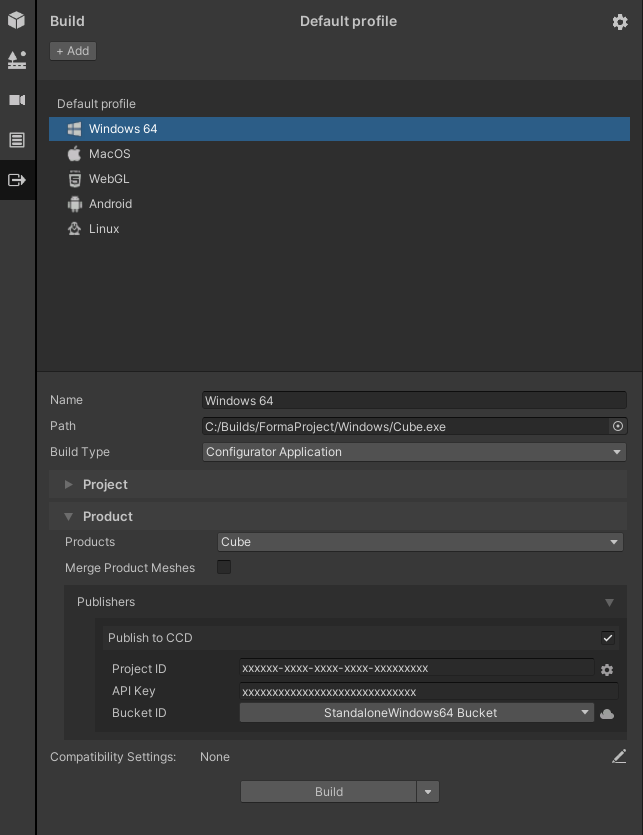
- In the Unity Forma interface, select to the Forma Export Tab.
- To add a new Build Profile, select Add.
- Select the Publish to CCD checkbox. Other options for setting up export to Unity Cloud Content Delivery appear.
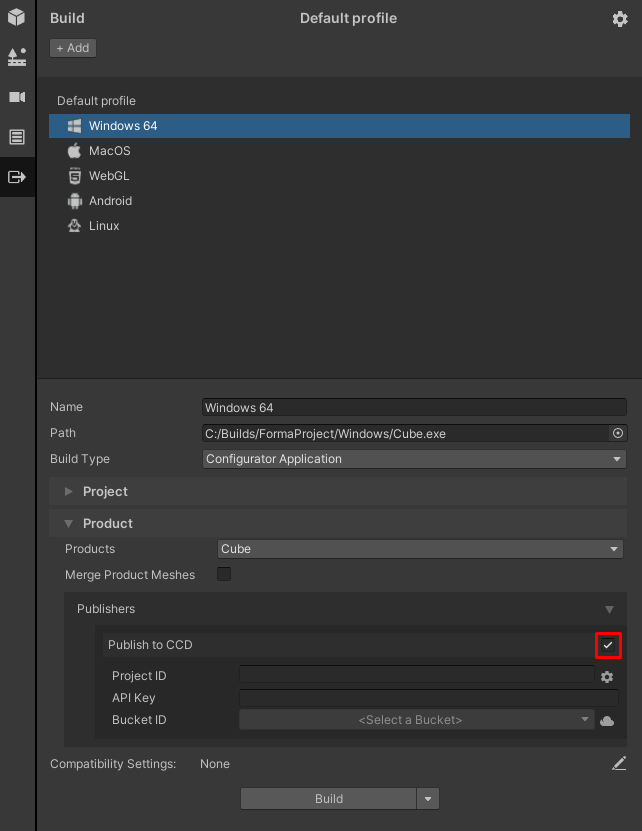
- In the CCD Project ID field, select the settings icon.
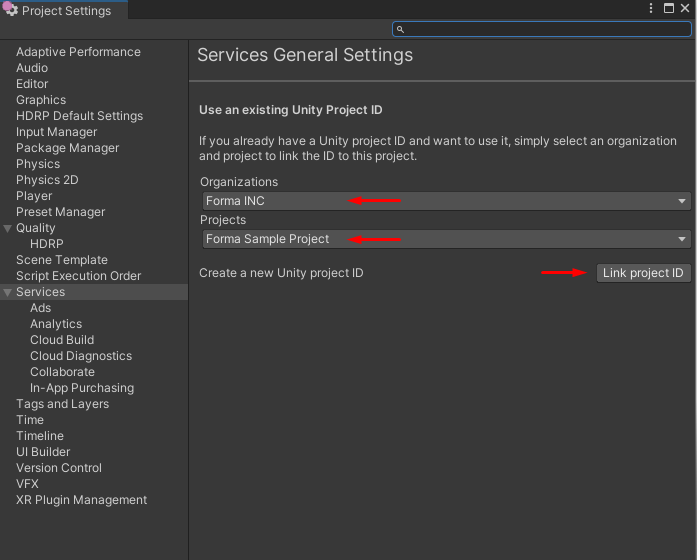
The Services General Settings window opens.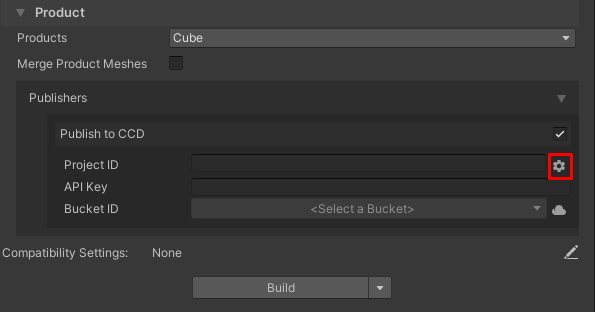
- In the Organizations drop-down, select the Organization you want to link to this Project.
- In the Projects drop-down, select the Project you want to link it to.
- Select the Link Project ID button.
- Close the Services General Settings window and return to your Build Profile.
- In the Bucket ID drop-down menu, select the Bucket ID a new bucket using the Bucket ID you want to use for this Build Profile.
- Select Build and then select Publish Products.

Your first release appears in your Unity Cloud Content Delivery bucket, tagged as latest.

The Editor automatically adds the CloudContentDeliveryProductSource component
to your configurator Scene before it builds the project. The component loads the latest products from the CCD bucket on startup.
Note
Products output build can be found under [PROJECT FOLDER]/ServerData.
Building without selecting a publisher will use [PROJECT FOLDER]/Library/com.unity.addressables/aa/[PLATFORM TARGET].
Manual
You can manually set up export to Unity Cloud Content Delivery.
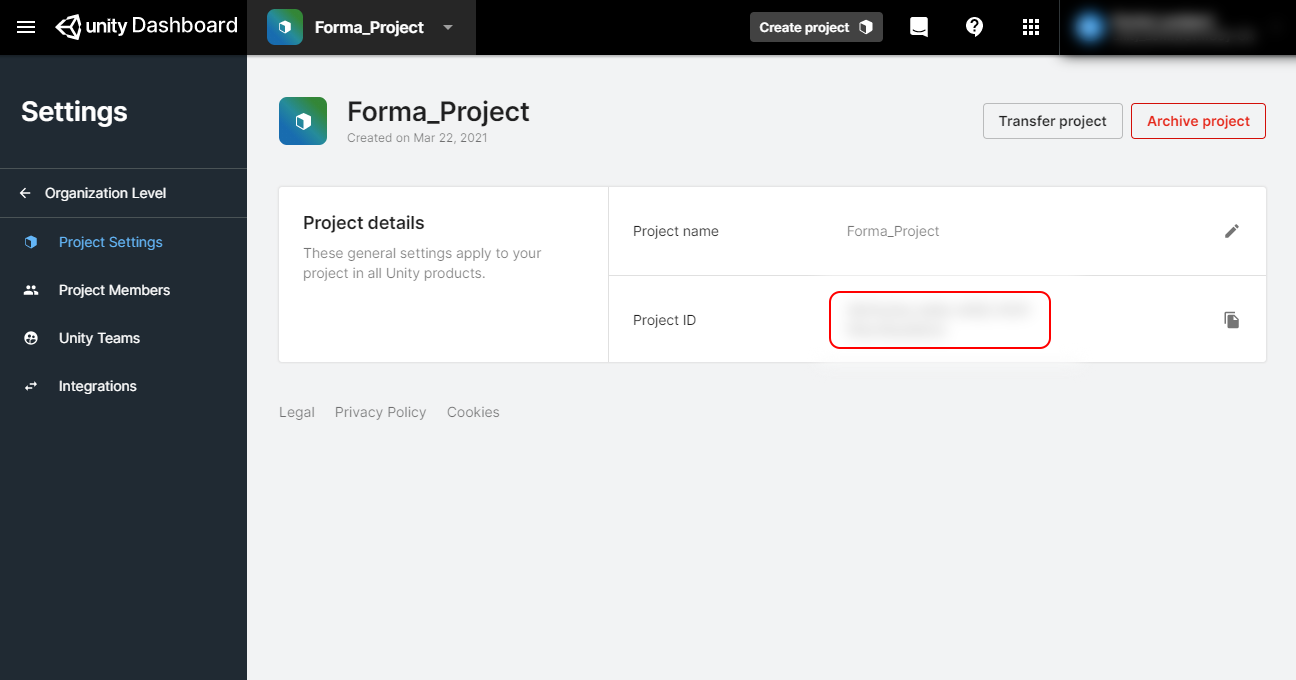
- From your Unity Cloud Content Delivery dashboard, select the Project you want to use (or add a new one).
- Note the Project ID. You will need it in later steps.
- Navigate to the API Key tab and note the API Key. You will need it in later steps.

- Navigate to the Buckets tab.
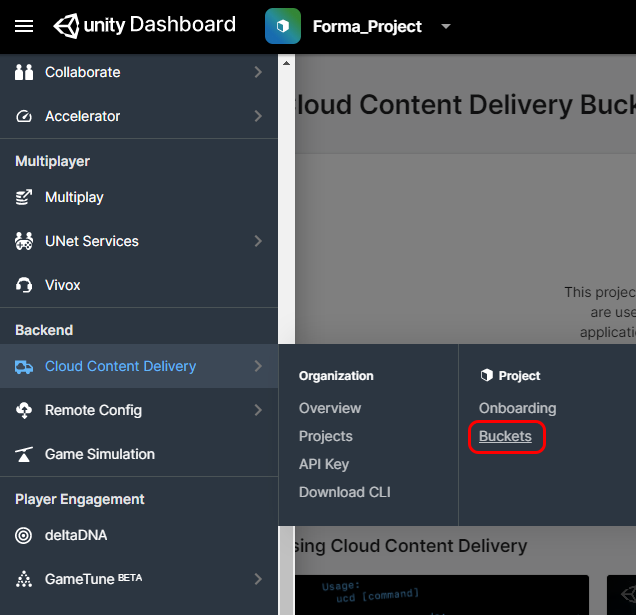
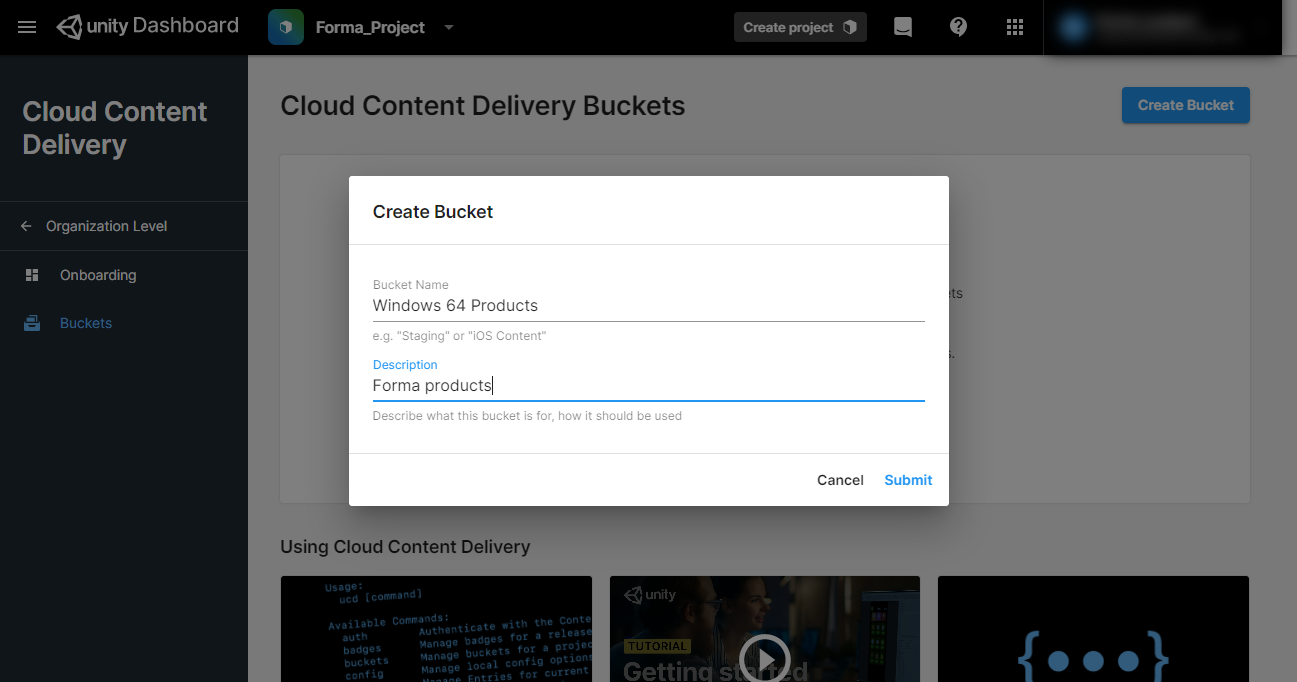
- Add a new bucket for your current Unity platform.
Important: Addressable assets are only compatible with the platform on which they were built. For examples, Windows cannot load Android Addressable Assets).
- In the Unity Forma interface, select to the Forma Export Tab.
- To add a new Build Profile, select Add.
- Under the Product parameters, in the Publish Products drop-down, select Remote.
 .
. - Select the Publish to CCD checkbox.
- In the API Key field, enter the API key that you noted from the CCD dashboard.
- In the Bucket drop-down, select the Bucket that you added.
- Select Build.
Your first release appears in your Unity Cloud Content Delivery bucket, tagged as latest.
Loading Products
You can load your Products in the Build, or in the Unity Editor (advanced).
Loading Products in the Build
You load Products in the Build locally or remotely.
Local
The system automatically builds and moves Products in the StreamingAssets folder.
By default, the MixedProductSource component loads catalogs in this directory on startup.
Remote
The system automatically adds the CloudContentDeliveryProductSource component to your configurator Scene before it builds the Project.
The component loads the latest products from the CCD bucket on startup.
In the Unity Editor (Advanced)
Note: To access advanced settings for your Configurator, you must switch to the Unity Editor interface (Forma>Switch Mode)
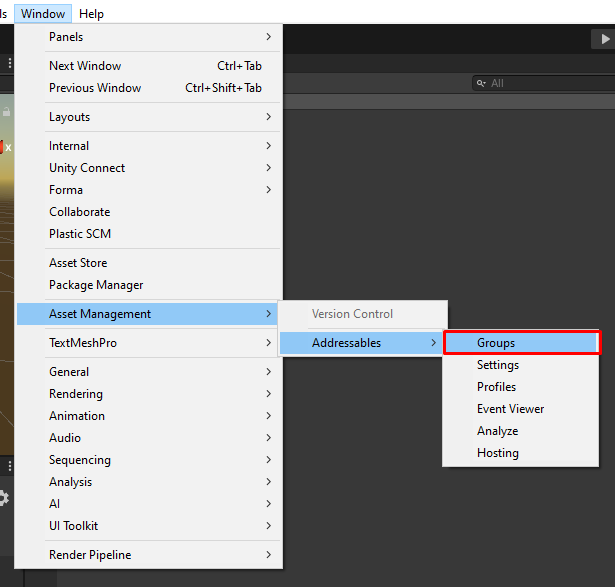
To load remote product catalogs in the Editor, you must change the
Play Mode Script in the Addressable Groups Window to Use Existing Build.
For more information for developers about Addressable Assets in Unity Forma, see Forma GameObjects

Product Source
To select a Product Source in the Editor, follow these steps:
Select your Configurator GameObject and add the
CloudContentDeliveryProuctSource.cscomponent.
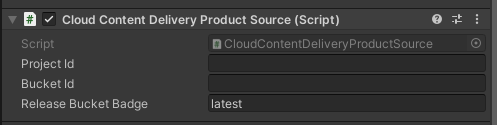
Enter your Project ID and Bucket ID. The default badge is
latest, but you can specify your own.Add the Product Source to your Configurator Settings.
Now, the configurator always loads the latest version from your CCD bucket.