Optimizing your configurator for different platforms
The user experience of your configurator can be different depending on the software and hardware platforms that a consumer uses to access your application. Unity Forma Profiles let you offer the best experience on each of the platforms you support. Each profile contains a list of products and environments that can be used with that profile, and its own quality settings. With Profiles, you can build applications using different combinations of Products and Environments and export configurators with higher or lower image quality.
You can create high and low resolution variations of the same Environment or Product to use for each platform.
You can open the Profiles window by going to the Forma menu and selecting Profile Settings. The Profiles window is divided into three sections: a list of profiles on the left, the selected profile's settings in the center, and a project asset library on the right.

Variant Profiles
Both Products and Environments can have variations that can be used in different profiles. These variations are referred to as Variant Profiles. In the Profiles window, Products or Environment with multiple Variant Profiles will have a number in the bottom-right of their display card indicating the number of available variants. When the Profiles window is first opened, all Products/Environments with multiple Variant Profiles are collapsed into a single display card. The card can be clicked on to toggle showing individual Variant Profiles.
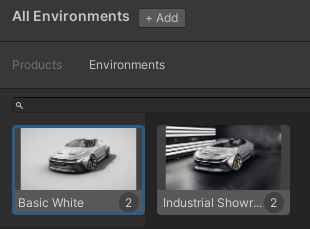
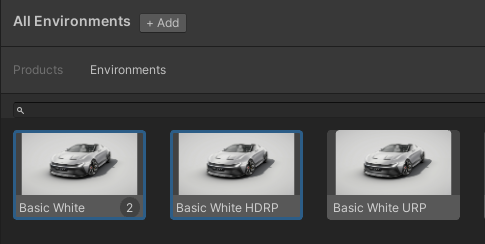
Selecting the Environments that you can use in Profiles
You may have added several Environments to your project. To select a specific Environment to use in a Profile, it must be available in the project asset library. By default, any environment included in an Environment Definition will be visible here.
Adding an Environment to the Project Asset Library
You can add any Unity Scene that does not have a configurator game object as a Forma Environment. To add an Environment to the library, follow these steps:
- Select the Forma menu and then select Profile Settings.
- In the right column of the window, select the Environments tab.

Select the Add button and do one of the following:
- To add an existing Unity Scene as an Environment, select Add from Unity Scene and navigate to the correct asset. The new Environment appears in the list of All Environments that you can select from when you add a Profile.

To add a different version of an Environment that already exists, follow these steps
- Select the Environment card you want to add a Variant for.
- Select the Add button and then select Add Alternate Environment.
- Navigate to the correct Asset. The system add the Scene you select as a Variant Profile for the selected environment.
- To add an existing Unity Scene as an Environment, select Add from Unity Scene and navigate to the correct asset. The new Environment appears in the list of All Environments that you can select from when you add a Profile.
Adding an Environment to a Profile
To add an Environment to a Profile, follow these steps:
- Select the profile you want to add an Environment to.
- Select the Environment section in either the Profile settings or the Asset Library.
- To add an Environment to the profile, select the display card for the Environment and then drag it to the settings section for the Profile.
Selecting the Products that you can use in Profiles
You may have several Products defined for your project. To select a specific Product to use in a Profile, you must make it available in the Profiles window. By default, any Product included in an Product Definition will be visible here.
Adding a Product to the Project Asset Library
To add a Product that you want to use in Profiles, follow these steps:
- Select the Forma menu and then select Profile Settings.
- In the right column of the window, select the Products tab.
- Select the Add button and do one of the following:
- To add a Product from a file in this project, select Add from File and then select the correct file.
- To add a Product from an existing Unity prefab, select Add from Unity Project and then select the correct asset.
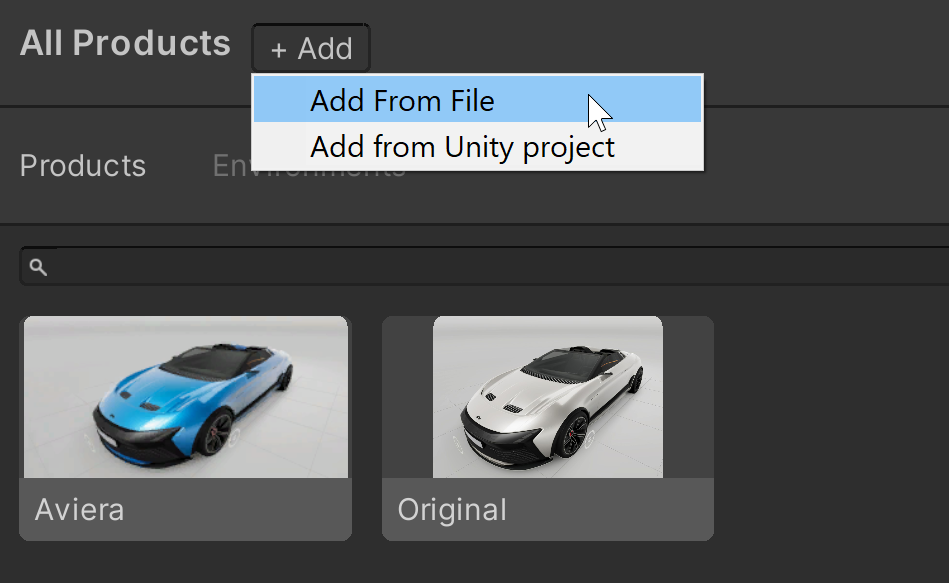
The new Product appears in the list of All Products that you can select from when you add a Profile.
If you have a Product card selected when you select the Add button, there will be a third menu option called Add Alternate Product. Choosing this option will allow you to select an existing Unity prefab and add it to the product as a Variant Profile.
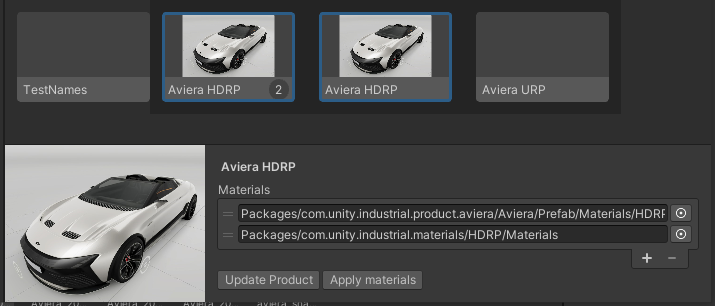
Sometimes, Variant Profiles under the same product require different materials. For example, a product designed for a URP pipeline must use different materials than a product designed for a HDRP pipeline. If the two sets of materials share names but are stored in different folders, this can be set up from the Profiles window.
To configure a Product Variant Profile so that you can assign materials within a specific folder, follow these steps:
- In the Asset Library, select the Variant Profile display card.
- In the bottom of the Asset Library column, in the detailed view of the Variant Profile properties that appears, customize any of the following:
| Property | |
|---|---|
| Display Name | Display Name for the variant in the configurator. Click this text to edit it. |
| Materials | A list of folders relative to the Unity project that contain the materials for this Variant Profile. |
| Update Product Button | Switches the product model. |
| Apply Materials Button | Update the material queries to use the materials in the listed Materials folders. |
Adding a Product to a Profile
To add a Product to a Profile, follow these steps:
- Select the Profile you want to add to.
- In the Profile settings window (or the Asset Library), select the Product section.
- To add a Product to the selected profile, select the display card for the product and then drag it to the Settings section for the Profile.
Adding a new Profile
To add a new profile, follow these steps:
- Select the Forma menu and then select Profile Settings.
- In the Profiles window, select Add.
in the list of Profiles, a new Profile appears with a default name that you can change.
- To select a quality level for this Profile, in the Quality Level drop-down, select from the available quality levels configured for your project.
Note: To define the different quality levels available for your project, select the Forma menu and then select Switch Mode. In the Unity Editor, follow instructions to customize Quality levels. Only Quality levels that you define for your project will appear in the drop-down list when you customize your Profile. - To specify which Products will appear in any applications you export using this Profile, select the Products tab and then drag and drop the correct Products from the All Products column to the list of selected Products for this Profile.
- To specify which Stages or Environments will appear in any applications you export using this Profile, select the Environments tab and then drag and drop the correct Environments from the All Environments column to the list of selected Environments for this Profile.
- Close the window and test your Profile by selecting it in a Build target for export.
Adding an Alternate Product
To add an alternate product, follow these steps:
- Select the Forma menu and then select Profile Settings.
- In the Profiles window, select your product's profile from the list of product's profiles.

- Above the list of Profiles for the Product, select Add.
A popup shows the following choices: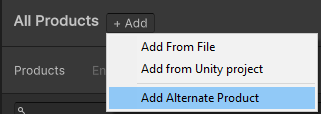
- Select the Add Alternate Product. A selection window appears.
- Find the Product model that you want to add as an alternate. For example, you might add a lighter version of your model that uses fewer meshes.
- Double click on the model to select it. The window closes and the new Product Profile is added. The updated Profile card appears as follows:

- (optional) To see each Profile of your product, select and expand the Profile card.

- (optional) To test it, drag and drop it into the Products under the active Profiles for the configurator.
Add a new Profile
To add a new Profile, follow these steps:
- In the Profiles window, select Add.
In the list of Profiles, a new Profile appears with a default name that you can change.

- To select a quality level for this Profile, go to the Settings tab and from the Quality Level drop-down, select from the available quality levels configured for your project.
Note: To define the different quality levels available for your project, select the Forma menu and then select Switch Mode. In the Unity Editor, follow instructions to customize Quality levels. Only Quality levels that you define for your project will appear in the drop-down list when you customize your Profile. - To specify which Products will appear in any applications you export using this Profile, select the Products tab and then drag and drop the correct Product Variant Profiles from the All Products column to the list of selected Products for this Profile.
- To specify which Stages or Environments will appear in any applications you export using this Profile, select the Environments tab and then drag and drop the correct Environment Variants from the All Environments column to the list of selected Environments for this Profile.
- Close the window and test your Profile by selecting it in a Build target for export.
Switch Profiles
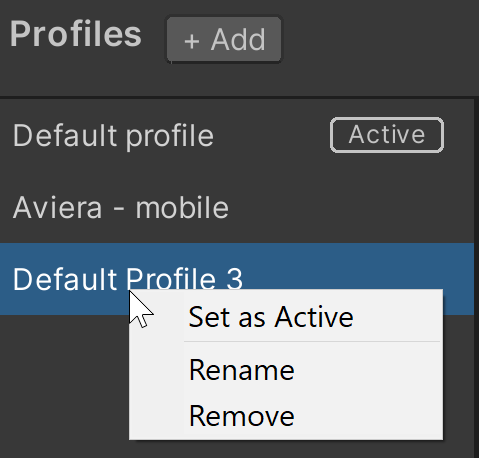
The Unity Editor only displays Products and Environments for the Active Profile. The system uses an Active label to indicate which Profile is currently active.
To set a different Profile as Active, right-click on the correct Profile and select Set as Active.