Sample: Create and upload Unity Editor assets
You can use the Asset Database Uploader sample in the Unity Editor to create and upload assets from your Unity project into your Unity Cloud project. By creating them and uploading them, your assets will be available in the Unity Asset Manager dashboard.
The sample use the management endpoints that requires a minimum role of:
- Manager in the Unity Cloud Organization you belong to.
OR - Asset Manager Contributor in the Unity Cloud Project you belong to.
Before you start
Before you use the Asset Database Uploader sample, you must have the following:
- An installed Assets package
- An installed Identity package
- A valid Unity ID account
- Access to Asset Manager service
- A Unity project with the Asset Manager service enabled (see Asset Manager documentation)
Note: While the Assets package doesn't depend on the Identity service, it is used in the sample to control the authentication flow.
Install the sample
To install the sample, follow these steps:
In your Unity project window, go to Package Manager > Unity Cloud Assets.
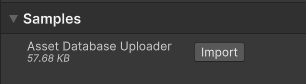
Expand the Samples section and select Import next to the Asset Database Uploader sample.
After the import process is complete, you can view your imported assets in the
Assets/Samples/Unity Cloud Assetsfolder.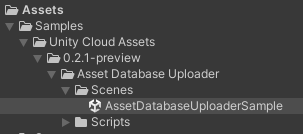
Run the sample
To run the sample, follow these steps:
- Go to
Assets/Samples/Unity Cloud Assets/<package-version>/Asset Database Uploader/Scenes/AssetDatabaseUploaderSample.unityand open the scene. If this is your first time launching the sample, make sure to sign in with your Unity Gaming Services account. - Select the
AssetDatabaseUploadergame object in the Hierarchy window. - In the inspector window, select the
Fetch Organizations and Projectsbutton.
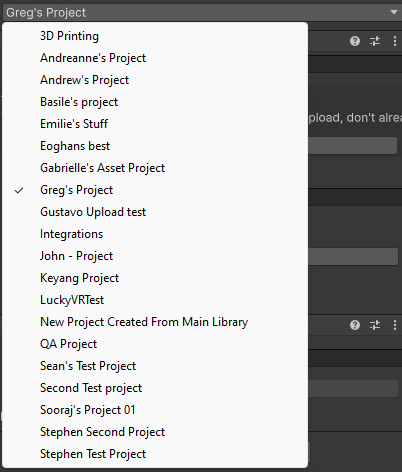
- Select the organization where you want to upload your assets to.
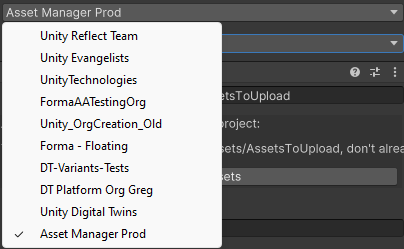
- Select the project where you want to upload your assets to.
- Set the folder path that contains your assets to upload.

- If you want to check which asset is already known in your Unity Cloud project, select the
Search Assetsbutton.

- To upload your assets, select the
Create and Upload Assetsbutton.

Note: The script is basic and doesn't handle asset defined by multiple files. Each file is seen as a new asset. Also, all the uploaded assets are set with draft status. The script doesn't provide a way to change the status of an asset.
The sample provide two time out settings:
- One for the main queries like Fetch and Search for example.
One for the upload process.

To change the upload timeout, select the AssetDatabaseUploader game object in the Hierarchy window. In the Inspector window, change the Upload Time Out value.

Main components
This section describes the scripts that make up the main components of the Asset Database Uploader sample.
AssetsEditor services script
The AssetsEditorServices class initializes and disposes of dependencies required by AssetManager and AssetFileManager. You can use this class to manage the Unity Cloud services and dependencies you use in your scripts.
To open the AssetsEditor services script, go to your Assets/Samples/Unity Cloud Assets/<package-version>/AssetDatabaseUploader/Scripts/AssetsEditorServices.cs file.
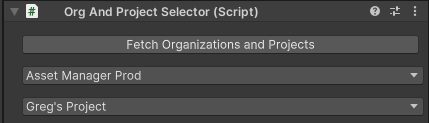
Organization and Project selector script
The OrgAndProjectSelector script shows you how to do the following:
- Retrieve organizations and projects from the Asset Manager service
- Select an organization and project from a list of organizations and projects
To open the OrgAndProjectSelector script, go to your Assets/Samples/Unity Cloud Assets/<package-version>/AssetDatabaseUploader/Scripts/OrgAndProjectSelector.cs file.
Assets Uploader script
The AssetsUploader script shows you how to do the following:
- Create an asset in a Unity Cloud project
- Create an asset file and attach it to the created asset
- Upload asset file contents
To open the AssetsUploader script, go to your Assets/Samples/Unity Cloud Assets/<package-version>/AssetDatabaseUploader/Scripts/AssetsUploader.cs file.
The AssetsUploader class has one required component called OrgAndProjectSelector.
Asset Database Uploader sample script
The AssetDatabaseUploaderSample shows you how to do the following:
- Integrate everything together the
AssetsEditorServices, theOrgAndProjectSelectorand theAssetsUploaderscripts - Use the
AssetsEditorServicesclass to get your authentication token - Use the
AssetsEditorServicesclass to initialize theOrganizationProvider,ProjectProvider,AssetManager,AssetFileManager - Initialize the
OrgAndProjectSelectorscript - Initialize the
AssetsUploaderscript
To open the Asset Database Uploader sample script, go to your Assets/Samples/Unity Cloud Assets/<package-version>/AssetDatabaseUploader/Scripts/AssetDatabaseUploaderSample.cs file.
Inspector UI scripts
The sample includes a set of Editor UI scripts. To open the scripts, go to Assets/Samples/Unity Cloud Assets/<package-version>/AssetDatabaseUploader/Scripts/Editor.
Limitations
The sample has the following limitations:
If your asset already exists in your Unity Cloud project, the sample will not update your asset nor upload the file content. It will just skip it. For now, the API endpoints don't support to get the upload URL of an asset if the file and the content has not been created and uploaded as the same time than the Asset's creation.
Allows you to create 1 asset per 'file', you can add rules of your own to combine asset based on 'naming convention, or anything else'. An example would be to combine all files that have the same letters before the first _ . The example of files below would create 2 assets.
Marble014_8K_Roughness.png
Marble014_8K_NormalGL.png
Marble014_8K_NormalDX.png
Marble014_8K_Displacement.png
Marble014_8K_Color.png
Marble014_PREVIEW.jpg
Marble014_8K-PNG.usdc
Rock030_PREVIEW.jpg
Rock030_8K_Roughness.png
Rock030_8K_NormalGL.png
Rock030_8K_NormalDX.png
Rock030_8K_Displacement.png
Rock030_8K_Color.png
Rock030_8K_AmbientOcclusion.png
Go further with your sample
This section describes other things you can do with the Asset Database Uploader sample.
Step-by-step mode
The sample provide a step by step mode to help you understand how the script works. If you want to follow each step instead of doing everything with one selection, enable the step by step mode.
- To enable the step by step mode, select the
AssetDatabaseUploadergame object in the Hierarchy window. - In the inspector window, check the
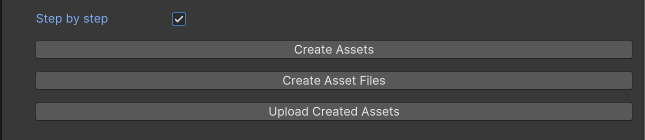
Step By Stepcheckbox. - Then like the
Create and Upload Assetsbutton, select each action button one by one following this order:-
Create Assets -
Create Asset Files -
Upload Created Assets
-
Troubleshooting
Refer to the troubleshooting section for help with sample issues.