Create a low-code custom post-processing effect in URP
The example on this page shows how to use the Full Screen Render Pass Renderer Feature to create a grayscale custom post-processing effect.
For more information on the Full Screen Render Pass Renderer Feature, refer to the Full Screen Pass Renderer Feature reference.
Prerequisites
This example requires the following:
A Unity project with the URP package installed.
The Scriptable Render Pipeline Settings property refers to a URP asset (Edit > Project Settings > Graphics > Pipeline Specific Settings).
Create a Fullscreen Shader Graph
You must create a Fullscreen Shader Graph to create a custom post-processing effect.
Create a new Shader Graph in your Project. To do this right-click in the Project window and select Create > Shader Graph > URP > Fullscreen Shader Graph.
Add a URP Sample Buffer node. To do this right-click in the Shader Graph window, and select Create Node. Then locate and select URP Sample Buffer.
In the URP Sample Buffer node’s Source Buffer dropdown menu, select Blit Source.
Add a Vector 3 node.
- Assign the Vector 3 node the following values:
- X = 0.2126
- Y = 0.7152
- Z = 0.0722
Add a Dot Product node.
-
Connect the nodes as shown below.
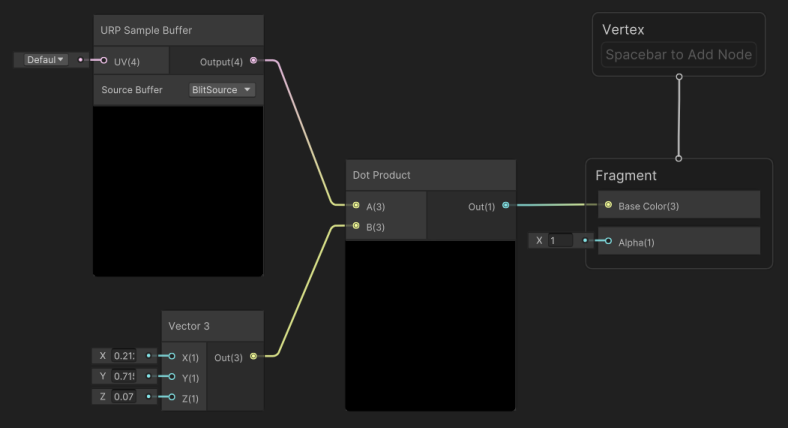
Grayscale Fullscreen Shader Graph with all nodes connected. Node Connection URP Sample Buffer Output to Dot Product A Vector 3 Out to Dot Product B Dot Product Out to Fragment Base Color Save your Shader Graph.
Create a new Material in your Project. To do this right-click in the Project window and select Create > Material.
Apply the Shader Graph shader to the Material. To do this, open the Material in the Inspector and select Shader > Shader Graphs, then select the Shader Graph you created in the previous steps.
Use the Material in a Full Screen Pass Renderer Feature
Once you’ve created a compatible Shader Graph and Material, you can use the Material with a Full Screen Pass Renderer Feature to create a custom post-processing effect.
-
Select your project’s Universal Renderer.
If you created your project using the Universal 3D template, you can find the Universal Renderers in the following project folder: Assets > Settings > Renderers.
In the Inspector, click Add Renderer Feature and select Full Screen Pass Renderer Feature. For more information on adding Renderer Features refer to How to add a Renderer Feature to a Renderer.
-
Set the Pass Material field to the Material you created with the Fullscreen Shader Graph.
You can also create the material and its shader directly from the New dropdown in this field. For more information, refer to Full Screen Pass Renderer Feature reference for URP.
Set Injection Point to After Rendering Post Processing.
Enable Fetch Color Buffer.
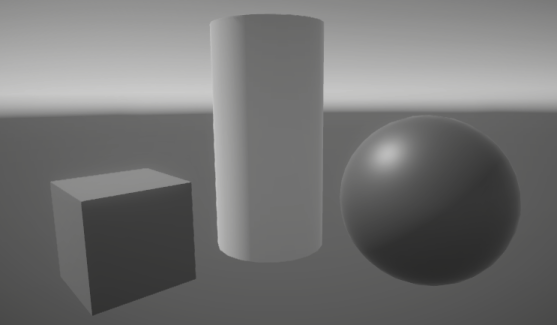
You should now notice the effect in both Scene view and Game view.