Submit a license request from a command line and browser (Windows)
Submit a license request from the command line to manually activate your license if you’re unable to use the other activation methods.
Note: Manual activation supports two kinds of licenses: assigned seats on a Unity Enterprise or Unity Industry subscription, and legacy serial-based Unity Pro licenses. It doesn’t support Unity Pro assigned seats, Unity Personal, or floating license subscriptions. To activate a license for Unity Personal, log in to the Unity Hub. To return a Personal license, log out of the Unity Hub.
Before you begin
- See Manual license activation to make sure you understand the scenario for using this procedure, its limitations, and its internet connectivity requirements.
- Make sure you know the path where you installed the Unity Editor. Use the Unity Hub to determine the path. Open the Unity Hub and select Installs from the side menu. The list shows the path for each installed Editor. For more information, see Locate the Editor.
The default installation path for the Unity Editor is "C:\Program Files\Unity\Hub\Editor\<version>\Editor\Unity.exe".
Procedure
To manually activate your Unity license, follow these steps:
-
Create a license request file (
.alf) from the command line. You must do this step from the computer where you installed Unity. - Use that
.alffile to generate a Unity license file (.ulfor.xml) from Unity. You must do this step from any computer that has internet access. - Use that license file to activate your license from the command line. You must do this step from the computer where you installed Unity.
1) Create a license request file from the command line
Important: You must run this command from the computer where you installed Unity, but the computer doesn’t need internet access for this step to work.
Open a Command Prompt as an administrator. If you lack administrator privilege, make sure you run this procedure’s command from within your user profile folder.
Make sure you’re aware which directory you’re in. The directory you run the command from is the same directory where the
.alffile is output.-
Enter the following command, replacing
<editor-installation-location>with the actual full path toUnity.exe:"<editor-installation-location>" -batchmode -createManualActivationFile -logfileNote: This command doesn’t return output to the Command Prompt. When the command completes, it returns control to the command prompt.
When the command completes, check the directory where you ran the command to make sure it created an activation license file, such as
Unity_v2022.2.0b4.alf. If you experience issues, see Troubleshooting.
Now you are ready to generate a Unity license file.
Example
Assuming you installed a 2022.2.0b4 Editor at "C:\Program Files\Unity\Hub\Editor\2022.2.0b4\Editor\Unity.exe", the command for this step is:
"C:\Program Files\Unity\Hub\Editor\2022.2.0b4\Editor\Unity.exe" -batchmode -createManualActivationFile -logfile
2) Generate a Unity license file
The next step is to use the license activation file (.alf) that you just created to request a Unity license file (.ulf or .xml).
Important: You can generate a Unity license file from any computer; it doesn’t necessarily need to be the same computer where you installed Unity. However, the computer you use in this step must have an internet connection.
Go to id.unity.com and make sure you’re signed in to your Unity ID. You need a valid login to request a Unity license file.
-
Use the same browser session to go to license.unity3d.com/manual. The Manual activation page appears.
Note: If you experience issues accessing this page, try pasting
https://license.unity3d.com/manualinto your browser’s address bar.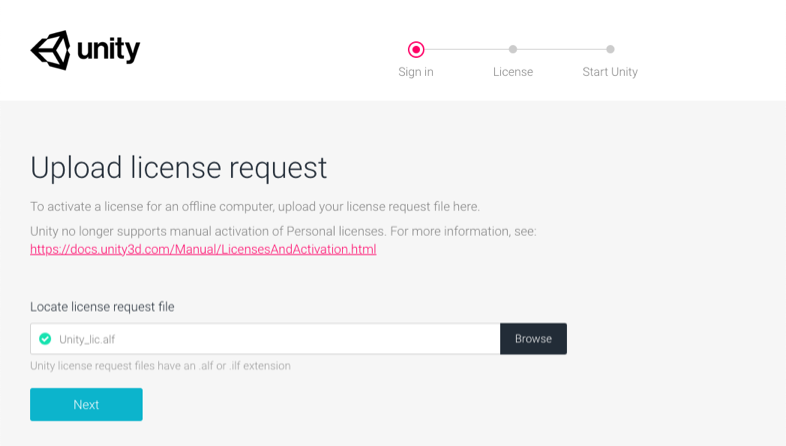
Upload license request page. -
Select the Browse button and use your computer’s file browser to select the license activation (
.alf) file from the create a license request file step.If the upload was successful and Unity detected that the file you chose was a license activation file, the filename appears in the text box with a green check mark. If you see a red X instead, try again.
-
Select the Next button. The Activate license for my assigned seats page appears, listing the assigned seats that are eligible for offline activation.
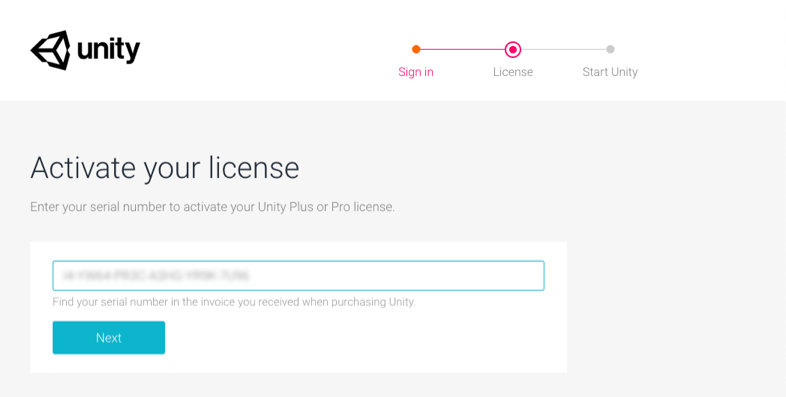
Activate license for my assigned seats page. Note: Only assigned seats on a Unity Enterprise or Unity Industry subscription are eligible for offline activation. If you have no eligible seats, the page displays You are not eligible to activate your license offline; contact your organization’s administrator. Seats that can’t be activated offline, such as Unity Pro seats, appear in a separate list.
-
Select Next to activate a license for all your eligible seats.
Note: If you don’t have an eligible seat and you have a legacy Unity Pro serial key, select Activate my legacy serial license instead. Enter the serial key you received in an email when you purchased a license. You need to enter the key in the exact format that it appears in the email. For example,
PS/SC/E3-XXXX-XXXX-XXXX-XXXX. Then select Next. On the Download license file page, select the Download license file button. If prompted, allow downloads for the license.unity3d.com/manual page.
-
Open your browser’s downloads location and confirm the new Unity license file:
An assigned seat activation downloads an
.xmlfile. For example,UnityEntitlementLicense-20260727103000.xml.A serial key activation downloads a
.ulffile. For example,Unity_v2017.x.ulf.
To activate Unity with the license file, open the Unity Hub and follow Licenses > Add license > Activate with license file. This step doesn’t need internet access. Alternatively, you can activate your Unity license from the command line.
3) Activate your license from the command line
Important: You must run this command from the computer where you installed Unity, but the computer doesn’t need internet access for this step to work.
-
Make sure you know the following paths:
-
<editor-installation-location>is the actual full path toUnity.exe. -
<yourLicenseFile>is the full path of the license file (.ulfor.xml) you generated in the generate a Unity license file step.
-
Open a Command Prompt as an administrator. If you lack administrator privilege, make sure you run this procedure’s command from within your user profile folder.
-
Run the following command, replacing
<editor-installation-location>and<yourLicenseFile>with the actual full paths:"<editor-installation-location>" -batchmode -manualLicenseFile <yourLicenseFile> -logfileNote: This command doesn’t return output to the Command Prompt. When the command completes, it returns control to the command prompt.
When the command completes, you can view your active license in the Hub by selecting Licenses from the side menu. If you experience issues, refer to Troubleshooting.
Example
This example assumes that you:
- Installed a
2022.2.0b4Editor at"C:\Program Files\Unity\Hub\Editor\2022.2.0b4\Editor\Unity.exe" - Generated a
.ulffile and stored it at"C:\Users\myAccount\Downloads\Unity_v2017.x.ulf"
"C:\Program Files\Unity\Hub\Editor\2022.2.0b4\Editor\Unity.exe" -batchmode -manualLicenseFile "C:\Users\myAccount\Downloads\Unity_v2017.x.ulf" -logfile
Troubleshooting
If the command line operations don’t yield the expected results, view the Editor.log file. To find the the location of this file, refer to Log files reference.
Additional resources
- License activation methods
- Activate a license for a Unity Personal plan (Unity Hub documentation)
- License troubleshooting