Create collision shapes for a sprite
In a 2D project, Unity uses collision geometry to determine if a sprite collides with other sprites. Collision geometry can be one shape, for example a circle around the sprite, or a set of multiple shapes.
You can do either of the following:
- Generate collision geometry automatically.
- Create default custom collision geometry for all instances of a sprite.
Generate collision geometry automatically
Follow these steps:
- From the Project window, drag the sprite asset () into the scene.
- In the Inspector window of the sprite GameObject, select Add Component.
- Select Physics 2D, then a Collider 2D component.
If you select Polygon Collider 2D, by default Unity tries to create collision geometry that encompasses the opaque parts of the sprite.
Unity displays the collision geometry as a green outline in the Scene view. To edit the collision geometry, refer to the Edit the collision geometry for one instance section.
Create default collision geometry for all instances of a sprite
To create custom collision geometry that Unity uses every time you create an instance of a sprite, use the Custom Physics Shape tab of the Sprite Editor window and a Polygon Collider 2D component.
Follow these steps:
In the Hierarchy window, select the sprite GameObject.
In the Inspector window, in the Sprite Renderer component, select Open Sprite Editor.
Select the Custom Physics Shape tab in the top-left dropdown. Unity displays the Outline Tools overlay.
-
Select Generate to automatically generate an outline that follows the opaque parts of the sprite. Unity displays the outline in white. Each point is a vertex of a collision shape.
You can also create one or more outlines manually by clicking the sprite then dragging a rectangle.
-
Edit the geometry if you need to. For more information, refer to Custom Physics Shape tab reference for the Sprite Editor window.
To change how closely the geometry follows the opaque parts of the sprite, adjust the Outline Detail and Alpha Tolerance properties, then regenerate the outline.
To save the geometry, select Apply in the toolbar.
Add the sprite to the scene.
In the Inspector window of the sprite GameObject, select Add Component, then Physics 2D > Polygon Collider 2D.
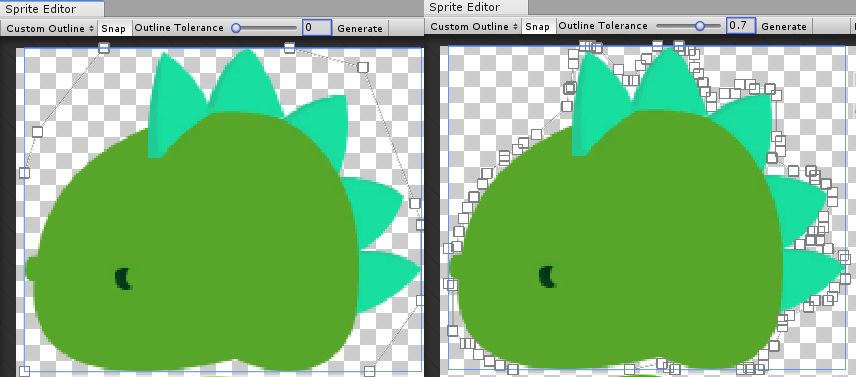
Unity now uses the collision geometry for all new instances of the sprite if you add a Polygon Collider 2D component.
Note: Unity doesn’t automatically update existing GameObjects with the collision geometry. To update an existing Polygon Collider 2D component, right-click the title of the collider component in the Inspector window, then select Reset.
For more information, refer to Custom Physics Shape tab reference for the Sprite Editor window.
Edit the collision geometry for one instance of a sprite
To edit the auto-generated collision geometry of a single sprite instance, or override the collision geometry from the Custom Physics Shape tab, use the Edit Collider  button.
Follow these steps:
- In the Hierarchy window, select the sprite GameObject.
- Select Edit Collider (). The Edit Collider button is also available in the Tools overlay of the Scene view.
To edit the geometry, do the following:
- To move a point, select and drag it.
- To add a point, click on an edge.
- To remove a point, hold Ctrl (macOS: Cmd) while hovering over an edge, then select a red edge.
- To exit the editing mode, select Edit Collider again.
Note: Editing the collision geometry of a single instance doesn’t change the collision geometry in the Custom Physics Shape tab of the Sprite Editor window.