Introduction to building
When you create a build of your application, you create a Player. A Player is the platform-specific runtime application that Unity builds from your project. This is also known as a project build, which is the workflow of building a project from the Unity Editor into an application that runs on a target platform.
Building a Player for a target platform requires the platform-specific build support module for the target platform. You can add build support for a target platform when you install Unity, or add it when you create a Build Profile.
Unity uses the scenes you define in the Build ProfilesA set of customizable configuration settings to use when creating a build for your target platform. More info
See in Glossary window or the BuildPipeline API to create a build of a Player. For more information, refer to Manage scenes in a build.
Create a build
The main way to create a build in Unity is through the Build Profiles window (menu: File > Build Profiles). Create build profiles to save build settings specific to a target platform and to distinguish between release and development builds. Use the Scene List globally or within a build profile to control what scenes your build includes. After you create and switch to your build profile, you can select a build option like Build or Build and Run. For more information about each build option, refer to Build options.
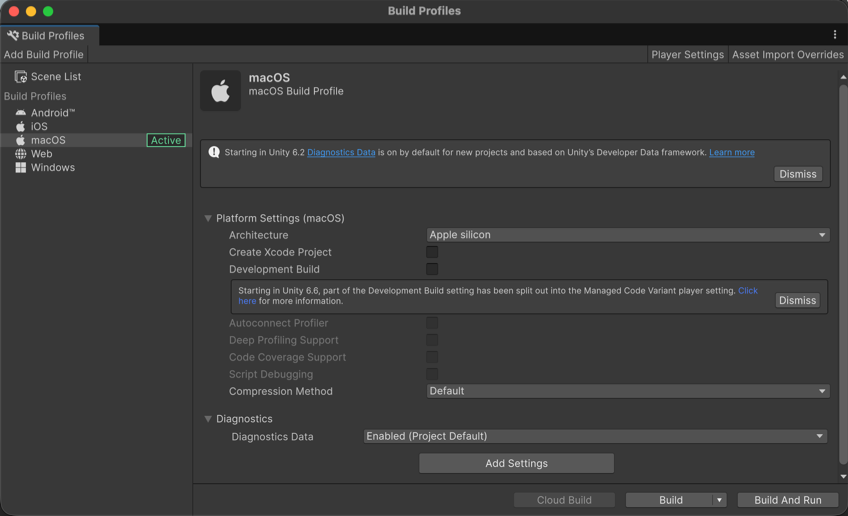
You can also build your application from the command line instead of from the Editor. To further customize the build process, you can create a custom build script.
Build modes
Unity has different build modes, as follows:
- Release build: Includes only what’s necessary to run the application. This is the default build type.
-
Development build: Includes scripting debug symbols and the ProfilerA window that helps you to optimize your game. It shows how much time is spent in the various areas of your game. For example, it can report the percentage of time spent rendering, animating, or in your game logic. More info
See in Glossary. You can enable development builds in the Build Profiles window, which allows you to set further options such as deep profiling support and script debugging. You can also use theBuildOptions.Developmentproperty to set a development build.
Both build modes provide options to build different variations of the Player application for different hardware architectures and scripting backendsA framework that powers scripting in Unity. Unity supports three different scripting backends depending on target platform: Mono, .NET and IL2CPP. Universal Windows Platform, however, supports only two: .NET and IL2CPP. More info
See in Glossary. You can customize these variations through the build settings, Player settingsSettings that let you set various player-specific options for the final game built by Unity. More info
See in Glossary, or command-line flags.
Incremental build pipeline
Unity uses an incremental build pipeline that only rebuilds the parts of your application that have changed since the last build, which helps speed up development iteration time. This build process includes build steps such as content building, code compilation, data compression, and signing.
By default, Unity uses the incremental build pipeline for both development and release builds. You can use the options in the Build Profiles window, or use the BuildOptions.CleanBuildCache API to create a non-incremental build, also known as a clean build. For more information, refer to Creating clean builds.
Note: AssetBundles don’t use the incremental build pipeline and have separate mechanisms for caching and reusing the results from previous builds. For more information, refer to Build assets into an AssetBundle.
Separate build content
To reduce the initial size of your application and to increase the build speed of your Player, separate your build into a content build and a Player build. A content build includes assets in the application that aren’t required by the Player build. You can use Addressables with AssetBundles to build your assets separately from your Player build. For more information about which method to choose for your application, refer to Introduction to runtime asset management.