Render Settings
Switch to ScriptingThe Render Settings contain default values for a range of visual elements in your scene, like Lights and Skyboxes.
To see the Render Settings choose from the menu bar.
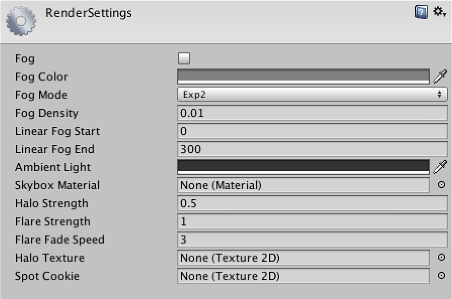
Properties
| Property: | Function: |
|---|---|
| Fog | If enabled, fog will be drawn throughout your scene. |
| Fog Color | Color of the fog. |
| Fog Mode | Fog mode: Linear, Exponential (Exp) or Exponential Squared (Exp2). This controls the way fog fades in with distance. |
| Fog Density | Density of the fog; only used by Exp and Exp2 fog modes. |
| Linear Fog Start/End | Start and End distances of the fog; only used by Linear fog mode. |
| Ambient Light | Color of the scene’s ambient light. |
| Skybox Material | Default skybox that will be rendered for cameras that have no skybox attached. |
| Halo Strength | Size of all light halos in relation to their Range. |
| Flare Strength | Intensity of all flares in the scene. |
| Flare Fade Speed | Time taken for flares to fade out. |
| Halo Texture | Reference to a Texture that will appear as the glow for all Halos in lights. |
| Spot Cookie | Reference to a Texture2D that will appear as the cookie mask for all Spot lights. |
Details
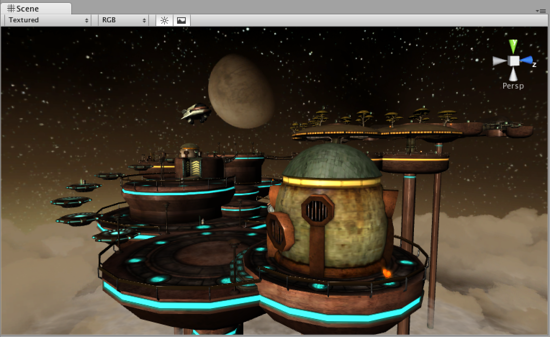
The Render Settings is used to define some basic visual commonalities of any individual scene in your project. Maybe you have two levels in the same environment: one at daytime and one at nighttime. You can use the same meshes and Prefabs to populate the scene, but you can change the Ambient Light to be much brighter at daytime, and much darker at night.
Fog
Enabling Fog will give a misty haze to your scene. You can adjust the look and color of the Fog with Fog Density and Fog Color, respectively.
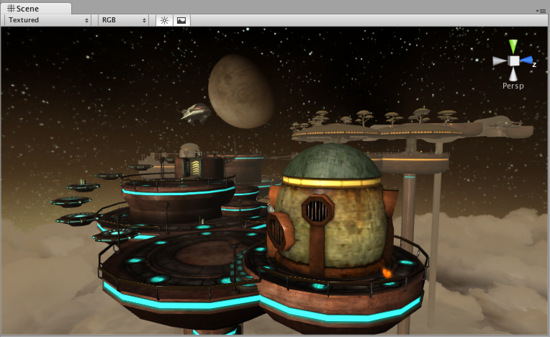
Adding fog is often used to optimize performance by making sure that far away objects fade out and are not drawn. Please note that enabling fog is not enough to enable this performance optimization. To do that you also need to adjust your Camera’s Far Clip Plane, so that geometry far away will not be drawn. It is best to tweak the fog to look correct first. Then make the Camera’s far clip plane smaller until you see the geometry being clipped away before the fog fades it out.
Note that fog is rendered uniformly in orthographic camera mode. This is because in our shaders, we output post-perspective space Z coordinate as the fog coordinate. But post-perspective Z is not really suitable for fog in orthographic cameras. Why do we do this? Because it’s fast and does not need any extra computations; handling orthographic cameras would make all shaders be a bit slower.
Hints
- Don’t under-estimate the visual impact your game can make by thoughtfully tweaking the Render Settings!
- Render Settings are per-scene: each scene in your game can have different Render Settings.