

Cache Server (Team license only)
Unity has a completely automatic asset pipeline. Whenever a source asset like a .psd or an .fbx file is modified, Unity will detect the change and automatically reimport it. The best parts about the asset pipeline are the "hot reloading" functionality and the guarantee that all your source assets are always in sync with what you see. This feature also comes at a cost. Any asset that is modified has to be reimported right away. When working in large teams, after getting latest from Source Control, you often have to wait for a long time to re-import all the assets modified or created by other team members. Also, switching your project platform back and forth between desktop and mobile, will trigger a re-import of most assets.
The time it takes to import assets can be drastically reduced by caching the imported assets on the Cache Server.
Each asset import is cached based on
- The asset file itself
- The import settings
- Asset importer version
- The current platform.
If any of the above change, the asset gets reimported, otherwise it gets downloaded from the Cache Server.
When you enable the cache server in the preferences, you can even share asset imports across multiple projects.
Note that once the cache server is set up, this process is completely automatic, which means there are no additional workflow requirements. It will simply reduce the time it takes to import projects without getting in your way.
How to set up a Cache Server (user)
Setting up the Cache Server couldn't be easier. All you need to do is click Use Cache Server in the preferences and tell the local machine's Unity Editor where the Cache Server is.

This can be found in on the Mac or on the PC.
If you are hosting the Cache Server on your local machine, specify localhost for the server address. However, due to hard drive size limitations, it is recommended you host the Cache Server on separate machine.
How to set up a Cache Server (admin)
Admins need to set up the Cache Server machine that will host the cached assets.
You need to:
- Download the Cache Server here
- Unzip the file, after which you should see something like this:

- Depending on your operating system, run the appropriate command script.
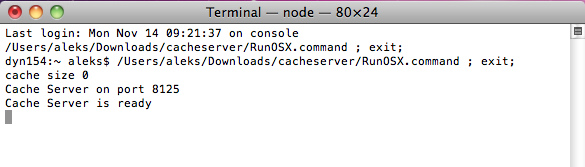
- You will see a terminal window, indicating that the Cache Server is running in the background
The Cache Server needs to be on a reliable machine with very large storage (much larger than the size of the project itself, as there will likely be multiple versions of imported resources stored). If the hard disk becomes full the Cache Server could perform slowly.
Installing the Cache Server as a service
The provided .sh and .cmd scripts should be set-up as a service on the server.
The cache server can be safely killed and restarted at any time, since it uses atomic file operations.
Cache Server Configuration
If you simply start the Cache Server by double clicking the script, it will create a "cache" directory next to the script, and keep it's data in there. The cache directory is allowed to grow to up to 50 GB. You can configure the size and the location of the data using command line options, like this:
./RunOSX.command --path ~/mycachePath --size 2000000000
--path lets you specify a cache location, and --size lets you specify the maximum cache size in bytes.
Recommendations for the machine hosting the Cache Server
We recommend equipping the machine with a lot of RAM. For best performance there is enough RAM to hold an entire imported project folder. In addition, it is best to have a machine with a fast hard drive and fast Ethernet connection. The hard drive should also have sufficient free space. On the other hand, the Cache Server has very low CPU usage.
One of the main distinctions between the Cache Server and version control is that its cached data can always be rebuilt locally. It is simply a tool for improving performance. For this reason it doesn't make sense to use a Cache Server over the internet. If you have a distributed team, we recommend that you place a seperate cache server in each location.
Page last updated: 2012-05-15