Upgrading to Unity 2020 LTS
Note: Follow the advice in this section in release order. For example, if you need to upgrade your project from 2018 to 2020, read the 2019 upgrade guides to see if there are any changes that you need to make before you read the 2020 upgrade guides.
This page lists changes in the Unity 2020 LTS version which might affect existing projects when you upgrade from a 2019 version to 2020 LTS.
Note that 2020LTS is also known as 2020.3.
Page outline
- All Mesh vertices are transformed for better UV unwrapping
- All Asset bundle hashes are different so all bundles are built
- The multiplayer HLAPI package is not automatically installed in project upgrades
- Improved LOD baking with the Progressive Lightmapper
- Adaptive Performance breaking changes
- Xcode Project Generation
- Particle System Force Field changes
- Changes to UGUI Graphic Class
- Set up Code Optimization in order to continue using Code Coverage
- AR/VR Platforms Support
All Mesh vertices are transformed for better UV unwrapping
Unity might change the MeshThe main graphics primitive of Unity. Meshes make up a large part of your 3D worlds. Unity supports triangulated or Quadrangulated polygon meshes. Nurbs, Nurms, Subdiv surfaces must be converted to polygons. More info
See in Glossary UVs of 3D objectsA 3D GameObject such as a cube, terrain or ragdoll. More info
See in Glossary you import to a project.
Unity transforms the positions of all imported Mesh vertices to scale in Unity unitsThe unit size used in Unity projects. By default, 1 Unity unit is 1 meter. To use a different scale, set the Scale Factor in the Import Settings when importing assets.
See in Glossary automatically.
From Unity 2020.1, Unity generates lightmap UVs using the transformed Mesh vertices, if you’ve enabled Generate LightmapA pre-rendered texture that contains the effects of light sources on static objects in the scene. Lightmaps are overlaid on top of scene geometry to create the effect of lighting. More info
See in Glossary UVs. Previous to Unity 2020.1, Unity generated lightmap UV maps using the original imported Mesh vertex positions, before the automatic position transformation.
UVs generated after the vertex transformation are more accurate to the original shape and scale of your imported object.
All Asset bundle hashes are different so all bundles are built
From Unity 2020.1, Unity generates a different hash for all asset bundles in your project. This ensures all bundles are built, including the ones with the same content but with different loadable paths.
The multiplayer HLAPI package is not automatically installed in project upgrades
From Unity 2020.1, install the multiplayer HLAPI package from the Package Manager if the project you’re upgrading has scriptsA piece of code that allows you to create your own Components, trigger game events, modify Component properties over time and respond to user input in any way you like. More info
See in Glossary that use the multiplayer HLAPI.
From Unity 2019.1 to 2019.4, Unity automatically installed the multiplayer HLAPI package when you upgraded a project created in Unity 2018.4 or earlier.
Improved LOD baking with the Progressive Lightmapper
Unity’s Progressive LightmapperA tool in Unity that bakes lightmaps according to the arrangement of lights and geometry in your scene. More info
See in Glossary consists of the CPU and GPU lightmappers.
From Unity 2020.1, the GPU lightmapper supports level of detail (LOD) baking.
The CPU lightmapper uses the same baking algorithm and this allows Unity to fully use all available CPU cores for faster baking times in ScenesA Scene contains the environments and menus of your game. Think of each unique Scene file as a unique level. In each Scene, you place your environments, obstacles, and decorations, essentially designing and building your game in pieces. More info
See in Glossary with LODThe Level Of Detail (LOD) technique is an optimization that reduces the number of triangles that Unity has to render for a GameObject when its distance from the Camera increases. More info
See in Glossary values above 0.
To upgrade the LOD in your Scene, clear the baked lightmap and then regenerate it. To do this:
- In the Unity Editor, Open Window > Rendering > Lighting Settings.
- In Debug Settings, click the drop-down menu on the Generate Lighting button, then click Clear Baked Data.

- Click Generate Lighting.
Adaptive Performance breaking changes
To update Adaptive Performance from 1.0 to 2.0, see the Adaptive Performance upgrade guide.
Xcode Project Generation
The MacOS Standalone Xcode project building path selection has changed. Now you must provide the path to the desired directory, and the .xcodeproj and accompanying files are created inside the target directory. The MacOS build folder can not be inside the project directory. See the manual page for Xcode project structure.
Particle System Force Field changes
To ensure consistent behavior of the Force Field properties, Unity now uses a reference frame rate of 30fps as the basis for simulation. If your app uses a different frame rate, this change might affect the following Force Field properties:
- Gravity
- Rotation
- Vector Fields
If these settings behave differently to earlier Unity versions, adjust their values.
Changes to UGUI Graphic Class
UnityEngine.UI.Graphic no longer includes the RequireComponent attribute for the CanvasRenderer component. To update your user-written classes that inherit from Graphic and render in the UGUI canvas, add the following RequireComponent attribute:
using UnityEngine;

[RequireComponent(typeof (CanvasRenderer))]
public class exampleClass: Graphic
{
  ...
}
Set up Code Optimization in order to continue using Code Coverage
The introduction of Code Optimization changes how the Code Coverage package works. To continue using the Code Coverage package with your project in 2020LTS, set up Code Optimization to compile scripts in Debug mode. Debug mode enables C# debugging and it is required in order to obtain accurate code coverage results.
To ensure Code Optimization is set to Debug mode, you can do one of the following:
- Switch to Debug mode in the Editor (bottom right corner, select the Bug icon > Switch to debug mode).
- Using the CompilationPipeline API, set
CompilationPipeline.codeOptimization = CodeOptimization.Debug. - Pass
-debugCodeOptimizationto the command line.
AR/VR Platforms Support
This document provides a guide for upgrading existing ARAugmented Reality More info
See in Glossary/VRVirtual Reality More info
See in Glossary projects that are using Unity versions prior to Unity 2020 releases.
Enable AR/VR in Project Settings
When upgrading your existing project to Unity 2020 releases and later, you should receive a notification that states the deprecated XRAn umbrella term encompassing Virtual Reality (VR), Augmented Reality (AR) and Mixed Reality (MR) applications. Devices supporting these forms of interactive applications can be referred to as XR devices. More info
See in Glossary integration (previously in Player/XR Settings) has been disabled.
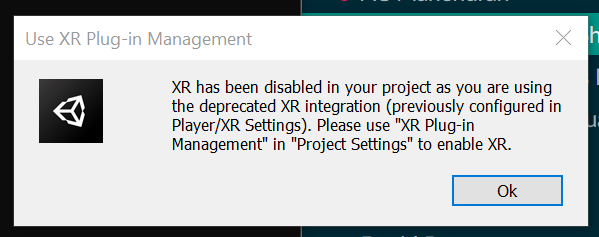
To enable AR/VR, use XR Plug-inA set of code created outside of Unity that creates functionality in Unity. There are two kinds of plug-ins you can use in Unity: Managed plug-ins (managed .NET assemblies created with tools like Visual Studio) and Native plug-ins (platform-specific native code libraries). More info
See in Glossary Management in Project SettingsA broad collection of settings which allow you to configure how Physics, Audio, Networking, Graphics, Input and many other areas of your project behave. More info
See in Glossary and select your target platforms.

Virtual reality
| Platform | Build target | Plug-in provider |
|---|---|---|
| Oculus Quest | Android | Oculus |
| Oculus Rift & Rift S | Desktop | Oculus |
| Windows Mixed RealityMixed Reality (MR) combines its own virtual environment with the user’s real-world environment and allows them to interact with each other. See in Glossary VR |
UWP | Windows Mixed Reality |
Augmented reality
| Platform | Build target | Plug-in provider |
|---|---|---|
| ARCore devices | Android | ARCore |
| ARKit devices | iOSApple’s mobile operating system. More info See in Glossary |
ARKit |
| HoloLens | UWP | Windows Mixed Reality |
| Magic Leap One | Lumin | Magic Leap |
Use optimal Player settings
Make sure your project’s renderingThe process of drawing graphics to the screen (or to a render texture). By default, the main camera in Unity renders its view to the screen. More info
See in Glossary and quality settings are optimal. The tables below detail recommended settings by target platform.
Virtual reality
| Platform | Graphics API | Stereo rendering modeA Standard Shader Material parameter that allows you to choose whether the object uses transparency, and if so, which type of blending mode to use. More info See in Glossary |
|---|---|---|
| Oculus Quest | OpenGL ES 3.0 | Multiview |
| Oculus Rift & Rift S | DX11 | Single Pass Instanced |
| Windows Mixed Reality VR | DX11 | Single Pass Instanced |
Augmented reality
| Platform | Graphics API | Stereo rendering mode |
|---|---|---|
| ARCore devices | OpenGL ES 3.0 | N/A |
| ARKit devices | Metal | N/A |
| HoloLens | DX11 | Single Pass Instanced |
| Magic Leap One | OpenGL ES 3.2 | Single Pass Instanced |
Note: “Single Pass” is no longer a rendering mode option, as “Single Pass Instanced” is more performant. If you are upgrading from “single pass” to “single pass instanced”, you may have to update custom shadersA program that runs on the GPU. More info
See in Glossary in your project.
Render Pipeline
The built-in render pipeline, Universal Render Pipeline, and High-Definition Render Pipeline are all supported in 2020.1. There are benefits to using our latest scriptable render pipelines, but it is not a requirement in this upgrade process.
Note: If you are using 3rd-party assets and/or custom shaders, you may need to update assets with shaders compatible with “single passed instanced”.
Camera in Scene
If you are using the XR Interaction Toolkit, no change is required for cameraA component which creates an image of a particular viewpoint in your scene. The output is either drawn to the screen or captured as a texture. More info
See in Glossary tracking.
If you are using a 3rd-party toolkit for camera tracking (OVRCameraRig, etc), make sure you have updated to the latest version. Note that upgrading to latest versions of 3rd-party tools might cause script errors, please reference 3rd-party documentation.
If you are using a Tracked Pose Driver for camera tracking, see our Migration Guide.
Upgrading 3rd-Party Toolkits
If you are using any toolkits developed by our supported platforms (Oculus Integration package, MRTK, MLTK), make sure you’re using the latest version. Note that upgrading to the latest versions of 3rd-party tools might cause upgrade-related script errors, and you may need to reference corresponding documentation of those toolkits.
FAQ
Why can’t I install XR Plug-in Management in Project Settings?
You may have upgrade-related script errors that need to be fixed before installing XR Plug-in Management.
Why are OpenVR and Google Cardboard missing from XR Plug-in Management?
The OpenVR and Google Cardboard XR Plug-ins are developed and maintained by Valve and Google, respectively. Links to installation instructions for both platforms can be found in our documentation.
Is the Unity input system supported?
Yes, our supported platform integrations are compatible with the Unity input system.
Are the Universal Render Pipeline and High-Definition Render Pipeline supported?
Yes, our supported platform integrations are compatible with both the Universal Render Pipeline and High-Definition Render Pipeline.
Why can’t I view the XR Interaction Toolkit in Package Manager?
The XR Interaction Toolkit is still in preview. To view preview packagesA preview package is in development and not yet ready for production. A package in preview might be at any stage of development, from the initial stages to near completion.
See in Glossary in 2020.1, you must enable it using the Package Manager tab in Project Settings. Once enabled, preview packages will be displayed in the Unity Registry of the Package Manager.
Why doesn’t Play in Editor work for my provider?
Play in editor support only works for providers that have standalone support for their provider. If the provider is not listed in the standalone section of the XR Plug-in Management provider selection UI(User Interface) Allows a user to interact with your application. More info
See in Glossary then Play in Editor will not work. Check your provider documentation as they may support some other means of integrating Play in Editor support.
Why can’t I use “single pass” rendering mode?
“Single pass” is no longer supported in 2020.1 as “single pass instanced” is most performant. If your project used “single pass” rendering, you may have to update shaders in your project. Third-party libraries that use custom shaders for “single pass” may also need to be updated. You can choose to upgrade from “single pass” to “multipass” and shaders should work, but we recommend targeting “single pass instanced” for maximum performance.
How do I configure graphics API?
Graphics API is configured in Player settingsSettings that let you set various player-specific options for the final game built by Unity. More info
See in Glossary (“Edit” → “Project Settings” → “Player”).
How do I configure stereo rendering mode?
Rendering mode is configured in provider-specific settings nested under XR Plug-in Management in Project Settings.
Why am I getting errors with renderScale using the XR Settings API?
renderScale has been removed and replaced with eyeTextureResolutionScale but that has been a script updater task since 2019.3. If you are upgrading from a Unity version prior to 2019.3, you will have to manually replace renderScale with eyeTextureResolutionScale.
Why isn’t input from my controllers (e.g. button presses) recognized by the XR Interaction Toolkit?
The headset needs to be detected before any device inputs can be detected. One common issue when testing, is that many people let their headsets rest on a table while debugging their interactions. The controllers won’t get recognized until you wear the headset (or the proximity sensor inside the headset gets activated). If you don’t get any input from your device, put on your headset after starting the app, or cover the proximity sensor.
Can I use the wide-angle camera on iPhones in AR Foundation apps?
ARKit does not provide the option of changing FOV of the camera.