Set up your field curves
Field curves add a bend to the hairs on the fur set. With field curves, you can push the hair to follow the direction of the curves (that is, field curves change the angle at which the hairs emerge from the surface). This also overrides the default bend setting.
Creating the field node and field curves is the first step in setting the hair direction with field nodes. Afterwards, you can set how the field curves affect the hair using the field node shape attributes.
Note
Fine-grained meshes give the smoothest flow forces. Coarse meshes have more granular flow forces.
Create a field node
To create a field node:
Select either the polygon mesh or the Fur node.
From the Wig menu, go to Strands and select Edit > Create a Field Solver. Wig adds a
wmWigFieldNodeand afieldProxynode for the geometry.
Create field curves
To create field curves:
Select the
fieldProxynode.From the Modify menu in Maya, select Make Live.
Draw the curves on the surface. These define the force direction on the surface. You can also use curves that you have already created.
Select the curves and the
wmWigFieldNode.From the Wig menu, go to Strands and select Edit > Create a Field Curve. Wig creates a
wmWigFieldCurveNodefor each input curve.Select the
wmWigFieldNode.In the
wmWigFieldNodeShapeattributes, do one of the following:- Select Solve to apply the curve force to the hair.
- Select Clear to remove the effects of the curve force.
- Select Regenerate Curve if you've made any changes to the field curves.
To see the effects of the field curves:
- In the Attribute Editor, select the
wmWigFieldNodeShape - Select Display Tangent to turn it on. Wig displays the tangent forces on the mesh surface.
Tip
Hide the fur set to get the best view.
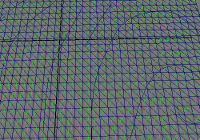
The following image illustrates tangent forces on a mesh surface.
Use field maps to set data values
Field maps allow you to paint data values onto the underlying mesh. The field node can take maps as input. You can paint maps for the hair attributes controllable by field curves and strand length.
Note
Hide the fur to paint the map values more easily.
To use a map:
- Select the Fur node.
- From the Wig menu, go to Strands > Edit > Create a Field Solver. This creates a field node (
wmWigFieldNode). - Select the
wmWigFieldNode. - From the Wig menu, go to Strands > Edit > Add/Update Field Maps...
- From the Add/Update drop-down, select the type of map you want.
- Select Add/Update.
- Select the
polySurfaceShape_fieldProxy. - Open the Tool Settings for the Paint Attributes tool.
- In the Paint Attributes section, select the type of field map that you added. This creates a paintable attribute map.