Cluster scene
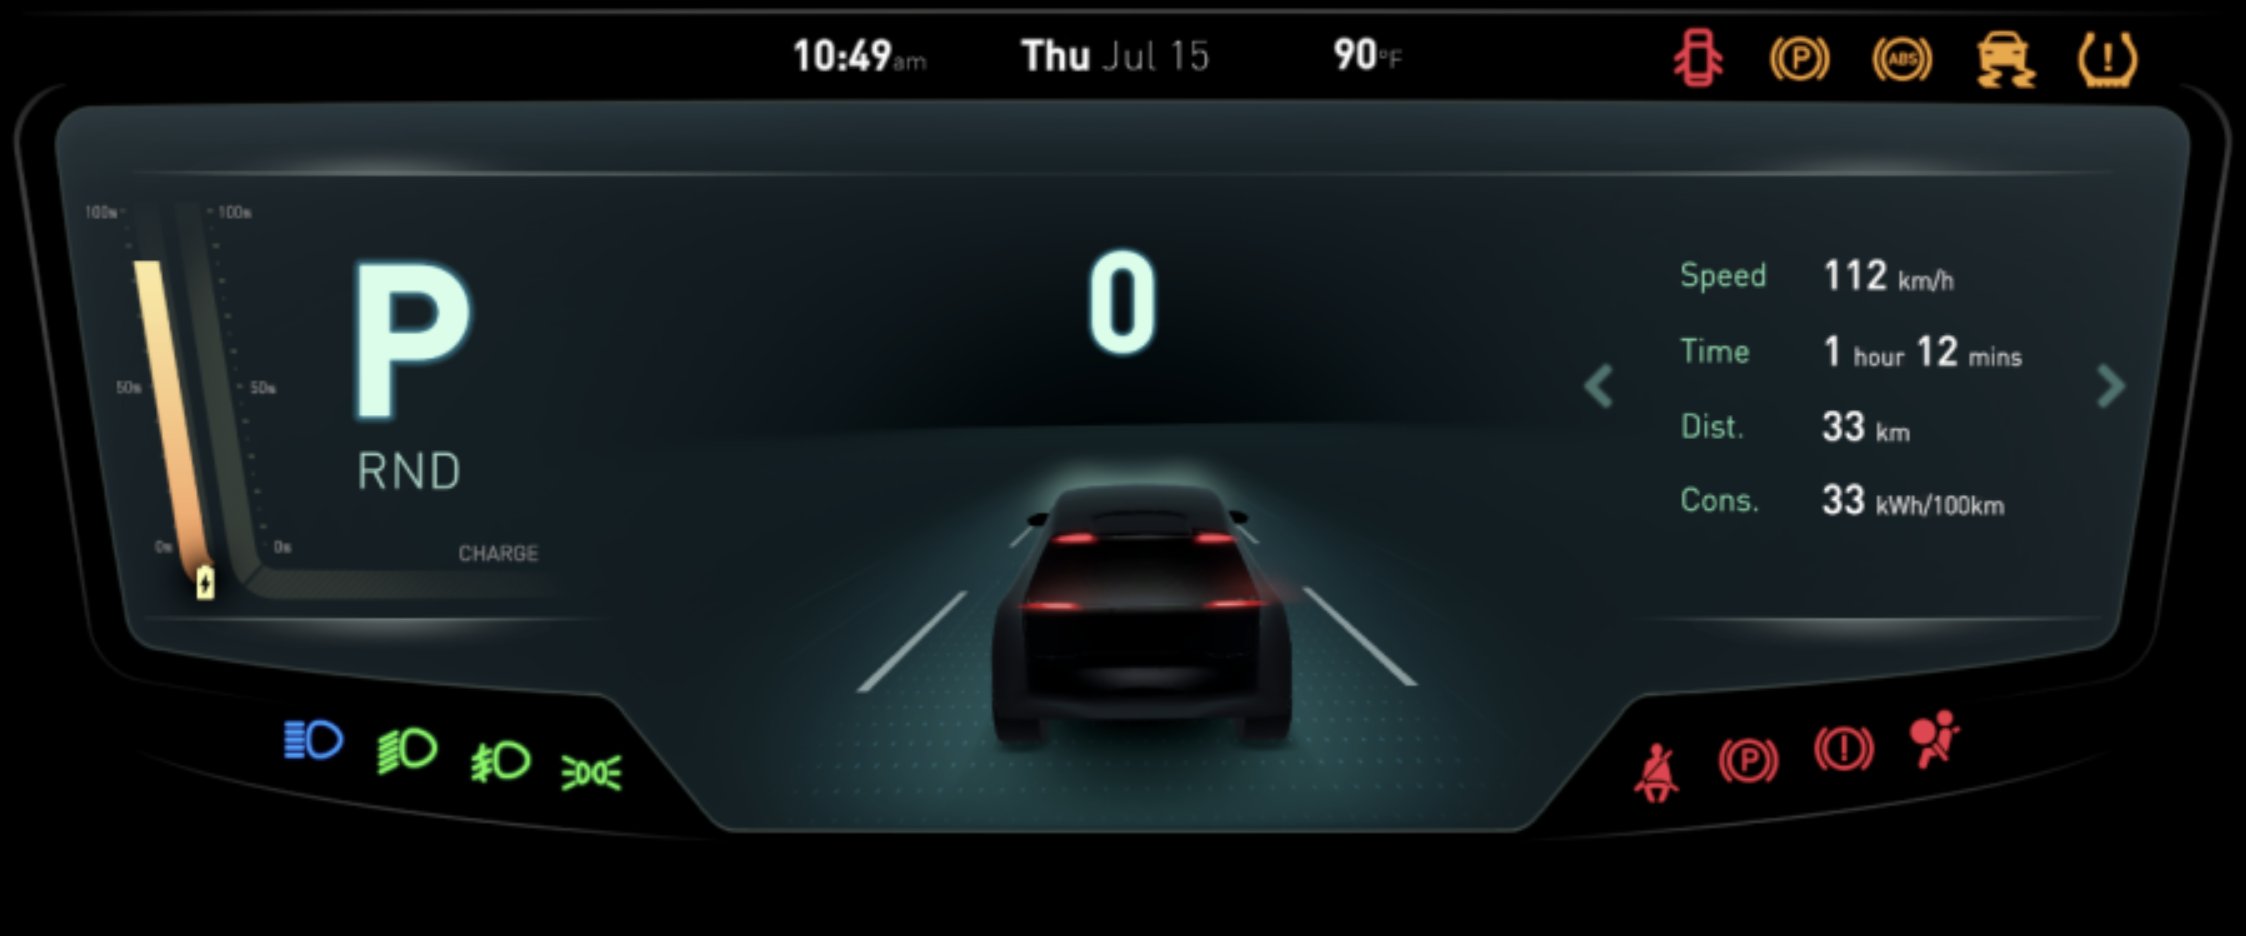
The Cluster scene shows how you can use icons and controls to create a clustered HMI.

Note: For information on how the scene implements ADAS, see ADAS.
Startup Animations
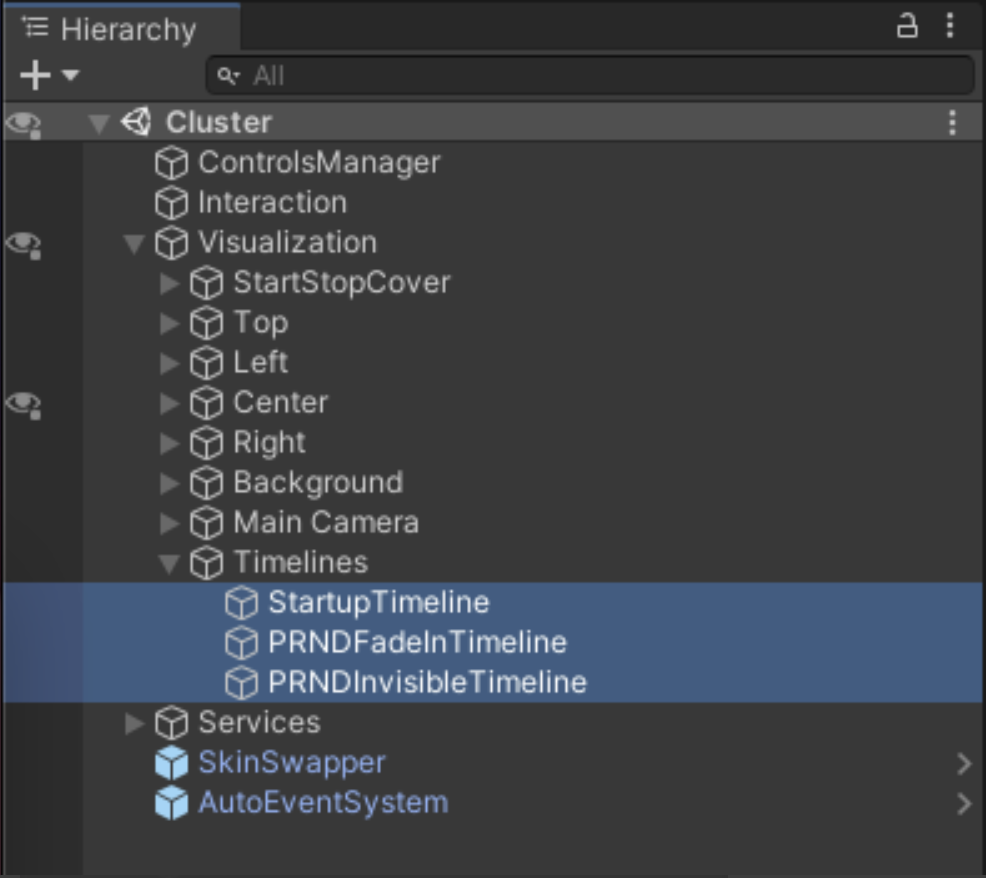
Startup animations in the scene are controlled by the timelines in the Visualization/Timelines section of the hierarchy.
What am I looking at?
The scene is organized in to four sections that appear in different areas of the display (top, left, center, and right).
GameObjects
Different GameObjects under the Visualization section of the project hierarchy control what is displayed on each part of the HMI.

Interaction Scripts
The Interaction GameObject contains three animation scripts for the HMI:
- Cluster Info Controller
- Center Controller
- Vehicle Controller
Cluster Info Controller
This script controls the right side of the cluster. Use this script to navigate through the information screens. The script is simple and plays fade-in and fade-out animations on the information screen directors and timelines.
Center Controller
This script controls the information displayed in the center of the cluster. It uses a director to animate between the map ADAS views.
Vehicle Controller
This script contorls the vehicle simulation. It supports acceleration, braking, and switching gears. The information is fed into the Vehicle Service.
Edit the intro animation
To make changes to the cluster intro animation, follow these steps:
- In the project hierarchy, find the Timelines GameObject and expand it to select one of the available timelines:
- StartupTimeline
- PRNDFadeInTimeline
- PRNDInvisibleTimeline

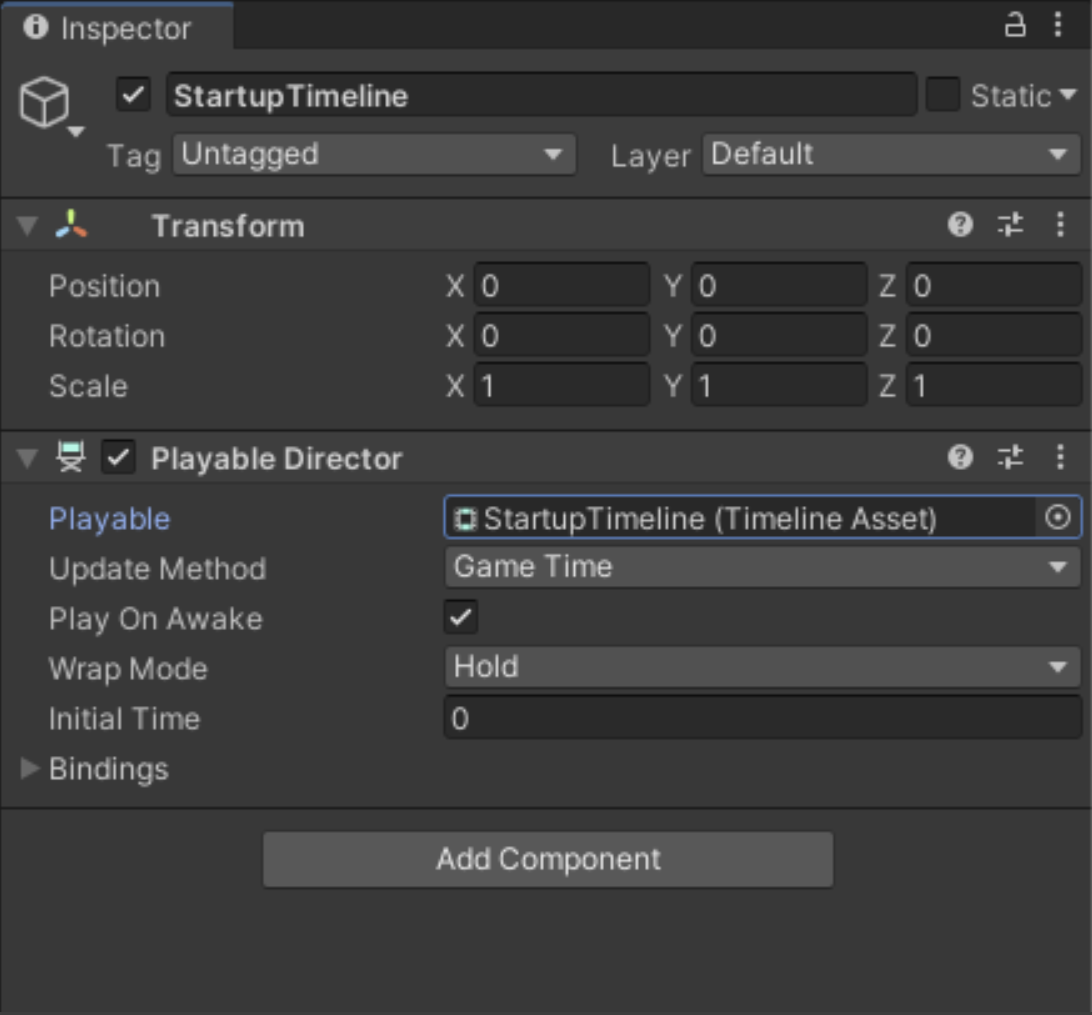
- In the Inspector panel for the timeline you selected, double-click the asset in the Playable field so that the timeline panel opens.

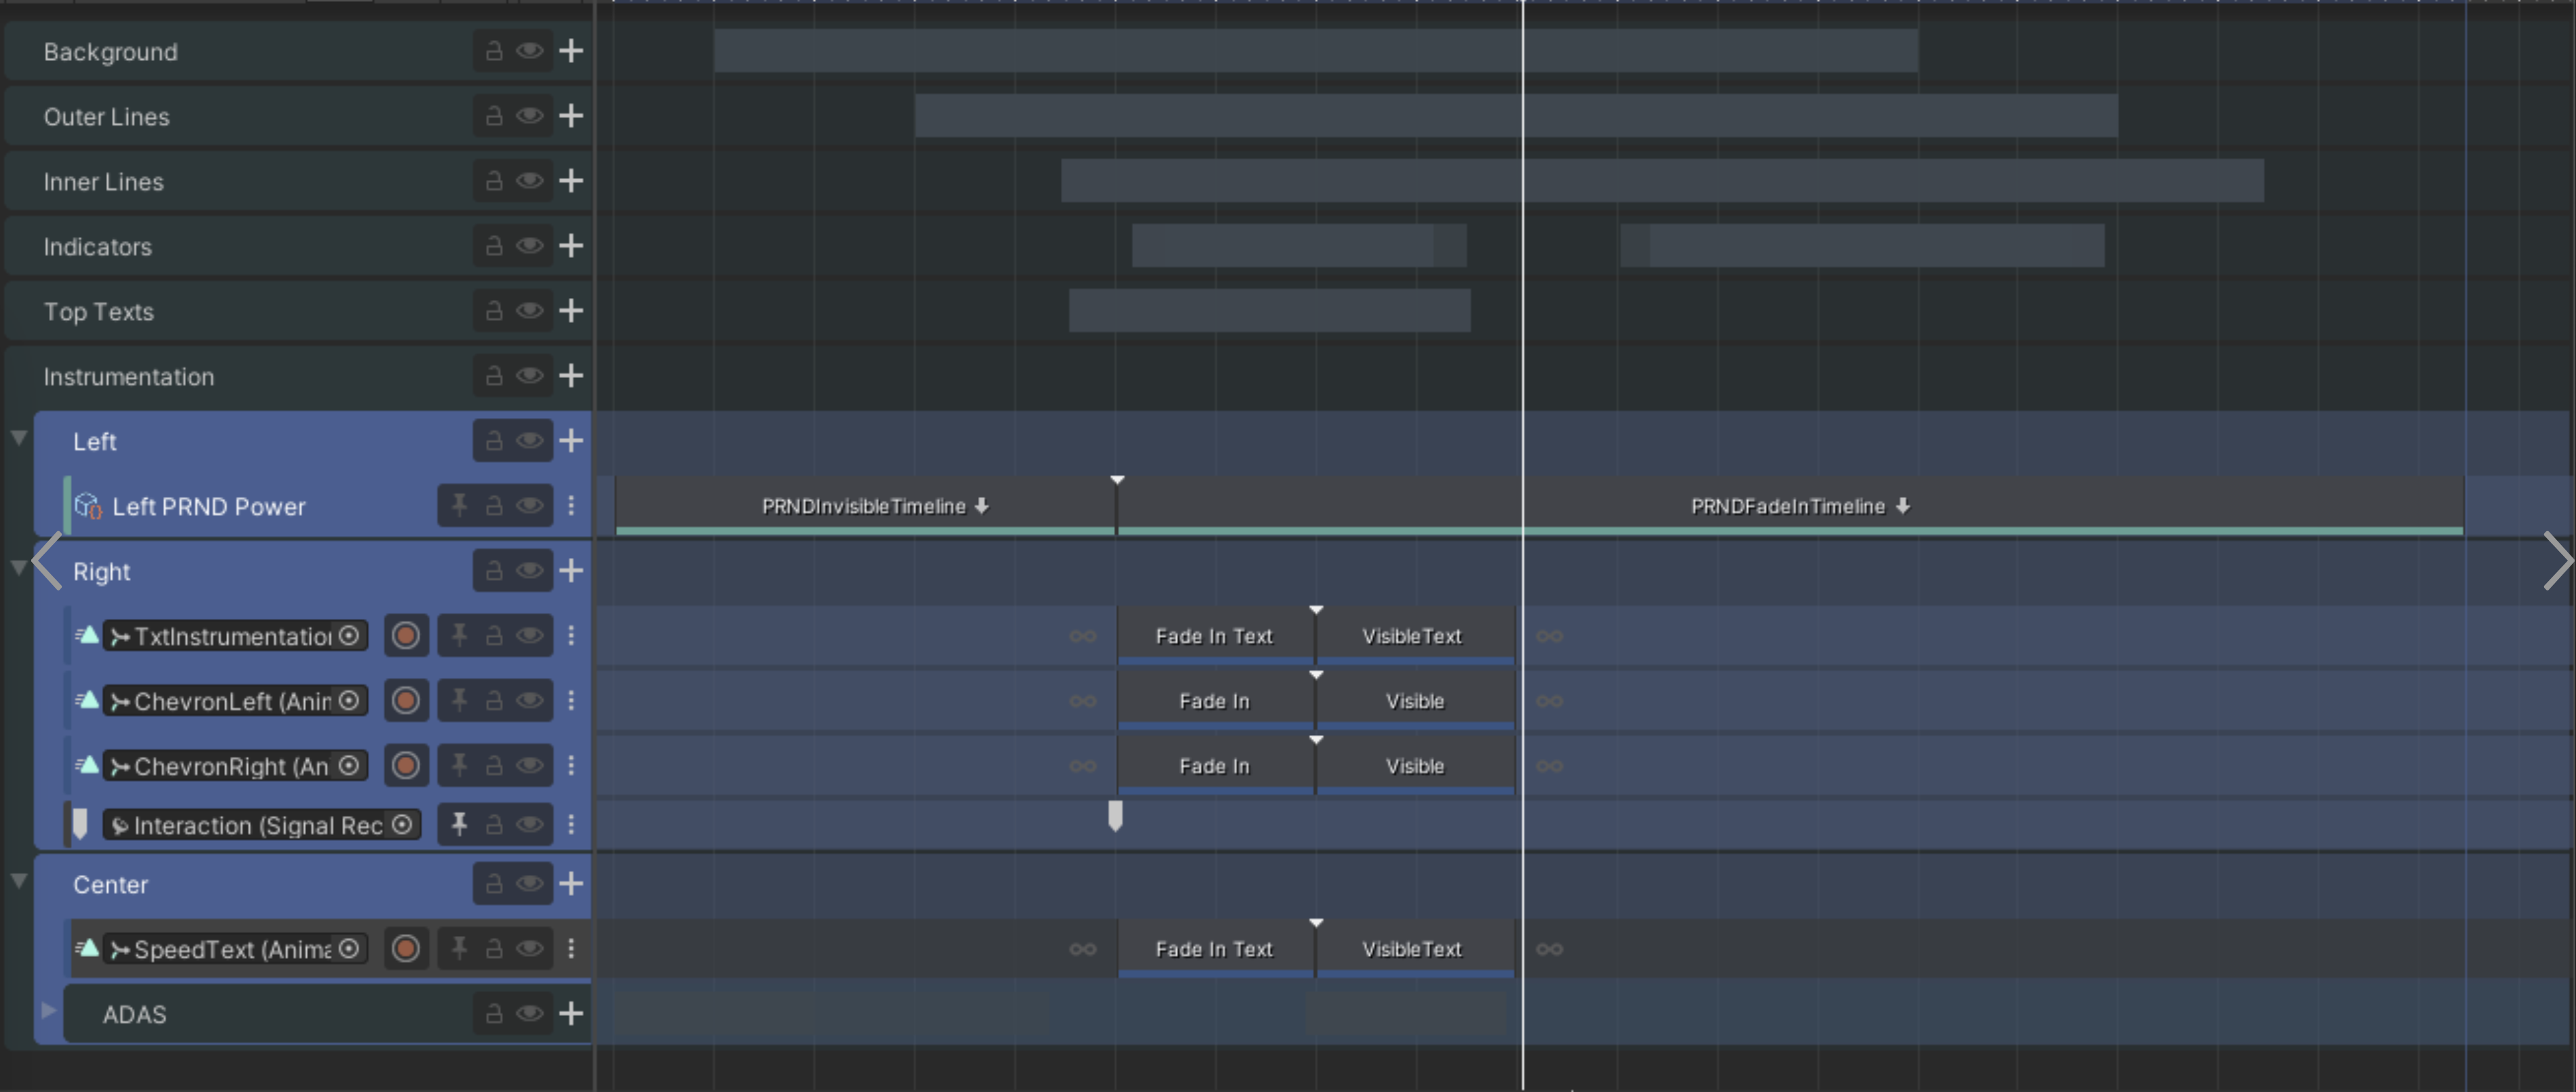
- In the Timeline panel, find the Instrumentation group and identify the Left, Right, and Center subgroups.
- Expand the groups you want to edit.
- Select the animations you want and use controls for dragging, deleting, or modifying values in the Inspector panel to edit them.
