Custom editors
Custom editors in the HMI framework let you setup, control, and test different services.
Car Services
Adding a VehicleService script to a scene lets you simulate the following car services:
- Vehicle speed
- PRNDL
- Turn signals
- Hazard lights
- Cluster emergency and information lights.
To use Car Services, your scene must be open in Play mode.
HVAC services
Adding the HVACService script to a scene lets you simulate the following HVAC services:
- Climate Zone Temperatures for left and right climate zones.
- Fan speeds for left and right climate zones.
- Seat Heater levels for left and right climate zones.
- Climate control toggles for common climate controls.
To simulate the data, these controls update data on the HVACService script in the Scene.
To use HVAC Services, your Scen must be open in Play mode.
Control Setup Services
The Control Setup Services editor lets you map key bindings to simulate input events of the car.
On open, the service finds a ControlsData scriptable object.
For a different control setup, you can manually change the data object that the service points to.
To generate a ControlsData object, go to Assets > Create > HMI > VehicleControlsSetup.
From the Control Setup Services tool, you can see the controls available in the data object. To actively map the keybind to the control, select the button and then select the button your want to map. This maps the keybind to the data object. The change is updated in the Editor window.
Skin Manager
The Skin manager changes the skins setup to the active scenes. You can add a Skinswapper prefab to a scene where you want to change skins. You can add a new skin by duplicating a skin folder with a UISkinCollectionData in it and assigning it through the skin manager
Skin Manager
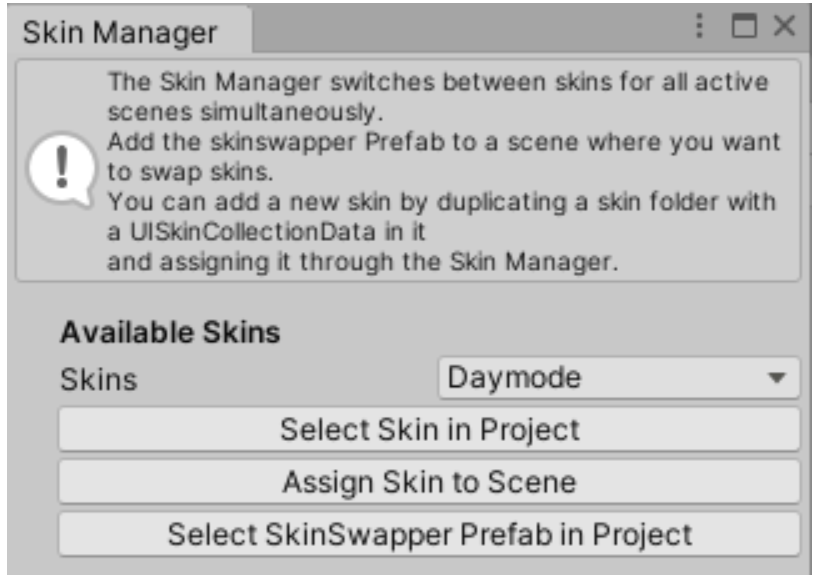
The Skin Manager appears as follows

It shows these controls:
- Skins Dropdown
Use to select th skin you want. - Select Skin in Project button
Selects the skin in your hierarchy - Assign Skin to Scene
Assigns the selected skin in the skins dropdown to the active scenes. - Select SkinSwapper Prefab in project
Selects the SkinSwapper Prefab in the project, making it easy to find and add to the scene you want.
Custom Build
Important!: Make sure that your scenes are added to the Scenes in Build list located at File > Build Settings
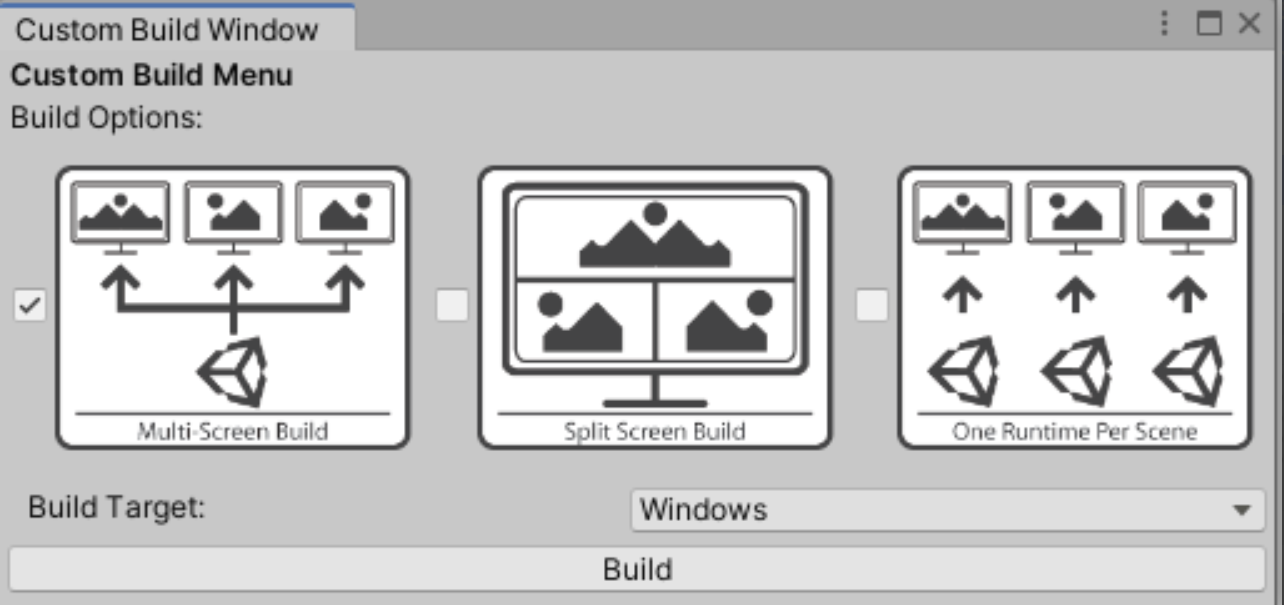
This custom editor window lets you build to our three custom build types.
You can select any of the following build options:
- Multi-Screen build
Builds the MultiScreenSetup scene and any other scenes it depends on.
Split Screen Build
Builds the SplitScreenSetup scene and any other scenes it depends on.
- One Runtime Per Scene
Creates 1 runtime per scene in the Scenes in Build (which you can find in File > Build Settings)
Choose a build target from the dropdown. When you select Build, the system creates a build for each option you choose.
Custom Build Window

Build Settings
