Data Builder
The Data Builder helps you to set up either your own data sources (which we call Stores) and connect to plugins, with the Stores acting as a bridge to our internal processing logic.
As the Data Binding Graph lets you create, structure, and reuse HMI Components, once your HMI Component does what you want it to do, you can use the Data Builder to start wrapping business logic around it.
Create a Store with the Data Builder
Open the Data Builder through the top HMI menu.

Give a name to your Store and select Add Store field button to start creating data fields.
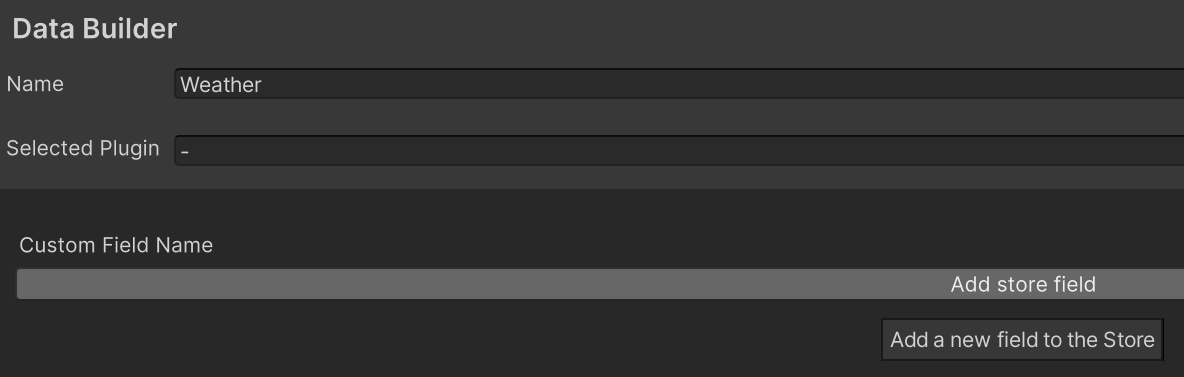
Specify the fields to describe what data you want to use in your HMI scene or component. Set the name, the data field type, and the default value.

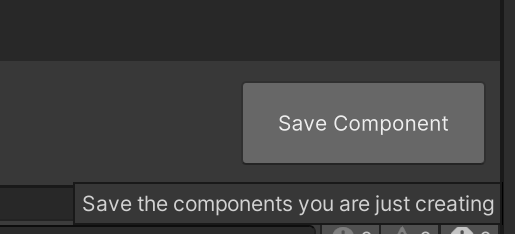
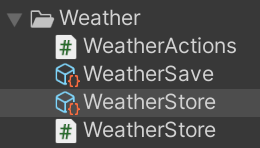
Select the Save Component button to finish the process and generate the required classes and assets for you. After an automatic compile, you can directly use this Store in the Data Binding Graph to bind the fields to some target.
In the Store asset, you can modify your data at the source of truth (origin of the data) and the changes are reflected everywhere the Store is used.
Important
When you open the save file, you can continue editing your Store, but saving the modifications will overwrite the previously generated classes, unless you give it a different name.
Connect your Store to a back-end with IOX Plugins
Stores are the source of truth for the application state/logic as they contain all the necessary code to drive our Flux pattern. You normally don't want to create all application logic just in the Stores, but have some subsystems or plugins that provide you with data or methods to use.
The HMI package provides a plugin architecture called IOX (Input/Output eXchange) to assist users with this logic.
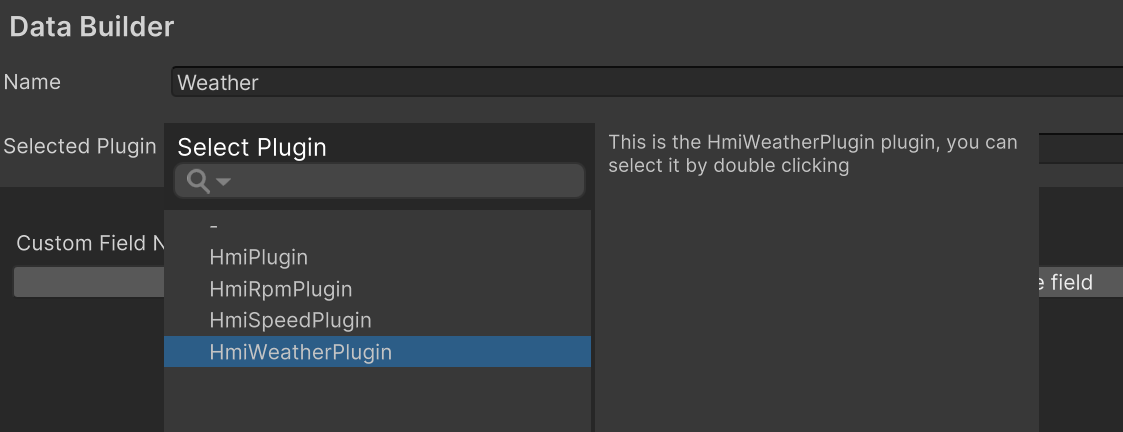
This preview gives a preview of plugin creation, and provides a sample plugin to provide you with weather data.
To use it in a Store:
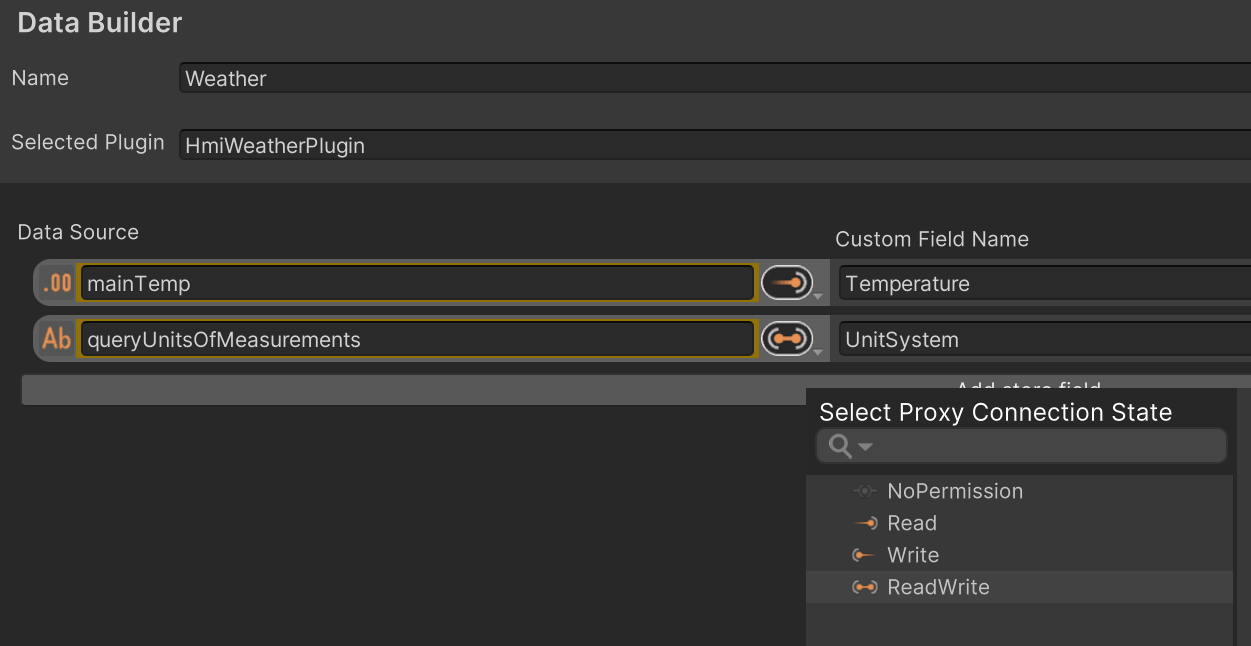
Connect your Store in the Data Builder to a plugin.
Associate your Store fields with the data coming from your plugins.

Select the connection type between the plugin field and the Store field. Based on this the communication between your Store field and plugin is automatically generated and handled and they update each other the specified way.
Use Stores in the Data Binding Graph
Once you have created Stores via the Data Builder, you can bind to their values (or send Actions to manipulate data in the Store) via the Data Binding Graph. There are two ways to bind values:
Via the Searcher.
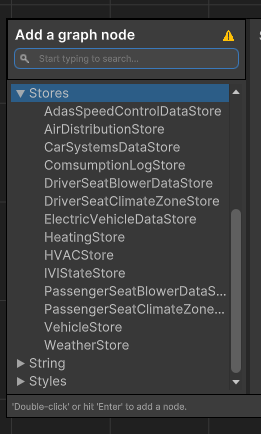
Via Drag & Drop from the Project window.
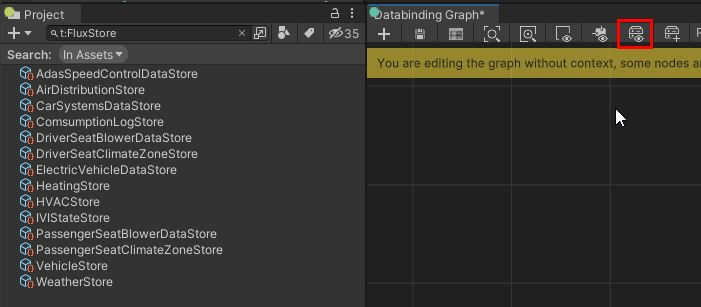
You can also use the quick filter from the graph menu bar to just list Store types in the Project window.
Add Actions and interactions to the Data Binding Graph
If you have created some HMI Components and connected them to Stores, you already have a data-driven system up and running. This is enough for creating passive data displays or labels.
The HMI package also allows you to interact with your system through Actions. Actions work on Stores, and are the only official way to modify data in a Store. The use of Actions (and their processing in the Store) allows the HMI package to know when and where data of Stores have been modified.
Default Actions for every data field in a Store are automatically created by the Data Builder and can be used instantly, just like the Store they belong to in the Data Binding Graph.
All Actions have an event input port, and they execute their Action when the event activates the input port.
Some Actions also have a payload port. This allows you to bind data to a payload and have the result sent to the Store via the Action.
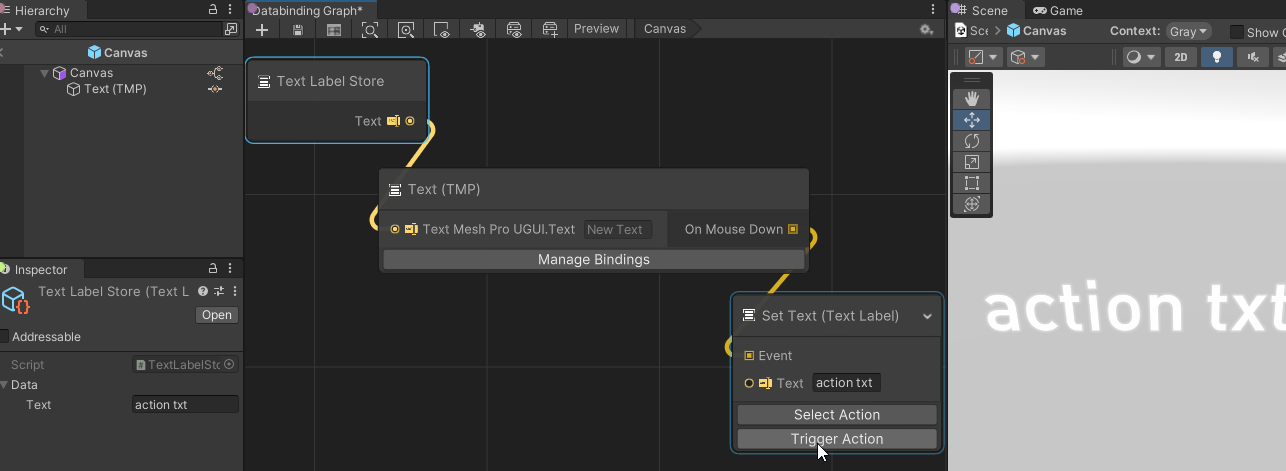
In the small example below you have a simple Store with one string called Text.
This Store value is bound to a Text GameObject in the Prefab.
Due to the data binding, it always shows the current Store value as the text in the scene.
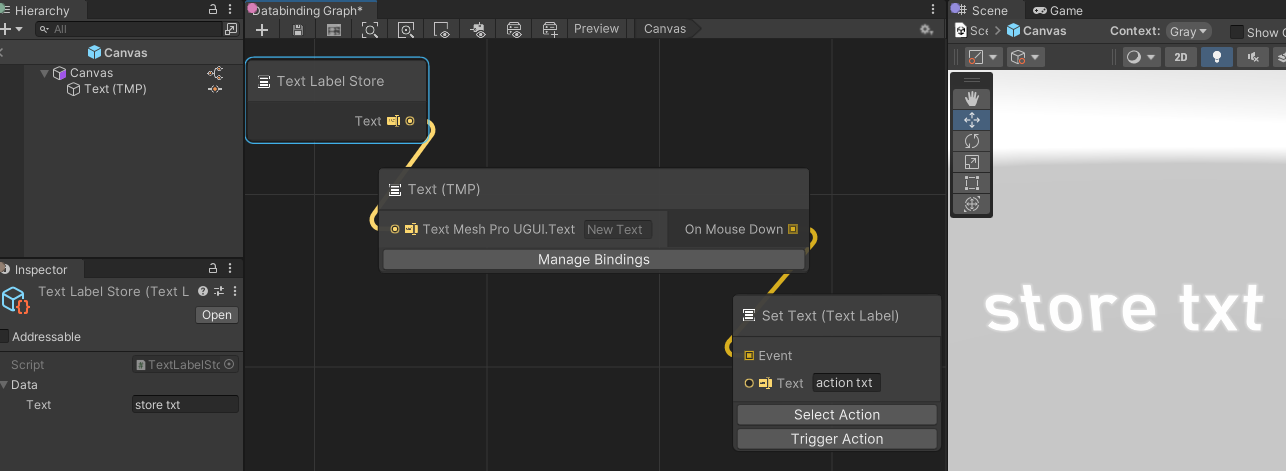
On the right side of the Text node you see the execution port for an event (in this case OnMouseDown) to which an Action node is connected with its execution port.
The Action node will fire the Set Text Action on the Text Label Store, as chosen through the Select Action button. It also has a payload of type String with the value of action txt.
The Action node will now fire whenever you click on the text in the scene with the mouse in Play mode.
You can develop and test your business logic you outside of Play mode. Select the Trigger Action button to test this logic, as shown in the following image:
You can find many examples in the sample project. We recommend the HVAC display as it's easy to understand. It also includes a bit of in-graph documentation.
Here is an example of how you would do a Toggle, where the toggle state is in a Store.
Every button click executes the Action which just takes the inverse input (bool) as a new value.
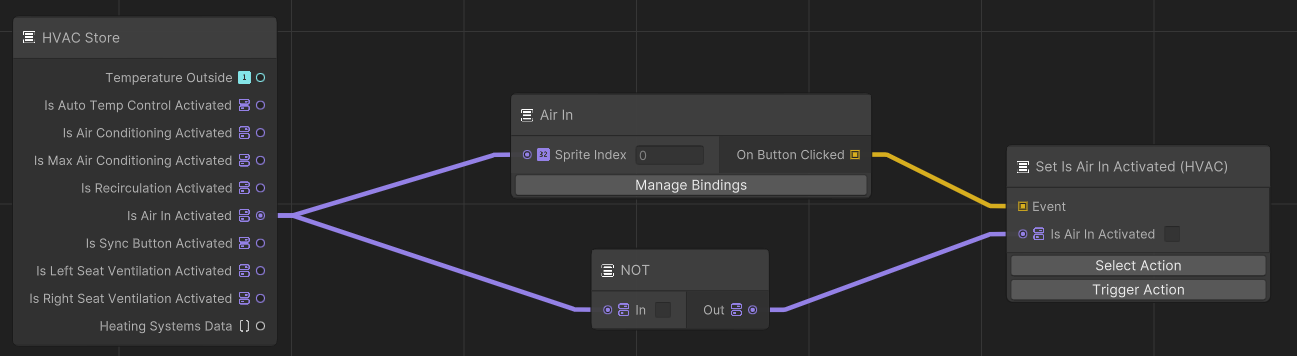
It's important to know that the HMI package treats Event ports as Boolean values, which means you can treat Execution ports just like a Boolean value. That way you can have conditions bundled with events (to block or override executions), or even have pure data driven Action triggers.

Preview and Play mode
Most interactions only function when you enter Play mode.
You can preview certain objects without going into Play mode.
Some examples that you can preview outside of Play mode are:
- Purely data-driven updates
- Objects connected to a Timer node
- Store values that's continuously changing
- Triggered animations
To test this, use the Preview button in the Graph Window.

This enforces a constant redraw of the Unity scene and Game view. Anything that would require a constant redraw to be noticeable can be previewed.