Extend a scanned trunk with a bake stitch
A bake stitch is used when you've imported a photogrammetry mesh and you need to blend to the SpeedTree branch. It's a connector. This stitch is for when you have one or several areas to blend and want the new blend area to be baked back into your original unwrapped trunk map. This saves a lot of space in particular for game trees.
Import the mesh and its textures
To use a 3D scan:
- Import the mesh as a mesh asset.
- Create a material asset that uses the textures associated with the scan. Be sure to associate the mesh asset with the material.
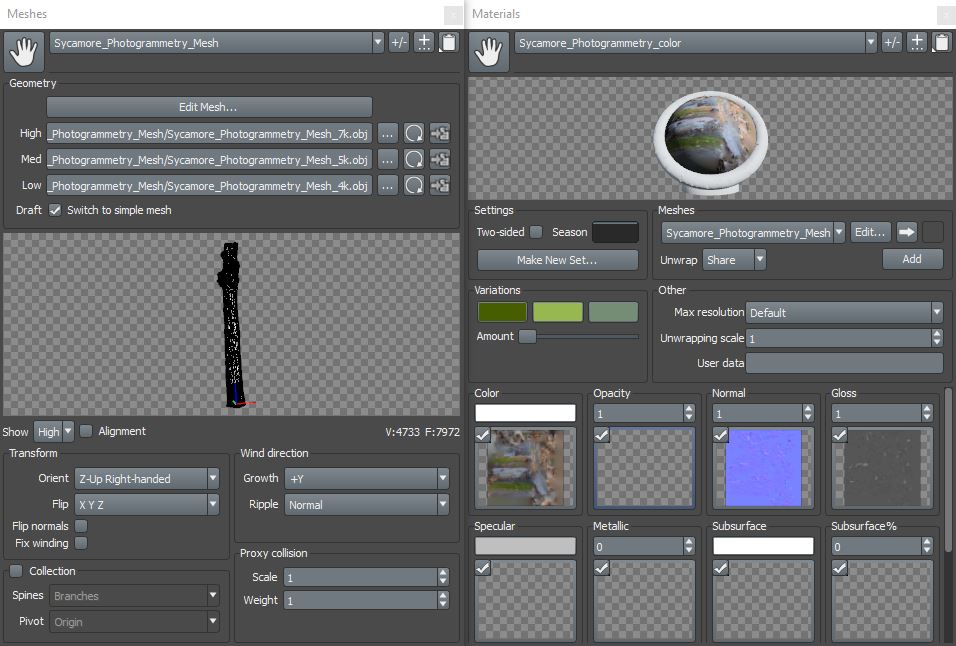
Note
Meshes must be a single model with a single material. Photogrammetry meshes are typically saved as single meshes with unwrapped UV data that correspond to a texture atlas.
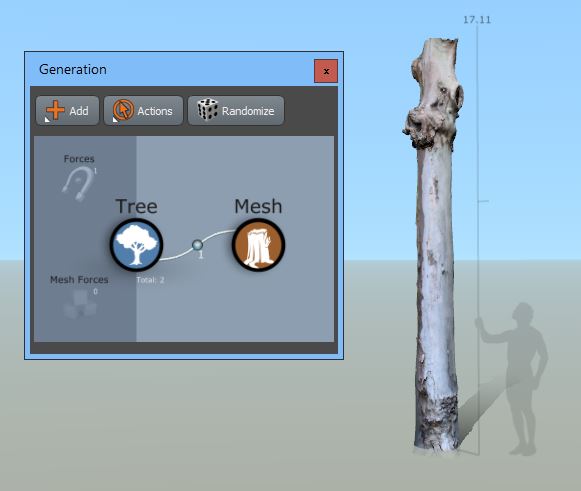
Add the mesh to the model
Once you have assets in place, use a Mesh generator to make it part of your model.
- Add a Mesh generator to the model.
- Assign the material asset to the Mesh generator. The generator will automatically pick up the mesh asset via its association with the material asset.
Note
You can move or rotate a mesh manually by switching to node editing mode, clicking on the mesh in the scene, and using the gizmo to transform the mesh.
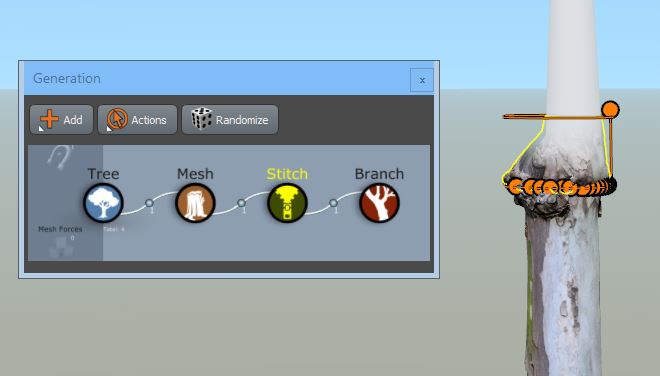
Add a bake stitch generator
- Select the Mesh generator.
- Add a Bake stitch (Add > Photogrammetry > Bake stitch). You should see a Stitch generator and a Branch generator added to the trunk as pictured below.
Choose a good material for the child
Create a material for the child branch and apply it. This material should match the scanned trunk as closely as possible (all maps: color, normal, gloss, etc.).
Note
Make sure you tile the map on the child branch such that the bark pattern density matches that of the photogrammetry model. The quality of the blend will be greatly improved by a good match between the material on the photogrammetry model and the material/mapping it's being blended onto.
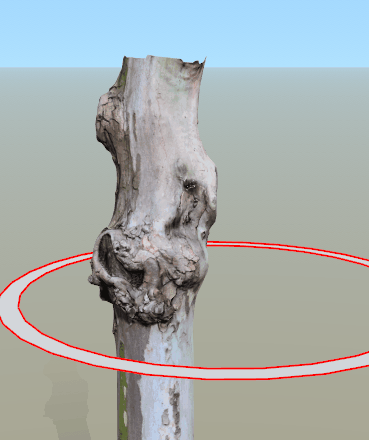
Put the stitch in a good spot
The stitch generates near the center of the mesh. If it doesn't generate in a valid position, you'll need to reposition it.
To reposition the stitch:
- Switch to node editing mode.
- Select either the stitch ring (if it's not valid) or the stitch geometry (if it is valid). 1. Move the stitch to the desired location. It should be placed near the end but not all the way to the end of the trunk as pictured below.
Note
Leave enough trunk geometry beyond the stitch location to be used in the blending process. The height of the blend region can be controlled in the Blend property group on the Stitch generator. Taller stitches require more trunk geometry beyond the stitch.
Edit the blend
Now that you have the stitch where you'd like it, it's time to make the blend region as seamless as possible.
To edit the blend:
- Use the properties in the Blend:Opacity group to control the transparency of the trunk geometry in the stitch region. Vertices near the stitch line should be opaque while vertices near the top of the stitch will be transparent.
- Use the Noise options to jumble up the effect.
- Use the properties in the Blend:Geometry group to shape the trunk geometry in the blend region to the child geometry.
There will typically be a little bit of back and forth between blend settings, child positioning, child radius editing, and stitch positioning to get the stitch just right. When you're done, you should have something like the following.

Build and bake
Build out the rest of your tree. If you have a multi-trunk opening or many stitches, set up the rest of your stitch areas. When building this way, it’s good practice to make all the stitches the same type (bake).
Before you export, bake the final material:
- Go to the Mesh generator properties (not the stitch).
- Under Bake Stitch Tools, select Create and assign new material to bake all your stitches into a copy of your original atlas and bring that texture back into SpeedTree. Your tree is now ready to export.
Best practices
The following list outlines a few things to keep in mind when using photogrammetry trunk meshes with a baked stitch.
- Choose a reasonably smooth portion to place the stitch if you can.
- You can increase the Clearance property of a stitch to "eat" more of the trunk geometry above the stitch.
- Switch to node editing mode to move the trunk mesh, stitch, and branch until the stitch is as seamless as possible.
- You can increase the tessellation of the stitch. Doing so will cost extra polygons but it may make the stitch region blend more effectively.
- A single Stitch generator can create multiple stitches. Use this fact to stitch up several holes on a single mesh without having to have a unique generation editor configuration for each one.