Set up your environment
This topic describes how to set up a development environment to make a customized Reflect app or plug-in.
Note: This procedure is intended for developers. Previous experience with Unity Editor is helpful.
Prerequisites
Licenses
A Unity Pro license and a Unity Reflect license
You can get both licenses on the product website. To manage previously purchased licenses, see Unity Reflect licenses.
Software
- Unity Hub and Unity Editor (any LTS version)
An integrated development environment (IDE) for Unity
Although you can use any code editor you like, Microsoft Visual Studio, Visual Studio Code, and Jetbrains Rider IDEs have integrations with Unity. Microsoft Visual Studio is the default IDE on Windows and macOS.
For more information, see Unity - Manual: Integrated development environment (IDE) support (unity3d.com)Git
You can get it here: GitHub: Where the world builds software · GitHub.
To make a customized Reflect app or create a plug-in, you will make a local clone of the Reflect GitHub repository.Tip: GitHub has a command line interface. If you are more comfortable with a graphical interface, install a Git client such as GitHub Desktop or Sourcetree.
Clone the repository
In a web browser, go to https://github.com/Unity-Technologies/com.unity.reflect.viewer/tree/beta/3.1.0.
Click the green Code button and select a cloning method.
Important: Do not download the ZIP file to clone the repository.
You can clone the repository using HTTPS, SSH, or GitHub CLI, or you can open the remote repository in a Git client application and clone it using the client’s tools.
For more information about how to clone a repository, refer to the GitHub documentation.
Open a Reflect project in the Unity Hub
- Open the Unity Hub and click Open> Add project from disk.
- Browse to the
ReflectViewerfolder you created in [Clone the repository](#) and click Open. This adds the project to the Unity Hub and opens the project in the Editor.
Open a Reflect scene in the Unity Editor
To open a Reflect scene inside the Project window, click Assets > Scenes > Reflect.

At this point, you can play the project. Proceed to the next section to continue setting up your environment.
Open a C# project in the Unity Editor
If you have not already done so, select your preferred external script editor:
- In the main menu at the top of the Editor, click Edit > Preferences.
The Preference window opens. - In External Tools, select your editor in the External Script Editor drop-down menu.
Access the script hierarchy and edit files
In the main menu at the top of the Editor, click Assets > Open C# Project.
You can now access the whole scripts hierarchy and start making changes to the Reflect viewer. When you save your changes, Unity automatically recompiles the viewer inside the Editor and displays any compiling errors in the Console (Window > General > Console).
Set up and run a build
You can use the Build Settings window (File > Build Settings or use the shortcut Ctrl-Alt-B) to configure and run a development build to test your application or to publish a final build.
Supported platforms for Reflect
- PC, Mac & Linux Standalone
- iOS (requires Xcode)
- Android (requires the Android SDK)
Note: WebGL is not supported.
Set up a build
- Open the Build Settings window and click File > Build Settings.
- Under Platform, select the appropriate build target (PC, Mac & Linux Standalone, iOS, or Android).
- Under Scenes in Build, ensure that all the required scenes are selected.
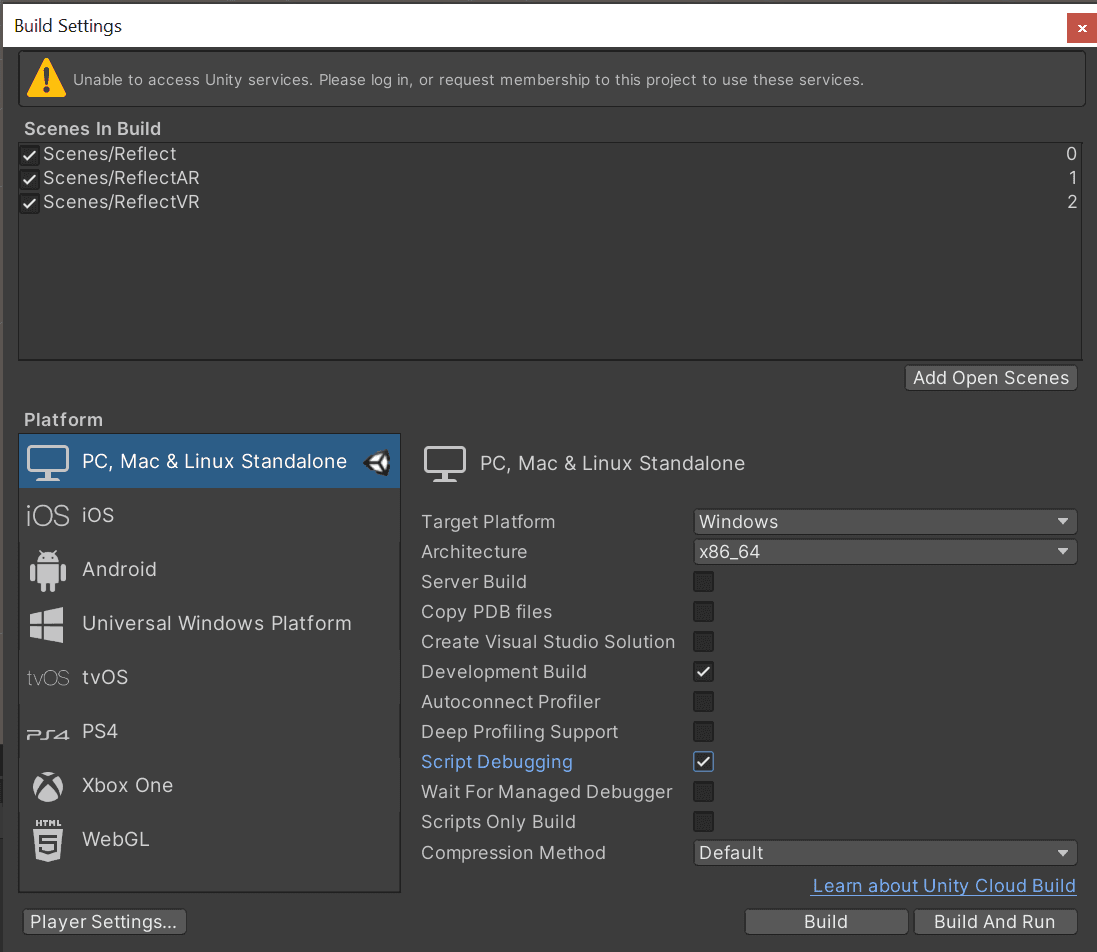
Select any other desired options.
Note: For more information about the Build Settings window, see Unity Manual: Build Settings.
Run a build
After selecting your settings, click the Build or Build And Run button.
When the Save dialog appears, follow the prompts to enter a name and save location or select a folder.
**Note: **If you're not sure where to save your build, consider making a subfolder inside your root folder to hold your builds. You cannot save the build into the Assets folder.
Select the Save button.
Unity builds your application.
You're ready to make changes to your custom Reflect application.