Adding a new radial dial widget
This walkthrough shows you how to add a new radial widget and respond to a user’s changes in the viewer.
The example we use adds a dial to set the time of day and time of year with the Sun Study feature.
Model, View, Controller
Reflect Viewer uses the unity.touch-framework package to implement the UI, based on centralized MVC.
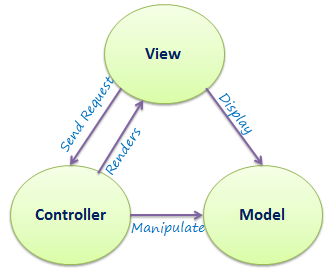
We use UGUI as our View framework, MonoBehaviours as the Controller basis, and we have a centralized Model using UIDATA structs. We are also using Flux C# implementation SharpFlux to manipulate the Model.
Model
Create new UI Data Model
If necessary, create a new UI Data Struct and add to UIStateData, UISessionStateData or UIProjectStateData depending on the data usage. In the example, the TimeOfDayYearDial uses the already-existing SunStudyData, so nothing new was created.
View
We need to create the outer month dial and inner hour dial.
Create a New Radial Prefab
Create the prefab and add all the necessary UI controls using the Dial Control prefab from the unity.touch-framework package. The Time of Day Year Radial prefab includes two Dial Control prefabs, one for each of the inner and outer dials, along with three buttons.

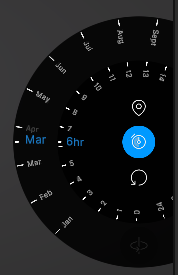
To create similar radial dials, you can copy and paste the prefabs in the “Assets/Prefabs/UI/Controls/Radial Dials” folder, perhaps as a prefab variant. Place your prefab in this folder as well.
Controller
Since the Time of Day Year Radial completely replaces the right-side toolbars (such as the Orbit Sidebar) when opened, it was added as a new ToolbarType and controlled via ActiveToolbarController.cs.
Note: This may not be applicable to other radial widgets, particularly those that do not replace other toolbars.
Add your new ToolbarType
Add a new ToolbarType in UIStateData as shown below:
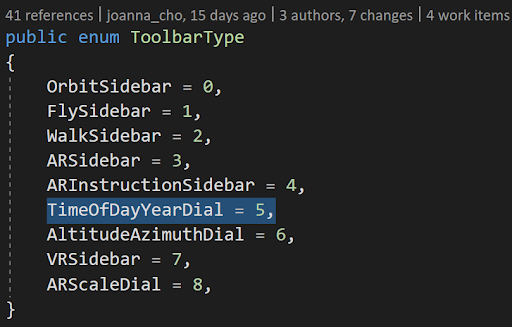
Path: Assets/Scripts/UI/UIStateData.cs
UIStateData is used in UIStateManager.cs, allowing centralized access to the active toolbar.
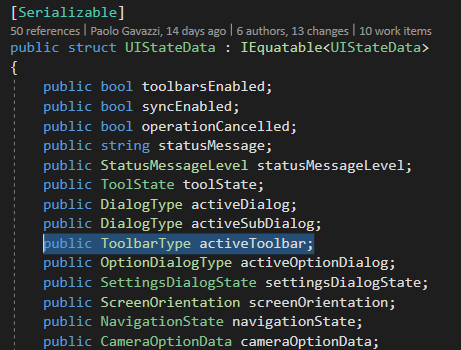
Path: Assets/Scripts/UI/UIStateData.cs
Add Your New Radial to ActiveToolbarController
Open ActiveToolbarController.cs and add your new dial with the following steps:
Add a new member for the new dial.

Update the OnStateDataChanged() event handler.
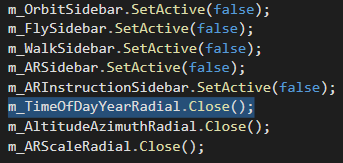
Add your switch case for your DialogType.

Now you can create the controller class to handle all the changes and data modifications.
Create the TimeRadialUIController.cs class.
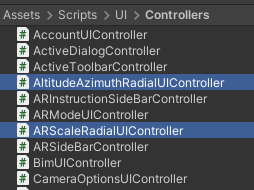
Every Radial prefab has a controller. Controllers are used to respond to UIData changes and to support UI user events (button presses, sliders, etc.). Do not hesitate to duplicate an existing radial controller (named ___RadialUIController.cs) and rename it. The AltitudeAzimuthRadialUIController.cs or ARScaleRadialUIController.cs scripts are recommended for copying because they are simpler than TimeRadialController.cs.
Add member controls for the UI with [SerializeField]. Also add local private members like previousToolbar to display the most recent toolbar on closing the dial. See the code below OnStateDataChanged():
using System;
using SharpFlux;
Using Unity.TouchFramework;
using UnityEngine;
using UnityEngine.UI;

namespace Unity.Reflect.Viewer.UI
{
  public class TimeRadialUIController : MonoBehaviour
   {
#pragma warning disable CS0649
       [SerializeField]
       DialControl m_HourDialControl;
       [SerializeField]
       DialControl m_MonthDialControl;
       [SerializeField]
       Button m_MainButton;
       [SerializeField]
       Button m_SecondaryButton;
       [SerializeField]
       Button m_ResetButton;
#pragma warning restore CS0649

       int m_DefaultHour;
       int m_DefaultMonth;
       public static ToolbarType m_previousToolbar; // display previous toolbar on dial closed
       readonly MonthLabelConverter m_MonthLabels = new MonthLabelConverter();
       readonly HourLabelConverter m_HourLabels = new HourLabelConverter();
Add Listener to UI controls in Start().
void Awake()
{
     UIStateManager.stateChanged += OnStateDataChanged;
      m_MonthDialControl.labelConverter = m_MonthLabels;
       m_HourDialControl.labelConverter = m_HourLabels;
}

void Start()
{
     m_HourDialControl.onSelectedValueChanged.AddListener(OnHourDialValueChanged);
     m_MonthDialControl.onSelectedValueChanged.AddListener(OnMonthDialValueChanged);
     m_ResetButton.onClick.AddListener(OnResetButtonClicked);

     m_MainButton.onClick.AddListener(OnMainButtonClicked);
     m_SecondaryButton.onClick.AddListener(OnSecondaryButtonClicked);

     int min, day;
     (m_DefaultHour, min) = SunStudyUIController.GetHourMinute(UIStateManager.current.stateData.sunStudyData.timeOfDay);
     (m_DefaultMonth, day) = SunStudyUIController.GetMonthDay(DateTime.Now.Year, UIStateManager.current.stateData.sunStudyData.timeOfYear);
     m_HourDialControl.selectedValue = m_DefaultHour;
      m_MonthDialControl.selectedValue = m_DefaultMonth;
}
OnStateDataChanged, remember to set the Dials’ selectedValue. This moves the dials whenever the appropriate state data is changed, such as sunStudyData.timeOfDay via the Sun Study Dialog time sliders. OnMonthDialValueChanged changes the Sun Study Data via dispatching the SetSunStudy action.
void OnStateDataChanged(UIStateData data)
        {
            m_HourDialControl.selectedValue = GetFloatFromMin(data.sunStudyData.timeOfDay);
            m_MonthDialControl.selectedValue = GetFloatFromDay(data.sunStudyData.timeOfYear);

            if (data.activeToolbar != ToolbarType.TimeOfDayYearDial && data.activeToolbar != ToolbarType.AltitudeAzimuthDial)
            {
                m_previousToolbar = data.activeToolbar;
            }
        }

        void OnMonthDialValueChanged(float value)
        {
            var data = UIStateManager.current.stateData.sunStudyData;
            data.timeOfYear = GetDayFromFloat(value);
            UIStateManager.current.Dispatcher.Dispatch(Payload<ActionTypes>.From(ActionTypes.SetSunStudy, data));
        }


// … code not shown, see full script for reference

   }
}
Path: Assets/Scripts/UI/Controllers/TimeRadialUIController.cs
At this stage, you can tie everything together.
Add the TimeRadialUIController Component to the Prefab
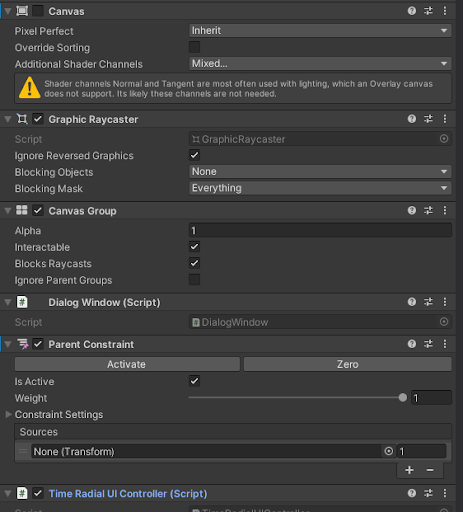
Edit the prefab (enter nested prefab edition mode). In the Inspector, add the component. If you created your Radial prefab from scratch instead of copying an existing prefab, make sure you have all required components (Canvas, Canvas Group, Graphic Raycaster, and Dialog Window).
Put your Prefab In the Scene
Place your Options Dialog under UI Main in the Reflect scene next to other sidebar prefabs.
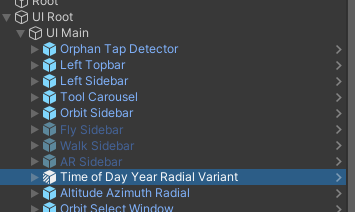
Select “UI Root” GameObject. There is an Active Toolbar Controller in the Inspector window. Drag and drop the Time of Day Year Radial Variant to the Inspector window to set the value.
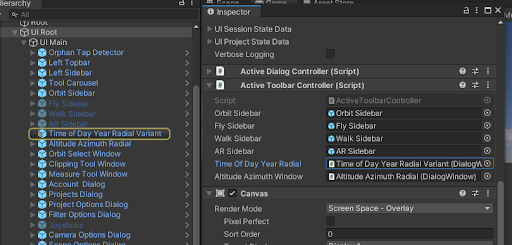
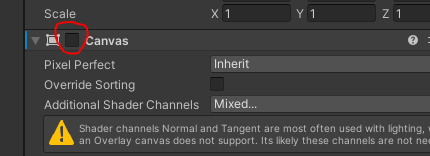
Disable the Canvas component to hide the radial by default. Visibility is controlled by DialogWindow component and the ActiveToolbarController.
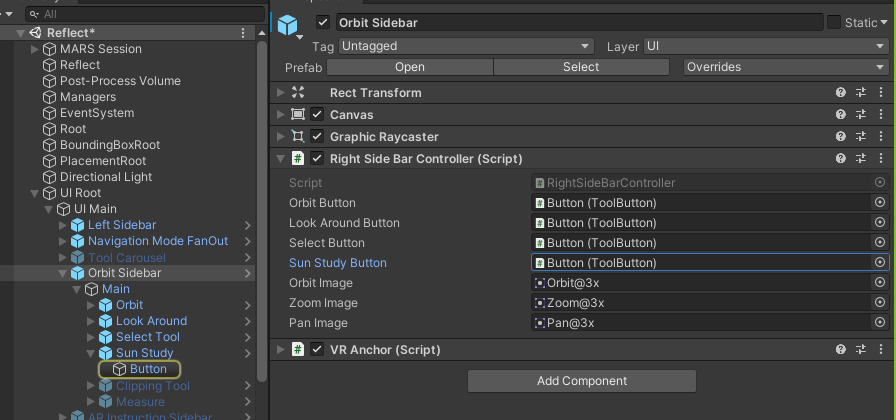
Create the button in the toolbar and link to the radial
The Time Dial is opened via the Sun Study button on the right toolbar (Orbit Sidebar). Make sure to create the button on the Orbit Sidebar prefab and add in necessary code to RightSidebarController.cs.
The dial opens when the Sun Study button is clicked.
Compile and Run
Compile and run. Check to make sure that the new dial opens when you click it. If so, keep going to implement the rest of your UI controller.
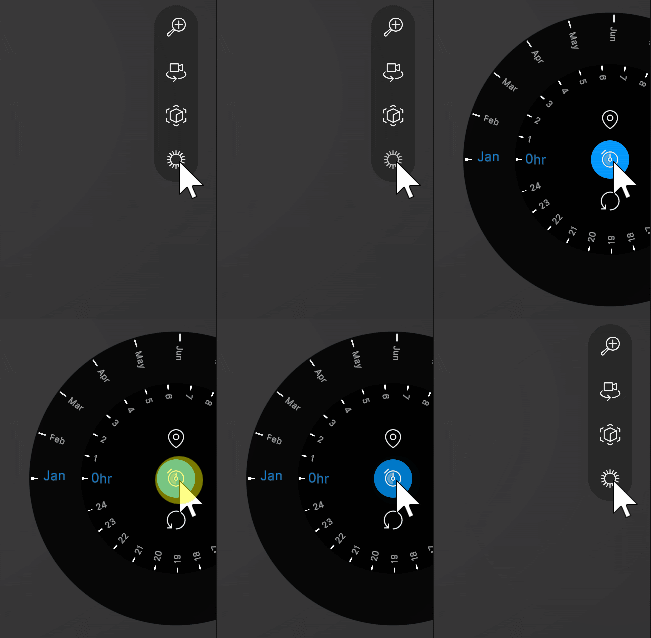
Congratulations, you just added your own custom dial to the Unity Reflect Viewer!