C#으로 자체 커스텀 패스 스크립팅
커스텀 패스 API에서 커스텀 패스 클래스를 확장하여 둘 이상의 버퍼가 있거나 컴퓨트 셰이더를 사용하는 커스텀 패스처럼 복잡한 효과를 만들 수 있습니다.
커스텀 패스 C# 템플릿의 명령을 사용하여 C# 커스텀 패스를 직접 만들면 이는 Custom Pass Volume 컴포넌트에서 사용 가능한 커스텀 패스 리스트에 자동으로 표시됩니다.
커스텀 패스 C# 템플릿
새로운 커스텀 패스를 만들려면 Assets > Create > Rendering > C# Custom Pass로 이동합니다. 이렇게 하면 다음과 같이 커스텀 패스 C# 템플릿이 포함된 새로운 스크립트가 생성됩니다.
class #SCRIPTNAME# : CustomPass
{
    protected override void Setup(ScriptableRenderContext renderContext, CommandBuffer cmd) {}

    protected override void Execute(CustomPassContext ctx) {}

    protected override void Cleanup() {}
}
C# 커스텀 패스 템플릿에는 다음과 같이 커스텀 패스에 코딩하기 위한 엔트리 포인트가 포함됩니다.
| 엔트리 포인트 | 설명 |
|---|---|
Setup |
이 엔트리 포인트를 사용하여 렌더 텍스처, 머티리얼, 컴퓨트 버퍼와 같은 패스를 렌더링하는 데 필요한 모든 리소스를 할당합니다. |
Execute |
이 엔트리 포인트를 사용하여 커스텀 패스 동안 HDRP가 렌더링하는 사항을 설명합니다. |
Cleanup |
이 엔트리 포인트를 사용하여 Setup 메서드에 할당한 리소스를 지웁니다. 메모리 누수를 방지하기 위해 모든 할당된 리소스를 포함해야 합니다. |
Setup 메서드와 Execute 메서드로 ScriptableRenderContext와 CommandBuffer에 액세스할 수 있습니다. ScriptableRenderContext와 함께 CommandBuffers를 사용하는 데 대한 자세한 내용은 스크립터블 렌더 파이프라인에서 커맨드 예약과 실행을 참조하십시오.
C#으로 전체 화면 커스텀 패스 생성
다음 코드는 씬의 오브젝트에 윤곽선 효과를 적용하는 전체 화면 커스텀 패스를 만드는 방법을 설명합니다.
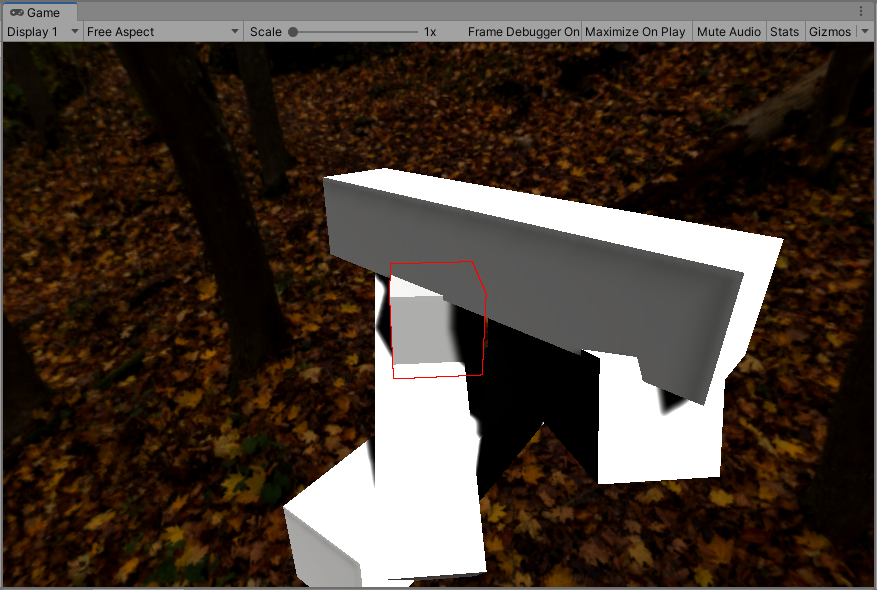
이 효과는 스크립트를 할당할 게임 오브젝트 주위 픽셀을 대체하는 블렌딩 모드와 함께 투명한 전체 화면 패스를 사용합니다.
이 셰이더 코드는 다음 단계를 수행합니다.
outlineBuffer라는 버퍼에 윤곽선 레이어의 오브젝트를 렌더링합니다.outlineBuffer에서 컬러를 샘플링합니다. 컬러가 임계값 미만이면 픽셀이 윤곽선 안에 있을 수도 있다는 의미입니다.- 이 경우가 해당하는지 확인하기 위해 인접 픽셀을 검색합니다.
- Unity가 임계값 위의 픽셀을 찾으면 윤곽선 효과를 적용합니다.
커스텀 패스 스크립트 생성
커스텀 패스 스크립트를 생성하려면 다음 단계를 따르십시오.
- Assets > Create > C# Script를 사용하여 새로운 C# 스크립트를 만듭니다.
- 스크립트에 이름을 지정합니다. 이 예시에서 새로운 스크립트의 이름은 “Outline”입니다.
- 다음의 코드를 입력합니다.
using UnityEngine;
using UnityEngine.Rendering.HighDefinition;
using UnityEngine.Rendering;
using UnityEngine.Experimental.Rendering;

class Outline : CustomPass
{
    public LayerMask    outlineLayer = 0;
    [ColorUsage(false, true)]
    public Color        outlineColor = Color.black;
    public float        threshold = 1;

    // To make sure the shader ends up in the build, we keep a reference to it
    [SerializeField, HideInInspector]
    Shader                  outlineShader;

    Material                fullscreenOutline;
    RTHandle                outlineBuffer;

    protected override void Setup(ScriptableRenderContext renderContext, CommandBuffer cmd)
    {
        outlineShader = Shader.Find("Hidden/Outline");
        fullscreenOutline = CoreUtils.CreateEngineMaterial(outlineShader);

        // Define the outline buffer
        outlineBuffer = RTHandles.Alloc(
            Vector2.one, TextureXR.slices, dimension: TextureXR.dimension,
            colorFormat: GraphicsFormat.B10G11R11_UFloatPack32,
// We don't need alpha for this effect
            useDynamicScale: true, name: "Outline Buffer"
        );
    }

    protected override void Execute(CustomPassContext ctx)
    {
        // Render meshes we want to apply the outline effect to in the outline buffer
        CoreUtils.SetRenderTarget(ctx.cmd, outlineBuffer, ClearFlag.Color);
        CustomPassUtils.DrawRenderers(ctx, outlineLayer);

        // Set up outline effect properties
        ctx.propertyBlock.SetColor("_OutlineColor", outlineColor);
        ctx.propertyBlock.SetTexture("_OutlineBuffer", outlineBuffer);
        ctx.propertyBlock.SetFloat("_Threshold", threshold);

        // Render the outline buffer fullscreen
        CoreUtils.SetRenderTarget(ctx.cmd, ctx.cameraColorBuffer, ClearFlag.None);
        CoreUtils.DrawFullScreen(ctx.cmd, fullscreenOutline, ctx.propertyBlock, shaderPassId: 0);
    }

    protected override void Cleanup()
    {
        CoreUtils.Destroy(fullscreenOutline);
        outlineBuffer.Release();
    }
}
Unity 셰이더 생성
새로운 셰이더를 생성하려면 다음 단계를 따르십시오.
- Assets> Create> Shader를 사용하여 새로운 Unity 셰이더를 만듭니다.
- 새로운 셰이더 소스 파일 이름을 “Outline”으로 지정합니다.
- 다음의 코드를 입력합니다.
Shader "Hidden/Outline"
{
    HLSLINCLUDE

    #pragma vertex Vert

    #pragma target 4.5
    #pragma only_renderers d3d11 playstation xboxone vulkan metal switch

    #include "Packages/com.unity.render-pipelines.high-definition/Runtime/RenderPipeline/RenderPass/CustomPass/CustomPassCommon.hlsl"

    TEXTURE2D_X(_OutlineBuffer);
    float4 _OutlineColor;
    float _Threshold;

    #define v2 1.41421
    #define c45 0.707107
    #define c225 0.9238795
    #define s225 0.3826834

    #define MAXSAMPLES 8
    // Neighbour pixel positions
    static float2 samplingPositions[MAXSAMPLES] =
    {
        float2( 1,  1),
        float2( 0,  1),
        float2(-1,  1),
        float2(-1,  0),
        float2(-1, -1),
        float2( 0, -1),
        float2( 1, -1),
        float2( 1, 0),
    };

    float4 FullScreenPass(Varyings varyings) : SV_Target
    {
        UNITY_SETUP_STEREO_EYE_INDEX_POST_VERTEX(varyings);

        float depth = LoadCameraDepth(varyings.positionCS.xy);
        PositionInputs posInput = GetPositionInput(varyings.positionCS.xy, _ScreenSize.zw, depth, UNITY_MATRIX_I_VP, UNITY_MATRIX_V);
        float4 color = float4(0.0, 0.0, 0.0, 0.0);
        float luminanceThreshold = max(0.000001, _Threshold * 0.01);

        // Load the camera color buffer at the mip 0 if we're not at the before rendering injection point
        if (_CustomPassInjectionPoint != CUSTOMPASSINJECTIONPOINT_BEFORE_RENDERING)
            color = float4(CustomPassSampleCameraColor(posInput.positionNDC.xy, 0), 1);

        // When sampling RTHandle texture, always use _RTHandleScale.xy to scale your UVs first.
        float2 uv = posInput.positionNDC.xy * _RTHandleScale.xy;
        float4 outline = SAMPLE_TEXTURE2D_X_LOD(_OutlineBuffer, s_linear_clamp_sampler, uv, 0);
        outline.a = 0;

      // If this sample is below the threshold
        if (Luminance(outline.rgb) < luminanceThreshold)
        {
            // Search neighbors
            for (int i = 0; i < MAXSAMPLES; i++)
            {
                float2 uvN = uv + _ScreenSize.zw * _RTHandleScale.xy * samplingPositions[i];
                float4 neighbour = SAMPLE_TEXTURE2D_X_LOD(_OutlineBuffer, s_linear_clamp_sampler, uvN, 0);

                if (Luminance(neighbour) > luminanceThreshold)
                {
                    outline.rgb = _OutlineColor.rgb;
                    outline.a = 1;
                    break;
                }
            }
        }

        return outline;
    }

    ENDHLSL

    SubShader
    {
        Pass
        {
            Name "Custom Pass 0"

            ZWrite Off
            ZTest Always
            Blend SrcAlpha OneMinusSrcAlpha
            Cull Off

            HLSLPROGRAM
                #pragma fragment FullScreenPass
            ENDHLSL
        }
    }
    Fallback Off
}
C# 커스텀 패스 효과 사용
생성한 효과를 셰이더에서 활성화하려면 Full-screeen Custom Pass 컴포넌트의 FullScreen Material 프로퍼티에 할당합니다.
코드를 사용하여 Custom Pass Volume 컴포넌트 제어
GetComponent를 사용하여 스크립트에 CustomPassVolume을 검색해서 가져오고 isGlobal, fadeRadius, injectionPoint처럼 UI에서 사용할 수 있는 대부분의 항목에 액세스합니다.
또한 customPasses 리스트를 수정하여 실행한 커스텀 패스 리스트를 동적으로 변경할 수 있습니다.
Custom Pass Volume 컴포넌트 프로퍼티 스크립팅
인스펙터 창에서 커스텀 패스 프로퍼티를 커스터마이즈하려면 CustomPropertyDrawer MonoBehaviour 에디터에 유사한 패턴을 사용할 수 있지만 다른 속성을 갖습니다.
다음의 예시는 전체 화면 커스텀 패스 드로어의 일부입니다.
[CustomPassDrawerAttribute(typeof(FullScreenCustomPass))]
public class FullScreenCustomPassDrawer : CustomPassDrawer
{
    protected override void Initialize(SerializedProperty customPass)
    {
        // Initialize the local SerializedProperty you will use in your pass.
    }

    protected override void DoPassGUI(SerializedProperty customPass, Rect rect)
    {
        // Draw your custom GUI using `EditorGUI` calls. Note that the Layout methods don't work here
    }

    protected override float GetPassHeight(SerializedProperty customPass)
    {
        // Return the vertical height in pixels that you used in the DoPassGUI method above.
        // Can be dynamic.
        return (EditorGUIUtility.singleLineHeight + EditorGUIUtility.standardVerticalSpacing) * X;
    }
}
커스텀 패스 드로어를 만들 때 Unity는 Custom Pass 프로퍼티 기본 리스트를 제공합니다. Unity는 DoPassGUI가 비어있어도 이를 제공합니다. 이러한 프로퍼티는 Unity가 기본적으로 드로우 렌더러 CustomPass Volume 컴포넌트에 제공하는 것과 동일한 프로퍼티입니다.
이러한 설정이 모두 필요하지 않은 경우 commonPassUIFlags 프로퍼티를 오버라이드하여 일부를 제거할 수 있습니다. 다음 예시에서는 이름과 타겟 버퍼 열거형만 있습니다.
protected override PassUIFlag commonPassUIFlags => PassUIFlag.Name | PassUIFlag.TargetColorBuffer;