Attention
Unity has discontinued selling and supporting Deep Compositing effective February 7, 2024.
“Defocus bending” support
With heavily defocused objects, nearby objects can apparently “bend” blurred objects behind them.
Here’s an example of the effect, rendered in Manuka with defocus:
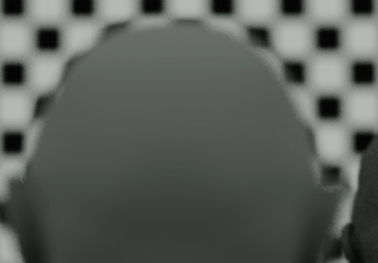
Here is a good explanation of the effect: How does light bend around my finger-tip?
This isn’t a diffraction effect, or the closer object acting as a lens, it’s just the way the nearby object blocks the path of rays from the far object as they travel towards the lens.
A blurred object forms a circle in the image because the entire lens is illuminated by the object. The blurred circle you are seeing is an image of the lens aperture. If something is between the object and the lens, it casts a (partial) shadow on the lens, which means the blurred circle gets partially cut off. If only one side of the circle is cut off, the position of the object will appear shifted, causing the apparent bending. It will also appear sharper, since the cut off circle has a smaller area than the whole circle.
DeepDefocus has a way of mimicking this effect.
To get it to work, you’ll need to defocus the background object (that will appear bent) and the foreground (bending) object in two separate passes. The foreground object both bends and holds out the background.
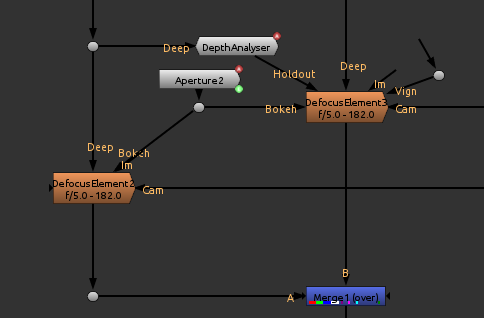
Connect an image with an alpha channel to the holdout input, enable the holdout effect, and set the depth of the holdout with the slider. The holdout input is a little tricky to find, as it appears after the vignette input on the node. You will also need to have the bokeh input connected to something.
In the output image you’ll see a hole appearing where the holdout is, and the rendered background should look bendy. There are a few controls to adjust the effect, and you can also cheat the depth of the holdout to change the look of the effect, or adjust its transparency.
As DeepDefocus draws each input pixels as a circle, it computes the path of the ray through the lens and back to the object, checking to see if the holdout object is in the way. If it is, that part of the circle gets cut off.
Because setting the depth of the holdout manually can be a pain, there’s a little gizmo to help below.
It uses wnkAnalyse-1.4.0 to find the average depth of the holdout element, and a CurveTool to bake that into a curve. Click the re-analyse button to analyse.
You can also use this gizmo to drive the focus point.
set cut_paste_input [stack 0]
version 10.0 v2
push $cut_paste_input
Group {
name DepthAnalyser1
selected true
xpos -501
ypos 582
addUserKnob {20 User}
addUserKnob {41 averageDepth l "average Depth" T
CurveTool1.maxlumapixvalue}
addUserKnob {41 go l re-analyse T CurveTool1.go}
}
Input {
inputs 0
name Deep
xpos 658
ypos 144
}
DeepFreeze {
name DeepFreeze1
xpos 658
ypos 196
}
set Nbe73670 [stack 0]
Output {
name Output1
xpos 658
ypos 248
}
push $Nbe73670
wnkAnalyse {
alphaWeight true
name wnkAnalyse1
xpos 454
ypos 204
}
CurveTool {
ROI {546 258 1639 775}
autocropdata {546 258 1639 775}
name CurveTool1
xpos 454
ypos 261
}
end_group