用 C# 编写你的自定义通道脚本
可以在自定义通道 API 中扩展 CustomPass 类以创建复杂效果,例如具有多个缓冲区或使用计算着色器的自定义通道。
使用自定义通道 C# 模板中的指令来创建自己的 C# 自定义通道时,该通道会自动显示在 Custom Pass Volume 组件中的可用自定义通道列表中。
自定义通道 C# 模板
要创建新的自定义通道,请选择 Assets > Create > Rendering > C# Custom Pass。这将创建包含自定义通道 C# 模板的新脚本:
class #SCRIPTNAME# : CustomPass
{
    protected override void Setup(ScriptableRenderContext renderContext, CommandBuffer cmd) {}

    protected override void Execute(CustomPassContext ctx) {}

    protected override void Cleanup() {}
}
C# 自定义通道模板包含用于对自定义通道进行编码的以下入口点:
| 入口点 | 描述 |
|---|---|
Setup |
用于分配渲染通道所需的所有资源(例如,渲染纹理、材质、计算缓冲区等)。 |
Execute |
用于描述在自定义通道期间 HDRP 渲染的内容。 |
Cleanup |
用于清除在 Setup 方法中分配的资源。请确保包含每个分配的资源以避免内存泄漏。 |
Setup 和 Execute 方法允许访问 ScriptableRenderContext 和 CommandBuffer。有关如何将 CommandBuffers 与 ScriptableRenderContext 配合使用的信息,请参阅在可编程渲染管线中调度和执行命令。
用 C# 创建全屏自定义通道
以下代码演示了如何创建一个全屏自定义通道,从而将轮廓效果应用于场景中的对象。
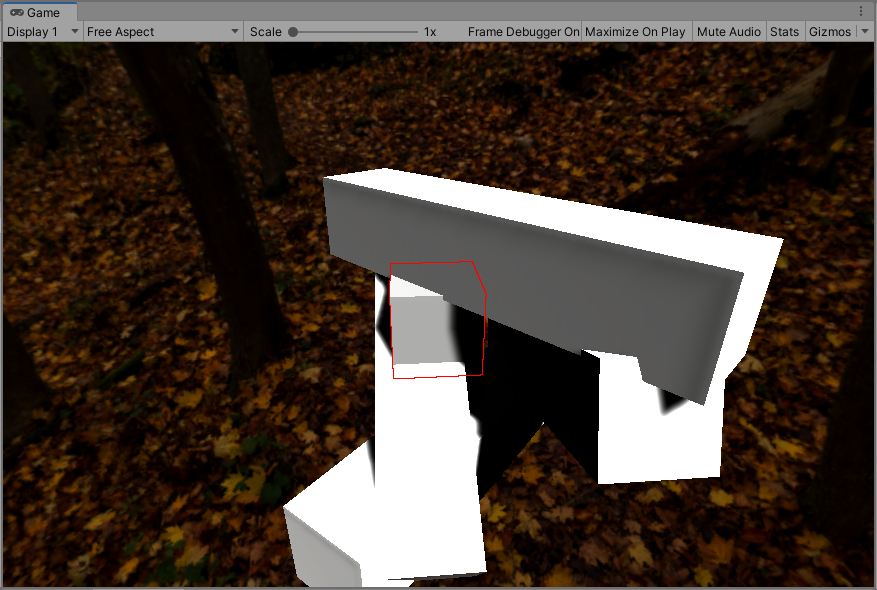
此效果使用带有混合模式的透明全屏通道。该模式将替换脚本所分配到的游戏对象周围的像素。
此着色器代码执行以下步骤:
- 将轮廓层中的对象渲染到一个名为
outlineBuffer的缓冲区中。 - 在
outlineBuffer中对颜色采样。如果颜色低于阈值,则表示像素可能在轮廓中。 - 搜索相邻像素以检查是否属于此情况。
- 如果 Unity 发现一个高于阈值的像素,则会应用轮廓效果。
创建 CustomPass 脚本
要创建 CustomPass 脚本,请执行以下操作:
- 使用 Assets > Create > C# Script 创建新的 C# 脚本。
- 为脚本命名。在本示例中,新脚本名为“Outline”。
- 输入以下代码:
using UnityEngine;
using UnityEngine.Rendering.HighDefinition;
using UnityEngine.Rendering;
using UnityEngine.Experimental.Rendering;

class Outline : CustomPass
{
    public LayerMask    outlineLayer = 0;
    [ColorUsage(false, true)]
    public Color        outlineColor = Color.black;
    public float        threshold = 1;

    // 为了确保着色器最终出现在构建中,我们保留对着色器的引用
    [SerializeField, HideInInspector]
    Shader                  outlineShader;

    Material                fullscreenOutline;
    RTHandle                outlineBuffer;

    protected override void Setup(ScriptableRenderContext renderContext, CommandBuffer cmd)
    {
        outlineShader = Shader.Find("Hidden/Outline");
        fullscreenOutline = CoreUtils.CreateEngineMaterial(outlineShader);

        // 定义轮廓缓冲区
        outlineBuffer = RTHandles.Alloc(
            Vector2.one, TextureXR.slices, dimension: TextureXR.dimension,
            colorFormat: GraphicsFormat.B10G11R11_UFloatPack32,
// 此效果无需 Alpha
            useDynamicScale: true, name: "Outline Buffer"
        );
    }

    protected override void Execute(CustomPassContext ctx)
    {
        // 渲染所需网格,从而在轮廓缓冲区中应用轮廓效果
        CoreUtils.SetRenderTarget(ctx.cmd, outlineBuffer, ClearFlag.Color);
        CustomPassUtils.DrawRenderers(ctx, outlineLayer);

        // 设置轮廓效果属性
        ctx.propertyBlock.SetColor("_OutlineColor", outlineColor);
        ctx.propertyBlock.SetTexture("_OutlineBuffer", outlineBuffer);
        ctx.propertyBlock.SetFloat("_Threshold", threshold);

        // 全屏渲染轮廓缓冲区
        CoreUtils.SetRenderTarget(ctx.cmd, ctx.cameraColorBuffer, ClearFlag.None);
        CoreUtils.DrawFullScreen(ctx.cmd, fullscreenOutline, ctx.propertyBlock, shaderPassId: 0);
    }

    protected override void Cleanup()
    {
        CoreUtils.Destroy(fullscreenOutline);
        outlineBuffer.Release();
    }
}
创建 Unity 着色器
要创建新的着色器,请执行以下操作:
- 使用 Assets > Create> Shader 创建新的 Unity 着色器
- 将新的着色器源文件命名为“Outline”
- 输入以下代码:
Shader "Hidden/Outline"
{
    HLSLINCLUDE

    #pragma vertex Vert

    #pragma target 4.5
    #pragma only_renderers d3d11 playstation xboxone vulkan metal switch

    #include "Packages/com.unity.render-pipelines.high-definition/Runtime/RenderPipeline/RenderPass/CustomPass/CustomPassCommon.hlsl"

    TEXTURE2D_X(_OutlineBuffer);
    float4 _OutlineColor;
    float _Threshold;

    #define v2 1.41421
    #define c45 0.707107
    #define c225 0.9238795
    #define s225 0.3826834

    #define MAXSAMPLES 8
    // 邻近像素位置
    static float2 samplingPositions[MAXSAMPLES] =
    {
        float2( 1,  1),
        float2( 0,  1),
        float2(-1,  1),
        float2(-1,  0),
        float2(-1, -1),
        float2( 0, -1),
        float2( 1, -1),
        float2( 1, 0),
    };

    float4 FullScreenPass(Varyings varyings) : SV_Target
    {
        UNITY_SETUP_STEREO_EYE_INDEX_POST_VERTEX(varyings);

        float depth = LoadCameraDepth(varyings.positionCS.xy);
        PositionInputs posInput = GetPositionInput(varyings.positionCS.xy, _ScreenSize.zw, depth, UNITY_MATRIX_I_VP, UNITY_MATRIX_V);
        float4 color = float4(0.0, 0.0, 0.0, 0.0);
        float luminanceThreshold = max(0.000001, _Threshold * 0.01);

        // 如果我们未在渲染注入点之前,则将摄像机颜色缓冲区加载到 Mip 0
        if (_CustomPassInjectionPoint != CUSTOMPASSINJECTIONPOINT_BEFORE_RENDERING)
            color = float4(CustomPassSampleCameraColor(posInput.positionNDC.xy, 0), 1);

        // 采样 RTHandle 纹理时,请始终先使用_RTHandleScale.xy 来缩放 UV。
        float2 uv = posInput.positionNDC.xy * _RTHandleScale.xy;
        float4 outline = SAMPLE_TEXTURE2D_X_LOD(_OutlineBuffer, s_linear_clamp_sampler, uv, 0);
        outline.a = 0;

      // 如果该样本低于阈值
        if (Luminance(outline.rgb) < luminanceThreshold)
        {
            // Search neighbors
            for (int i = 0; i < MAXSAMPLES; i++)
            {
                float2 uvN = uv + _ScreenSize.zw * _RTHandleScale.xy * samplingPositions[i];
                float4 neighbour = SAMPLE_TEXTURE2D_X_LOD(_OutlineBuffer, s_linear_clamp_sampler, uvN, 0);

                if (Luminance(neighbour) > luminanceThreshold)
                {
                    outline.rgb = _OutlineColor.rgb;
                    outline.a = 1;
                    break;
                }
            }
        }

        return outline;
    }

    ENDHLSL

    SubShader
    {
        Pass
        {
            Name "Custom Pass 0"

            ZWrite Off
            ZTest Always
            Blend SrcAlpha OneMinusSrcAlpha
            Cull Off

            HLSLPROGRAM
                #pragma fragment FullScreenPass
            ENDHLSL
        }
    }
    Fallback Off
}
使用 C# 自定义通道效果
要启用在着色器中创建的效果,请将其分配给 Full-screeen Custom Pass 组件的 FullScreen Material 属性。
使用代码来控制 Custom Pass Volume 组件
可以使用 GetComponent 在脚本中获取 CustomPassVolume,并可访问通过 UI 提供的大部分内容,例如 isGlobal、fadeRadius 和 injectionPoint。
也可以通过修改 customPasses 列表来动态更改执行的自定义通道的列表。
编写 Custom Pass Volume 组件属性的脚本
要在 Inspector 窗口中对自定义通道的属性进行自定义,可以使用与 CustomPropertyDrawer MonoBehaviour 编辑器相似(但具有不同属性)的模式。
以下示例是全屏自定义通道绘制器的一部分:
[CustomPassDrawerAttribute(typeof(FullScreenCustomPass))]
public class FullScreenCustomPassDrawer : CustomPassDrawer
{
    protected override void Initialize(SerializedProperty customPass)
    {
        // 初始化将在通道中使用的本地 SerializedProperty。
    }

    protected override void DoPassGUI(SerializedProperty customPass, Rect rect)
    {
        // 使用 `EditorGUI` 调用来绘制自定义 GUI。请注意,Layout 方法在此处无效
    }

    protected override float GetPassHeight(SerializedProperty customPass)
    {
        // 返回在以上的 DoPassGUI 方法中使用的垂直高度(以像素为单位)。
        // 可以是动态的。
        return (EditorGUIUtility.singleLineHeight + EditorGUIUtility.standardVerticalSpacing) * X;
    }
}
创建自定义通道绘制器时,Unity 将提供默认的自定义通道属性列表。DoPassGUI 为空时,Unity 仍会这样做。这些属性与 Unity 在绘制渲染器 CustomPass Volume 组件中默认提供的属性相同。
如果这些设置中有一些是不需要的设置,可以覆盖 commonPassUIFlags 属性以移除其中的一些设置。以下示例只保留名称和目标缓冲区枚举:
protected override PassUIFlag commonPassUIFlags => PassUIFlag.Name | PassUIFlag.TargetColorBuffer;