Warning
Warning: Unity Simulation is deprecated as of December 2023, and is no longer available.
Using Prebuilt Cameras
The prebuilt camera sensors we provide are all of simulated ZED Camera models. The following are instructions on how to get started with using them:
Prerequisites
The following prerequisites must be fulfilled before being able to use the ZED camera sensors in your project:
- A Windows or Linux machine
- An installation of ZED SDK
- The ZED Camera sensor code uses version 4.0.9 of the ZED SDK, which can be found here
- An installation of CUDA. If CUDA is not installed, then you will be prompted to during the installation of the ZED SDK.
- A Unity project with the Simulation Sensors package installed.
Steps to Set Up
Sending Camera Output to ZED SDK
To use the ZED Camera sensors, follow these steps:
Import the ZED Camera sample into your project
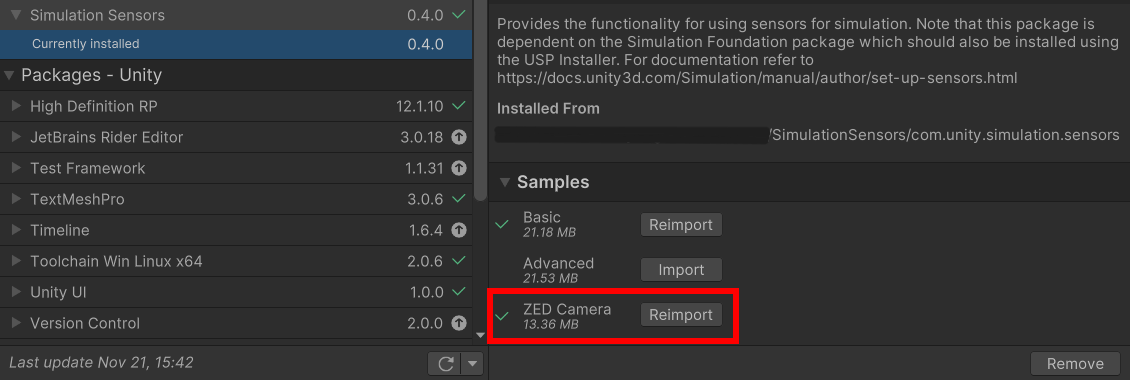
- In the Editor, navigate to Window > Package Manager > Simulation Sensors > Samples > ZED Camera
After importing the sample to your project, you should be able to use the ZED Camera prefabs
- As the ZED Camera code has the XR Plugin Management package as a dependency, you will need to install that package if importing the sample causes a compiler error
- The XR Plugin Management package (com.unity.xr.management) can be found in the Unity registry section of the package manager
- As the ZED Camera code has the XR Plugin Management package as a dependency, you will need to install that package if importing the sample causes a compiler error
Add a ZED Camera sensor prefab to your Unity scene:
- Navigate to Window > Simulation > Sensors
- Once the sensors window opens, switch to the "Prebuilt Sensors" tab and click on the ZED Camera model of your choice to import it into the scene
- As the sensor uses dual Unity cameras to capture data, the position and rotation of the object in the scene matters. Place the sensor like you would place a standalone Unity camera
- Navigate to Window > Simulation > Sensors
- (Optional) Reconfigure the ZED Camera parameters as needed:
- The ZED prefab you added will have a child object called “ZEDCamera”. Modify the parameters of this object in the inspector. A full list of properties and their functionality is provided in the next section.
- Start the scene. Immediately after starting, any ZED Camera sensor in the scene will start streaming
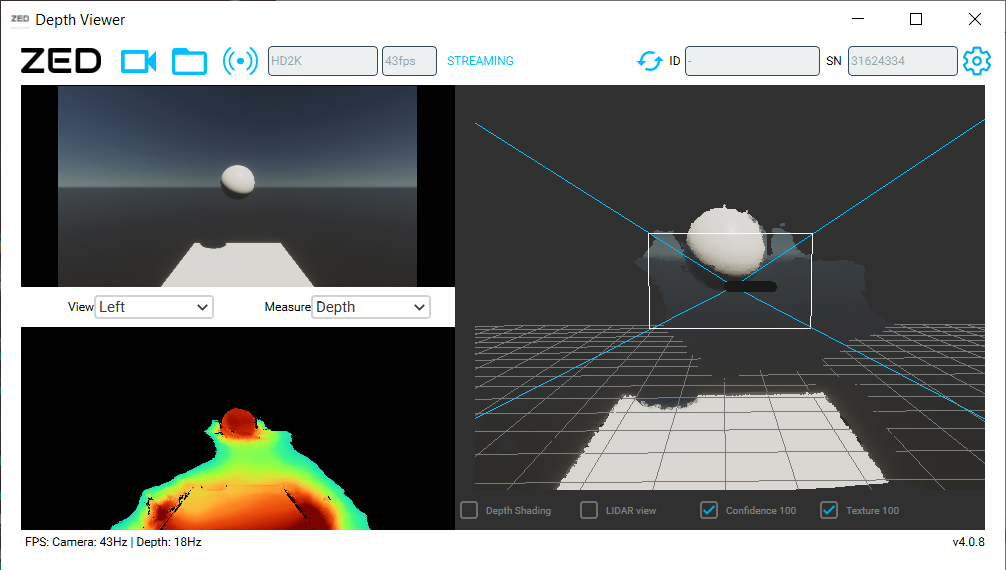
- Open the ZED Depth Viewer app
- In your machine’s file system, this executable can be found at “{path to ZED SDK}/tools”
In the ZED Depth Viewer app, click the button with the “Streaming” tooltip. Once a dialog titled “Open ZED Stream” appears, change the IP address to “127.0.0.1” and the port to the same one as the ZED Camera in the Unity scene

The depth output from the Unity scene will now be visible through the ZED Depth Viewer. In the window, you will see:
- The original RGB view of the scene
- The computed depth map
- A 3D reconstruction of the scene from the ZED Camera’s point of view
Retrieving Depth from ZED SDK
When a given ZED Camera sensor sends images to the ZED SDK, those images will be used to compute a depth map. These depth maps can be retrieved from the ZED SDK. To do this, follow these steps:
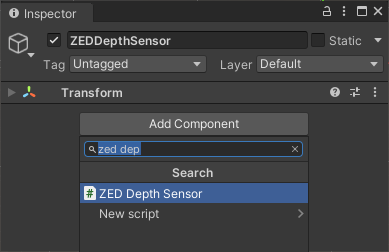
In a Unity scene with at least one ZED Camera sensor, the DefaultVisualizationSuite, and a DummyConnector, create a new game object and add the ZEDDepthSensor component to it:
Alternatively, you can search in the Project window for the "ZEDDepthSensor" prefab and add that to your scene instead of manually creating the object
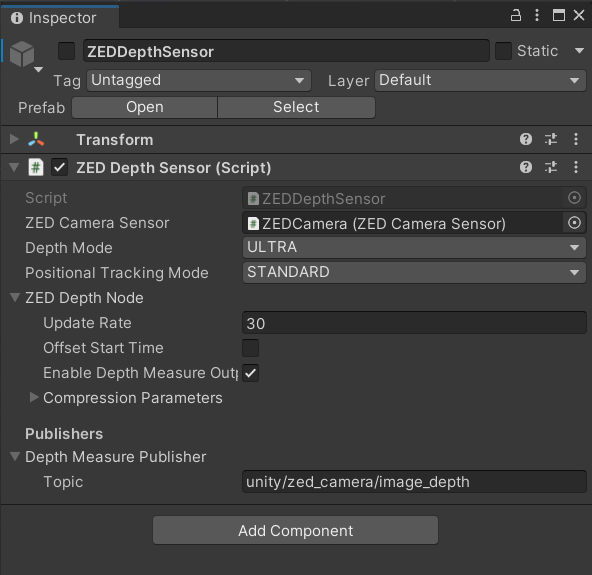
Drag the ZED Camera sensor to be visualized into the
ZED Camera Sensorfield.Set the ZEDDepthSensor component’s
TopicfieldThe topic must be unique
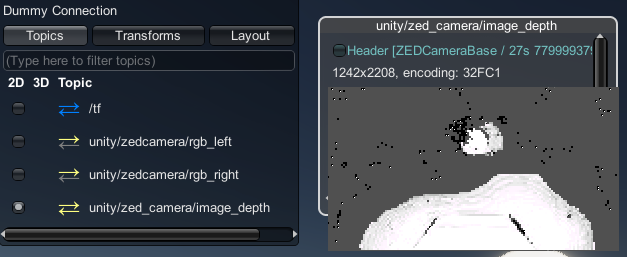
Start the scene, and then click the “Topics” button in the top right corner of the game view
- Toggle the “2D” checkbox corresponding to the topic that you set in step 3 (you may need to wait a few seconds for the topic to appear)
Integrating with ROS
Unity, the ZED SDK and ROS can be connected using a ROS package called the ZED ROS Wrapper.
Your system will need:
We have prepared a Docker image that will have everything needed to get this connection working. The Dockerfile that is used to create that image can be found in the root of the ZED Camera sample in Unity. Note that the instructions have only been tested to work on an Ubuntu machine. If you are running Windows, then you may use WSL running on Ubuntu 22.04.
This Dockerfile can be found at <path to Unity project>/Assets/Samples/Simulation Sensors/<version>/ZED Camera/Docker
The following steps will allow you to get up and running with Unity and ROS:
In your terminal, navigate to the path provided above and build the Docker image using:
docker build -t zed-ros-docker ./Start the Docker container with:
docker run --gpus all -it --privileged --ipc=host --pid=host \ -e NVIDIA_DRIVER_CAPABILITIES=all -e DISPLAY --network host \ -v /dev:/dev -v /tmp/.X11-unix/:/tmp/.X11-unix \ -v ${HOME}/zed_docker_ai/:/usr/local/zed/resources/ zed-ros-docker- Start the ZED Camera sample scene in Unity
Back in the Docker container, start the wrapper using:
ros2 launch zed_wrapper zed_camera.launch.py camera_model:=<ZED Camera model> \
  sim_mode:=true use_sim_time:=true sim_address:=<IP address of device running Unity sim> \
  sim_port:=<port that ZED Camera sensor is streaming data to>
Example Usage
ros2 launch zed_wrapper zed_camera.launch.py camera_model:=zed2i sim_mode:=true use_sim_time:=true sim_address:='127.0.0.1' sim_port:='30000'
NOTE: If you are using WSL, then you can find the IP address of the simulation by opening a new Powershell or Command Prompt tab and running ipconfig. Use the IPv4 address found under “Ethernet adapter Ethernet x”
If you’ve followed all of the above steps correctly, then you should see confirmation in the console that a connection has been made to the ZED Camera running in Unity. If you would like to see a visual representation of the data computed by the ZED SDK in ROS, run the following command to open an instance of rviz which is configured to visualize data from ZED SDK:
ros2 launch zed_display_rviz2 display_zed_cam.launch.py camera_model:=<ZED Camera model> \
  sim_mode:=true use_sim_time:=false sim_address:=<IP address of device running Unity sim> \
  sim_port:=<Port that ZED Camera sensor is streaming to>
Example Usage
ros2 launch zed_display_rviz2 display_zed_cam.launch.py camera_model:=zed2i sim_mode:=true use_sim_time:=false sim_address:='127.0.0.1' sim_port:='30000'
Properties
ZED Camera Sensor
The following is a list of properties and their functions for the ZED Camera Sensor component.
Streaming Parameters
| Property | Function |
|---|---|
| Port | Port number that data will be streamed through. |
ZED Camera Node
| Property | Function | XML Element |
|---|---|---|
| Update Rate | The frequency at which the node will generate data, in Hz. | sensor/update_rate |
| Offset Start Time | Determines if the node should offset its start time by a small, random amount of frames. | sensor/offset_start_time |
| Enable Camera Info Output | Toggle on for camera info messages to be published. Toggle off to prevent. | sensor/camera/camera_info/enable |
| Left Camera | The camera component that will act as the left camera to capture data. | |
| Right Camera | The camera component that will act as the right camera to capture data. | |
| Serial Number | The serial number of the specific ZED Camera model. This will be set on startup, do not edit yourself. | |
| Model | Represents the ZED Camera model to be simulated. Different models will have different settings/visuals and will behave differently. | |
| Resolution | The resolution of the images to be outputted by the camera. | |
| Frame Rate | The frame rate at which images will be sent from the sensor to the ZED SDK. | |
| Render Every Frame | Whether or not the camera will be rendered automatically on each Unity update. Publishing will still happen at the update rate, regardless. | |
| Compression Parameters | Allows JPG or PNG compression to be applied to the camera output. | |
| Camera Noise | Refers to the amount of noise to be applied to the colour of each pixel captured by the cameras. Will be applied on each update. |
IMU Node
| Property | Function |
|---|---|
| Update Rate | The frequency at which the node will generate data, in Hz. |
| Offset Start Time | Determines if the node should offset its start time by a small, random amount of frames. |
| Discard Redundant Data | When enabled, redundant node updates that have the same node data and timestamp will be discarded. This happens if the node's update rate is higher than the physics update rate (controlled by fixed time step). Enabling this option will result in less messages being published, so the actual update rate of the sensor will be only as high as the physics update rate. |
| Noise | Refers to the amount of noise applied to the output of the node. Will be applied on each update. |
Publishers
| Property | Function | XML Element |
|---|---|---|
| Left Image Publisher Topic | The name of the topic on which the left camera RGB image is published. | sensor/left/image_color |
| Right Image Publisher Topic | The name of the topic on which the right camera RGB image is published. | sensor/right/image_color |
| Left Camera Info Publisher Topic | The name of the topic on which the left camera info is published. | sensor/left/camera_info |
| Right Camera Info Publisher Topic | The name of the topic on which the right camera info is published. | sensor/right/camera_info |
ZED Depth Node
The following is a list of properties and their functions for the ZED Depth Sensor component.
| Property | Function |
|---|---|
| ZED Camera Sensor | The depth sensor will display and publish depth images for the ZED Camera Sensor specified in this field. |
| Depth Mode | To be used by the ZED SDK; an additional setting to configure the level of accuracy, range, performance, etc. of the depth computation. See the following for more details. |
| Update Rate | The frequency at which the node will generate data, in Hz. |
| Offset Start Time | Determines if the node should offset its start time by a small, random amount of frames. |
| Enable Depth Output Measure | Toggle on for depth images to be published. Toggle off to prevent. |
| Compression Parameters | Allows JPG or PNG compression to be applied to the depth image output. |
| Topic | The name of the topic on which the depth images are published. |