About the Mock HMD XR Plugin
The Mock HMD XR Plugin enables you to build VR applications without a device.
It provides stereo rendering support by mimicking the display properties of an HTC Vive HMD.
Requirements
This version of Mock HMD is compatible with the following versions of the Unity Editor:
- 2022.3 LTS+
XR plugin systems
Display
Display supports all graphics APIs for basic stereo rendering support.
Input
Input is not supported. It's up to your application to mock input by moving the camera's parent, or providing its own Tracked Pose Driver source.
Getting started
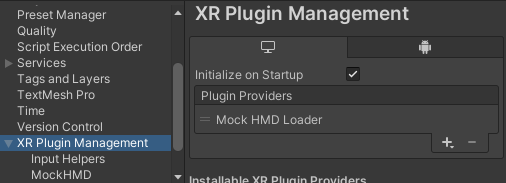
Add the Mock HMD to XR Management.
Enter Play mode. Select the Game view render mode from the drop-down above the Game view.

Game view blit modes
- Left Eye - Just the left eye, cropped to the center of the image.
- Right Eye - Just the right eye, cropped to the center of the image.
- Both Eyes - Both eyes, cropped and displayed side-by-side.
- Occlusion Mesh - Full left and right eyes, shown side-by-side as they would be submitted to the compositor. Uses Vive's occlusion mesh.
Use the API XRSettings.gameViewRenderMode to control the blit mode at runtime for the built-in renderer. Scriptable Render Pipelines control the blit mode themselves.
Stereo render modes
The mock HMD supports the following stereo rendering modes:
- MultiPass - Submit separate draw calls for each eye.
- SinglePassInstanced - Submit one draw call for both eyes.
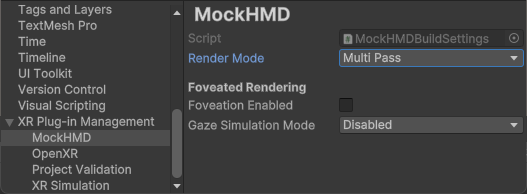
You can set the render mode at build time in the Project Settings window (from Unity's main menu, go to. Edit > Project Settings, then select the XR Plugin Management > MockHMD category from the menu on the left. The setting will take effect in play mode.
You can also set the render mode at runtime using MockHMD.SetRenderMode. Be sure to reference the Unity.XR.MockHMD asmdef + namespace.
Foveated Rendering
To learn about foveated rendering in XR, review the Foveated Rendering page in the Unity manual.
Note
Foveated rendering is only available for MockHMD using DirectX 12 and Vulkan.
Set runtime foveated rendering level
To enable foveated rendering, you must first set the foveated rendering level at runtime. To understand how to do this, follow the instructions in Control foveated rendering.
Enable foveated rendering
To enable a simulation of foveation on Mock HMD:
- Open the Mock HMD section of the XR Plug-in Management settings (menu: Edit > Project Settings > XR Plug-in Management).
- Enable the Foveation Enabled checkbox.
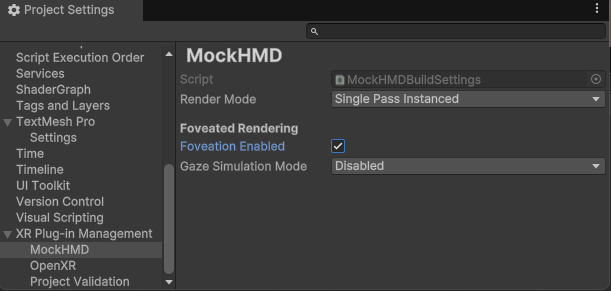
Foveation Enabled in the Mock HMD settings.
Gaze Simulation Mode
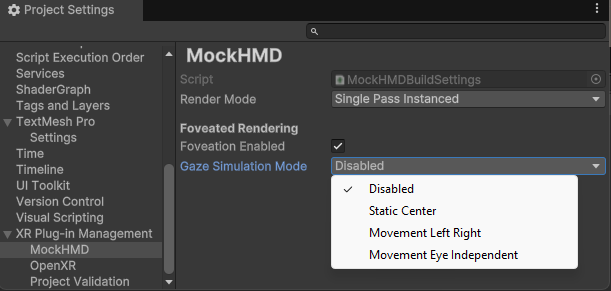
Gaze Simulation Mode dropdown in the Mock HMD settings.
The mock HMD supports several ways to simulate eye motion in the simulator:
- Disabled and Static Center - Foveation will appear in the center of each eye.
- Movement Left Right - Foveation will move from left to right, in each eye.
- Movement Eye Independent - Foveation will be independent between each eye.
You will notice a lower-resolution 'edge' in the rendered image that delineates the edge of the foveated area. For example, with Static Center you will observe the following:

Foveation Example in the active GameView.
You can also begin to see the effects of foveation along the bottom of the rendered image.
You can see the effect more dramatically if you choose Movement Left Right.