Configure project settings
Configure your Unity project to support Android XR devices and enable immersive experiences.
Once you have installed Android XR, use the Project Settings window to enable Android XR features and configure interaction profiles. This ensures your application runs correctly on Android XR headsets and provides users with proper controller input, eye tracking, and AR capabilities.
Configuring these settings is essential for developers building XR applications that target Android devices, whether you're creating immersive games, productivity tools, or mixed reality experiences.
Prerequisites
You must have the Android module installed in the version of the Unity Editor you're using. Refer to Add modules for more information.
Set up Android XR build platform and build profile
In Unity 6.1 and newer, use the Android XR build platform and build profile to configure your Android XR project. This ensures your project builds correctly for Android XR devices and applies the appropriate XR-specific settings.
Note
Before you can set up your Android XR build profile, you need to install the Android module for your current Unity Editor version if you haven't done so already. To do so, you can either select your current Editor install in the Unity Hub then select Manage > Add Modules or go to File > Build Profiles > Android XR in the Unity Editor and select Install with Unity Hub.
With the Android module installed, follow these steps to set up an Android XR build profile:
- In the Unity Editor, go to File > Build Profiles.
- Select Add Build Profile and Android XR as the platform.
- For Android XR in the Platform Browser dialog, select Add Build Profile.
- Adding a new build profile doesn't automatically enable it, so select the Android XR build profile from the list, then select Switch Platform.
After you set up and select the Android XR build profile to enable it, you can build for Android XR devices with optimized settings.
Note
To learn more about the Android XR build platform and build profile, refer to Develop for Android XR workflow in the Unity User Manual.
Enable Unity OpenXR: Android XR
To enable Unity OpenXR: Android XR in your project, follow these steps:
- Go to Edit > Project Settings > XR Plug-in Management. If you don't already have it installed, click Install XR Plug-in Management.
- In the Android tab, under Plug-in Providers, enable OpenXR.
- While still in the Project Settings window, go to XR Plug-in Management > OpenXR.
- Under OpenXR Feature Groups, enable the Android XR feature group.
- When you enable the Android XR feature group, Unity automatically enables some features. To enable only the features relevant to your project, click on the Android XR feature group, and select the relevant features.
After you enable the Android XR feature group, you can access XR features like AR sessions and spatial interactions in your project.
Important
You must enable the Android XR: Session feature for AR features in your project to work correctly.
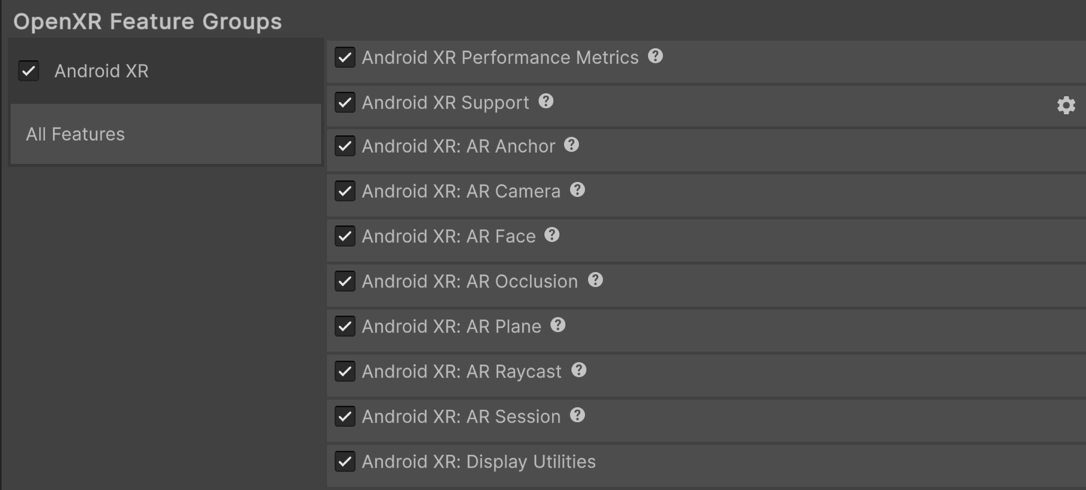
The Android XR OpenXR feature group, shown with all features enabled.
Note
XR Plug-in Management supports only one enabled plug-in provider at a time per build target. If your project also targets ARCore using the Google ARCore XR Plug-in, to avoid errors disable the Google ARCore plug-in provider in the Android tab of Project Settings > XR Plug-in Management before you build an APK for Android XR devices. Likewise, disable OpenXR before you build for ARCore.
Add interaction profiles
For Android XR projects using controller input, add the Oculus Touch Controller Profile. If you're using Eye tracking and foveated rendering features in your project, add the Eye Gaze Interaction profile.
To add the Oculus Touch Controller Profile and the Eye Gaze Interaction profile:
- Go to Edit > Project Settings > XR Plug-in Management.
- In the Android tab, under Plug-in Providers, enable OpenXR.
- While still in the Project Settings window, go to XR Plug-in Management > OpenXR.
- In the Android tab, under Enabled Interaction Profiles, add Oculus Touch Controller Profile and Eye Gaze Interaction profile.
After you add the interaction profiles, your Android XR project can support Oculus Touch controllers and eye gaze interactions. This enables users to interact with your application using hand controllers and eye tracking.
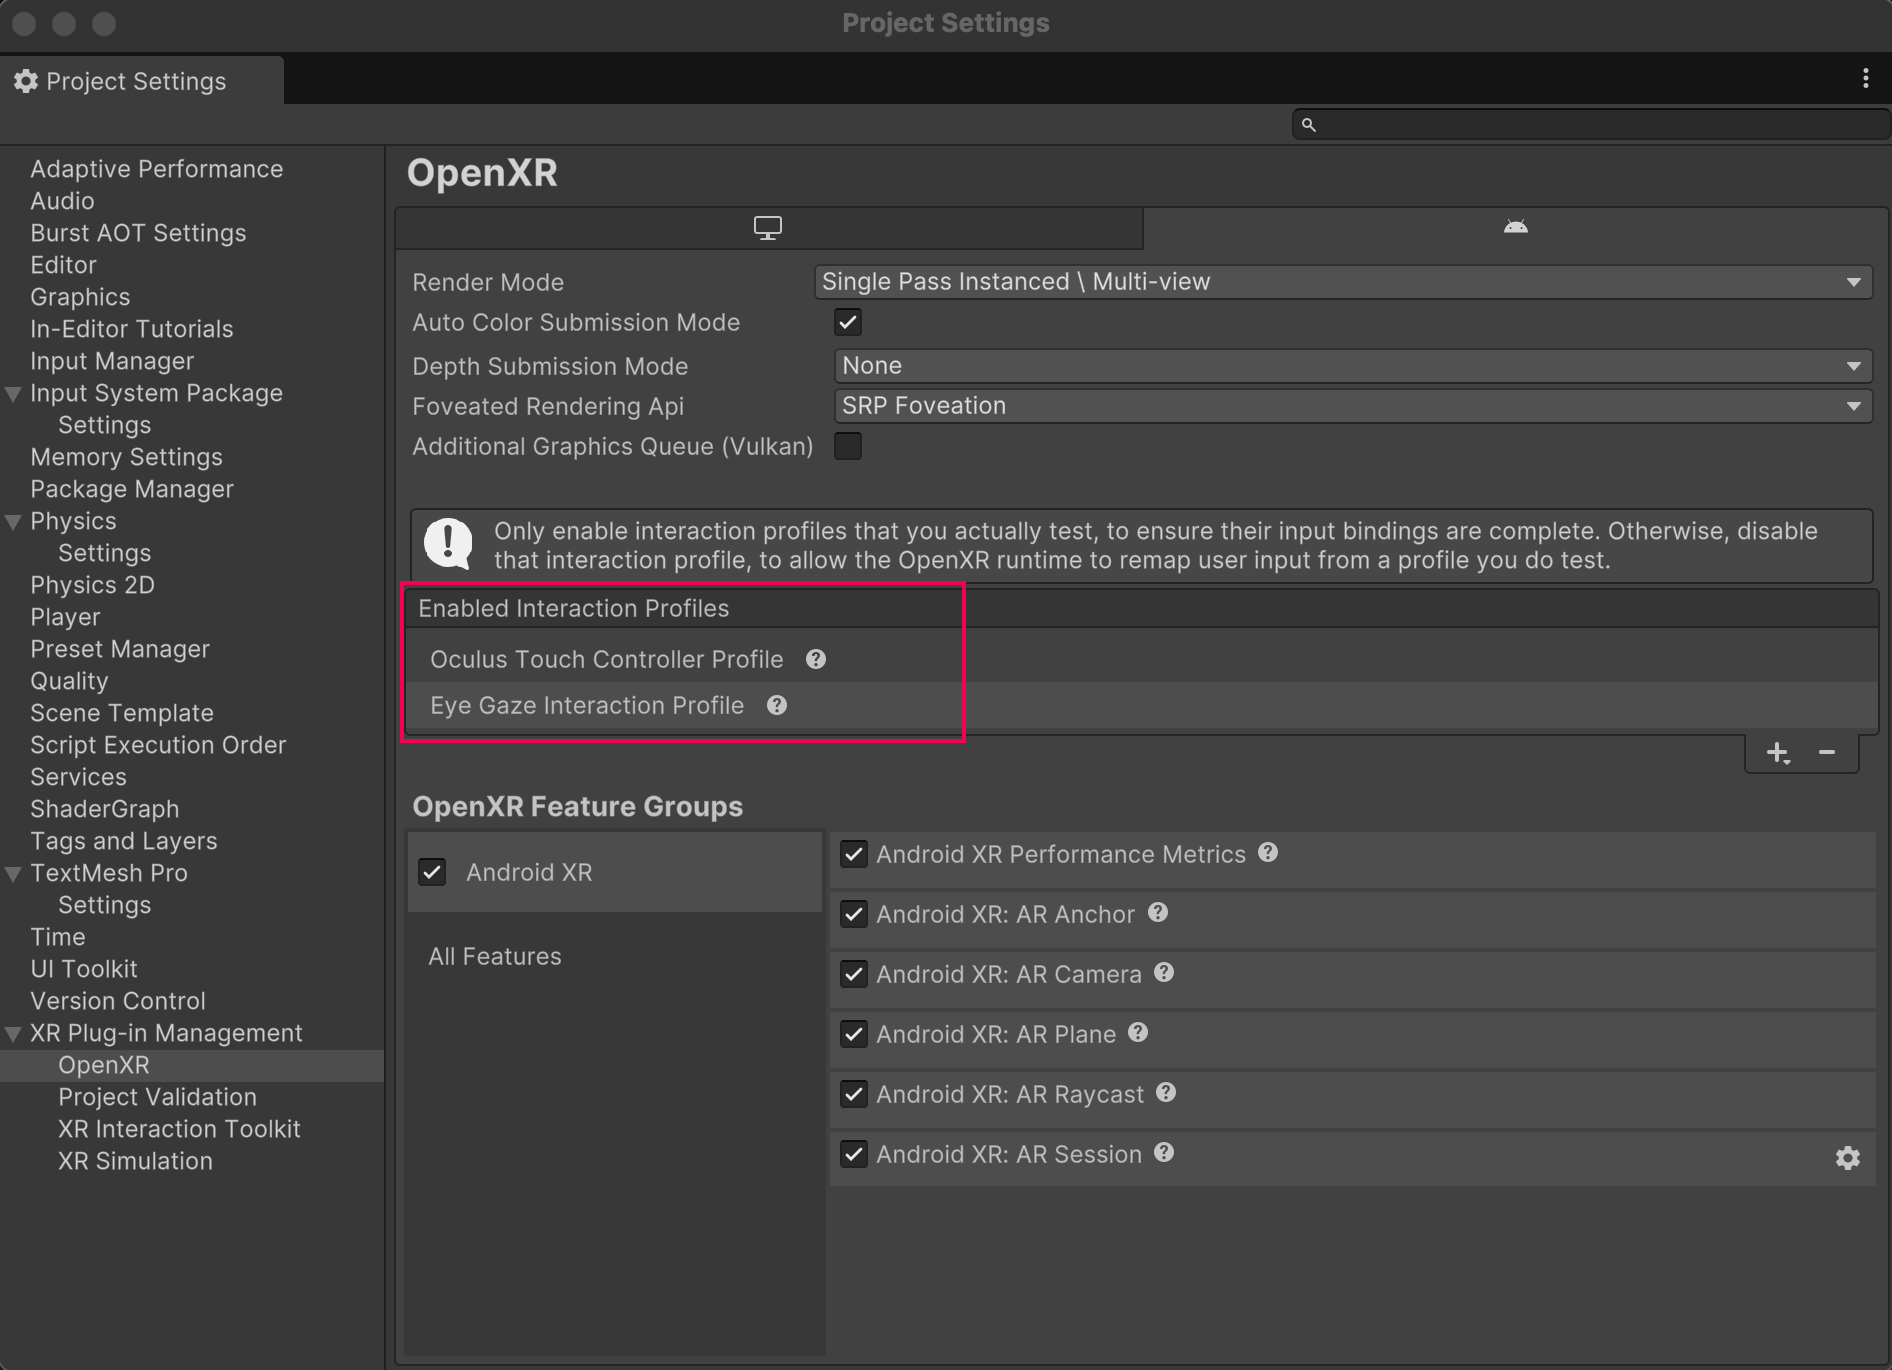
Enabled profiles include the Oculus Touch Controller Profile and the Eye Gaze Interaction Profile.
Configure additional settings
Once you have added interaction profiles, configure the following settings for Android XR.
Tip
Access Android Player Settings in Unity by selecting Edit > Project Settings > Player > Android tab > expand Resolution and Presentation.
Enable run without focus
By default, Unity disables Run Without Focus when you create a project from scratch. When Unity disables it, the application pauses but remains visible.
Enable Run Without Focus in the Android > Resolution and Presentation > Resolution section of Android Player settings to keep your application running when it's not in focus but is visible. For example, on devices supporting split-screen mode.
After you enable Run Without Focus, your application continues running in the background when not in focus, preventing issues with XR tracking and input systems.
Important
Ensure you enable this setting if your project uses the Input System Tracked Pose Driver component. Without Run Without Focus enabled, you can encounter headlock issues in your project.
Enable resizeable activity for dialog windows
Most Android XR apps require the activity window to be resizable so the device can render pop-ups, such as system permission requests.
To make sure the device renders dialog windows correctly, enable Resizeable Activity in the Android > Resolution and Presentation > Resolution section of the Android Player settings.
After you enable Resizeable Activity, your application can display system dialog windows and permission requests on Android XR devices.
Note
Earlier versions of Unity named this setting Resizable Window.
Set application entry point
Android XR requires you to Set the Application Entry Point for your project to GameActivity.
You can set the Application Entry Point in the Android Player settings.
After you set the Application Entry Point to GameActivity, your Android XR application uses the correct entry point for optimal performance and compatibility with XR devices.
Tip
To learn more about Game Activity, refer to The GameActivity application entry point.
Additional resources
- Set up your scene for Android XR
- Develop for Android XR workflow
- Learn about Android Player settings