Timeline Integration
Sample
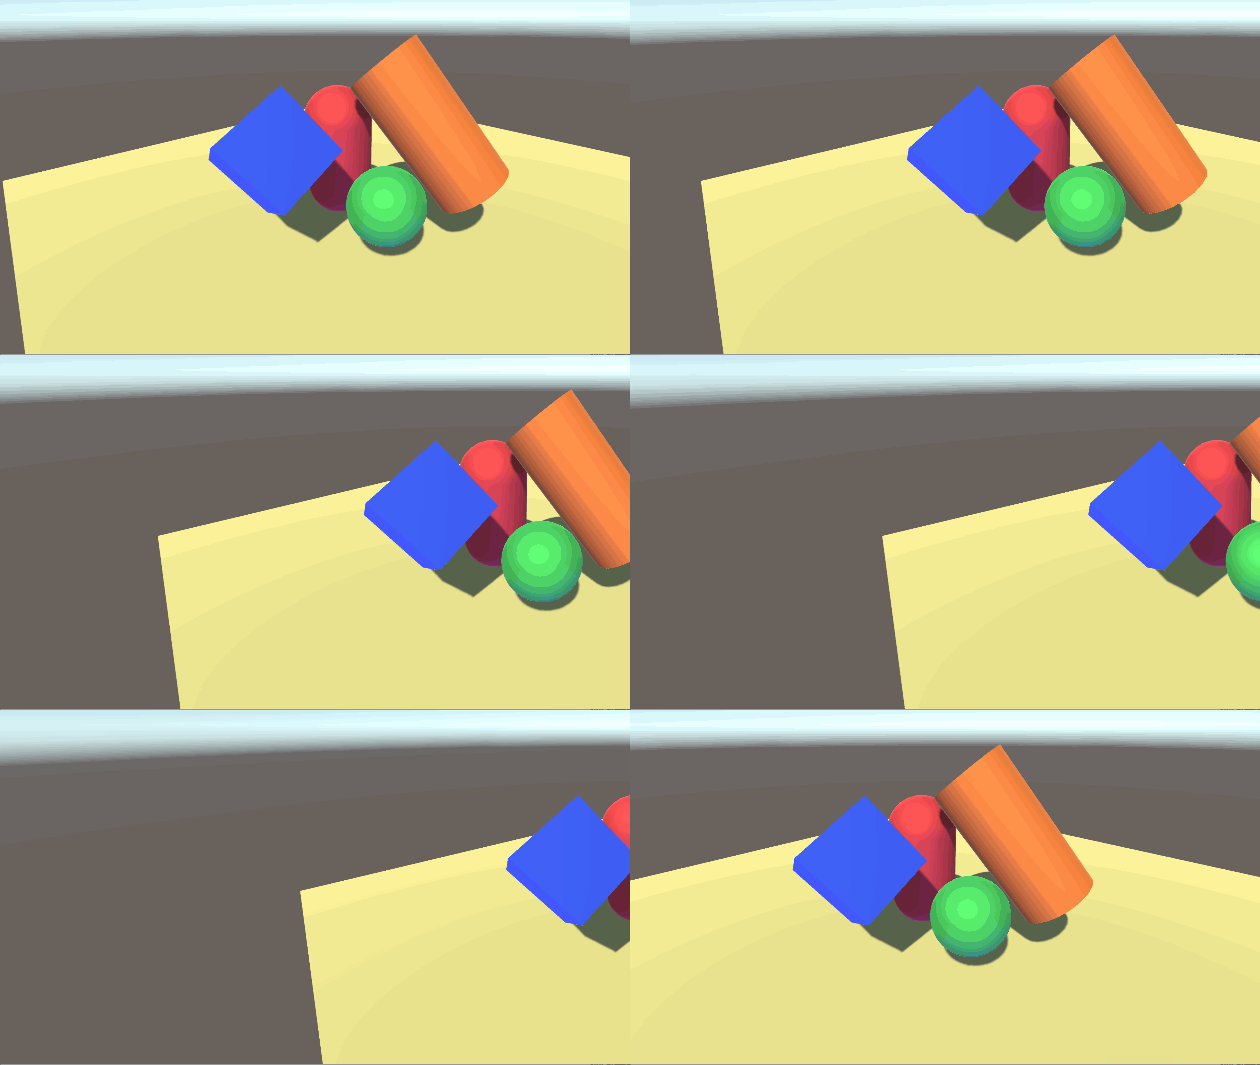
To demonstrate integration with
Timeline,
we will create a compositor graph asset that will pan an image horizontally using a Transform node.
The steps are as follows:
Set the size of the Render node to 3840x1080.
Then, right click the Transform node, and choose "Expose as Component".
This allows Timeline to use this node.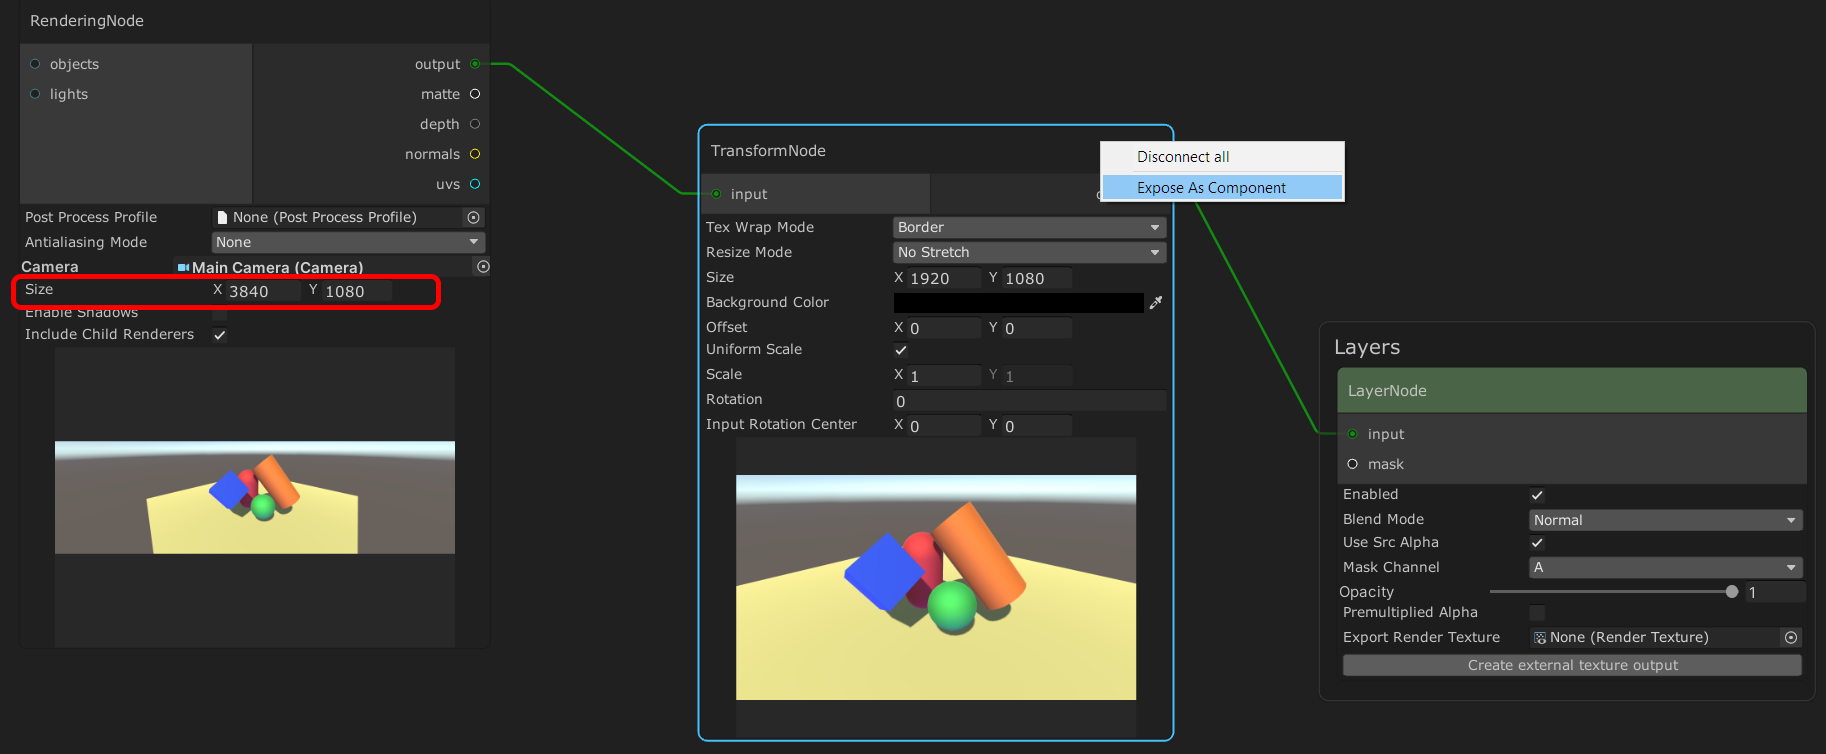
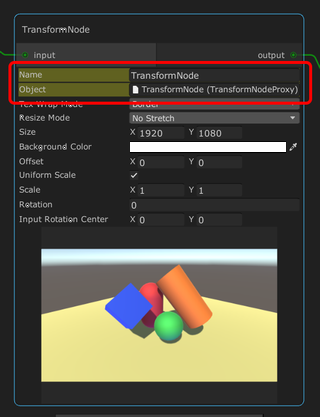
When a compositor node is exposed, two new fields become visible.
- Name: the unique name for the node.
- Object: the internal object for dragging and dropping into a timeline track.
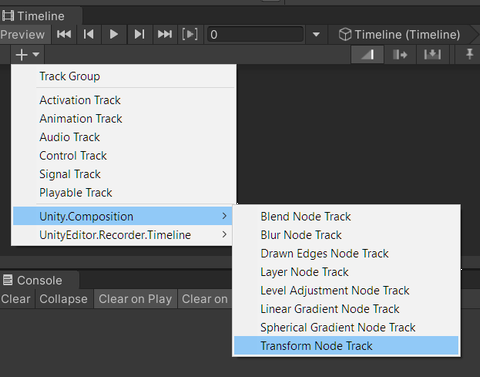
Create a new timeline track. In this case, we choose the Transform Node Track.
Drag the internal object from the Transform node (see step 2) into the slot on the timeline track.
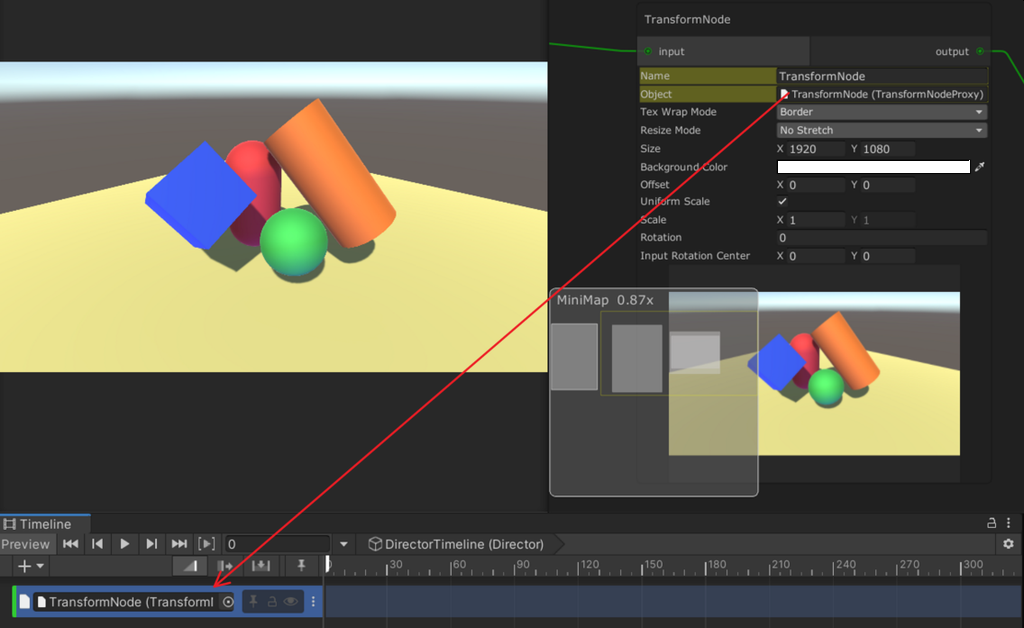
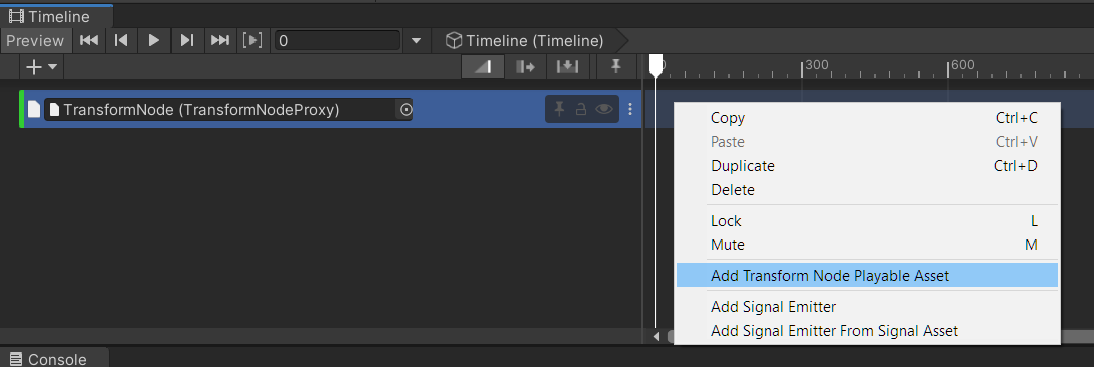
Right click in the timeline track and choose "Add Transform Node Playable Asset".
Click the curves button in the timeline track.
This will show the properties that can be used to animate Transform node values.
Do the following:
- Select the offset.x property
- Right click the end key of the curve of the property, and click "Edit Key".
- Set it to 512 (pixels).

Enter Play mode or scrub the Timeline to see the image pan horizontally.
Caveat
After executing "Expose as Component", all the values of the node are driven by timeline, so any changes that we make to the node in the VisualCompositor window will not affect anything.