docs.unity3d.com
    Show / Hide Table of Contents

    タイムラインとの統合

    • サンプル
    • 注意

    サンプル

    TimelineIntegration

    タイムラインとの統合をデモするために、 Transform ノードで、画像を水平方向にパンするコンポジターグラフアセットを作成します。
    ステップは下記となります:

    1. Render ノードの size を3840x1080に設定します。
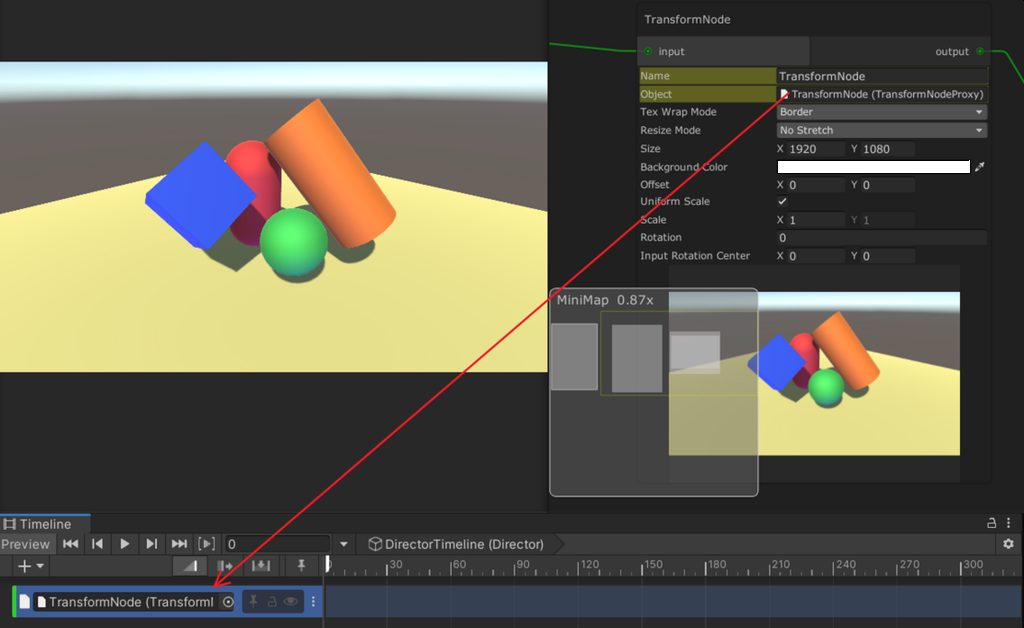
      次に、Transform ノードを右クリックし、"Expose as Component" を選択します。
      これにより、タイムラインでこのノードを使用できるようになります。

      TimelineExpose

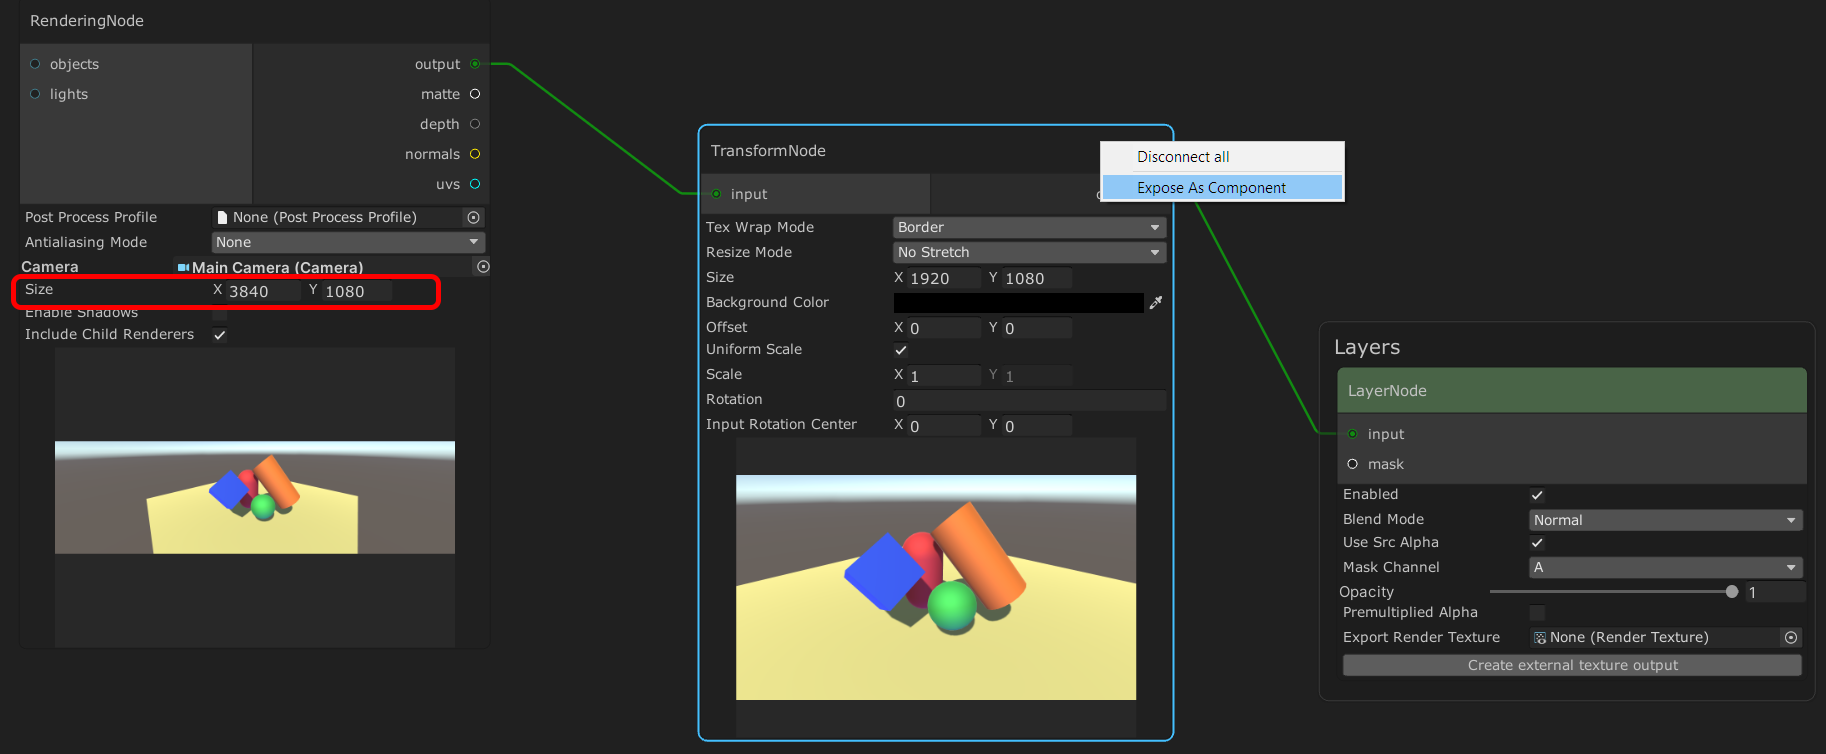
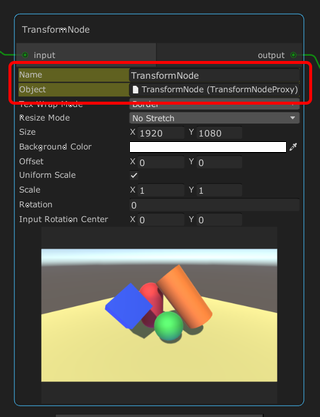
    2. コンポジターノードが expose されると、2つの新しいフィールドが表示されます。

      1. Name: ノードのユニークの名前。
      2. Object: タイムライントラックにドラッグアンドドロップするための内部オブジェクト。

      TimelineTransformNode

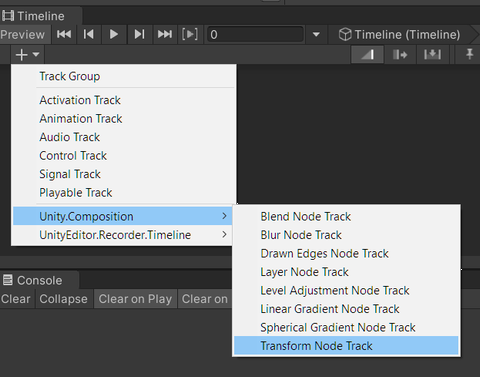
    3. 新しいタイムライントラックを作成します。 この場合、Transform Node Track を選択します。

      TimelineTransformTrack

    4. Transform ノードの内部オブジェクト(ステップ 2 を参照)をタイムライントラックのスロットにドラッグします。

      TimelineSlot

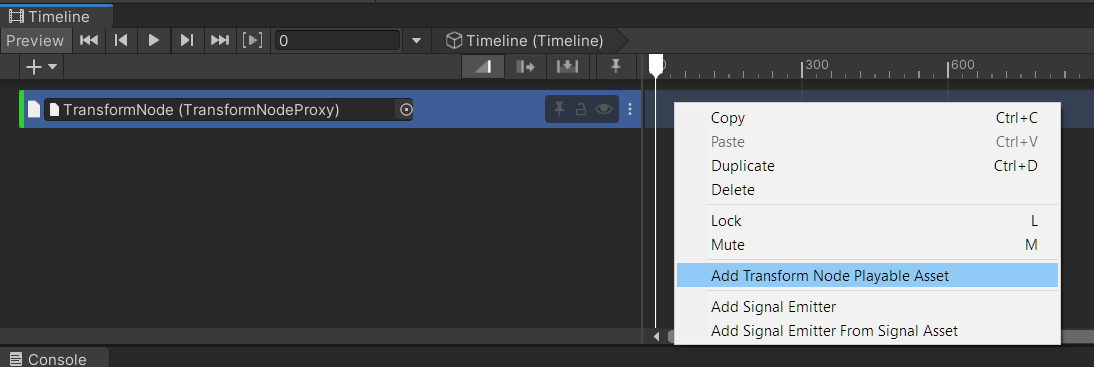
    5. タイムライントラックを右クリックして、"Add Transform Node Playable Asset" を選択します。

      TimelineAddPlayableAsset

    6. タイムライントラックのカーブボタンをクリックします。 これにより、Transform ノードの値をアニメートする為に使用できるプロパティが表示されます。

      TimelineCurve

    7. 次の操作を行います:

      1. offset.x プロパティを選択します。
      2. プロパティのカーブの終了キーを右クリックし、"Edit Key" をクリックします。
      3. 512(ピクセル)に設定します。

      TimelineCurveEdit

    8. 再生モードに入るか、タイムラインをスクラブして、画像が水平方向にパンするのを確認します。

    注意

    "Expose as Component" を実行した後、ノードのすべての値はタイムラインによって操作されるため、 Visual Compositor ウィンドウでノードに加えた変更は何にも影響しません。

    Back to top
    Copyright © 2023 Unity Technologies — Terms of use
    • Legal
    • Privacy Policy
    • Cookies
    • Do Not Sell or Share My Personal Information
    • Your Privacy Choices (Cookie Settings)
    "Unity", Unity logos, and other Unity trademarks are trademarks or registered trademarks of Unity Technologies or its affiliates in the U.S. and elsewhere (more info here). Other names or brands are trademarks of their respective owners.
    Generated by DocFX on 18 October 2023