Building and Testing
The simplest and quickest way to build your project is to click the Play button in the Editor. Unity will build your project and open it in your default web browser. You can then play-test in the browser on your local development computer.
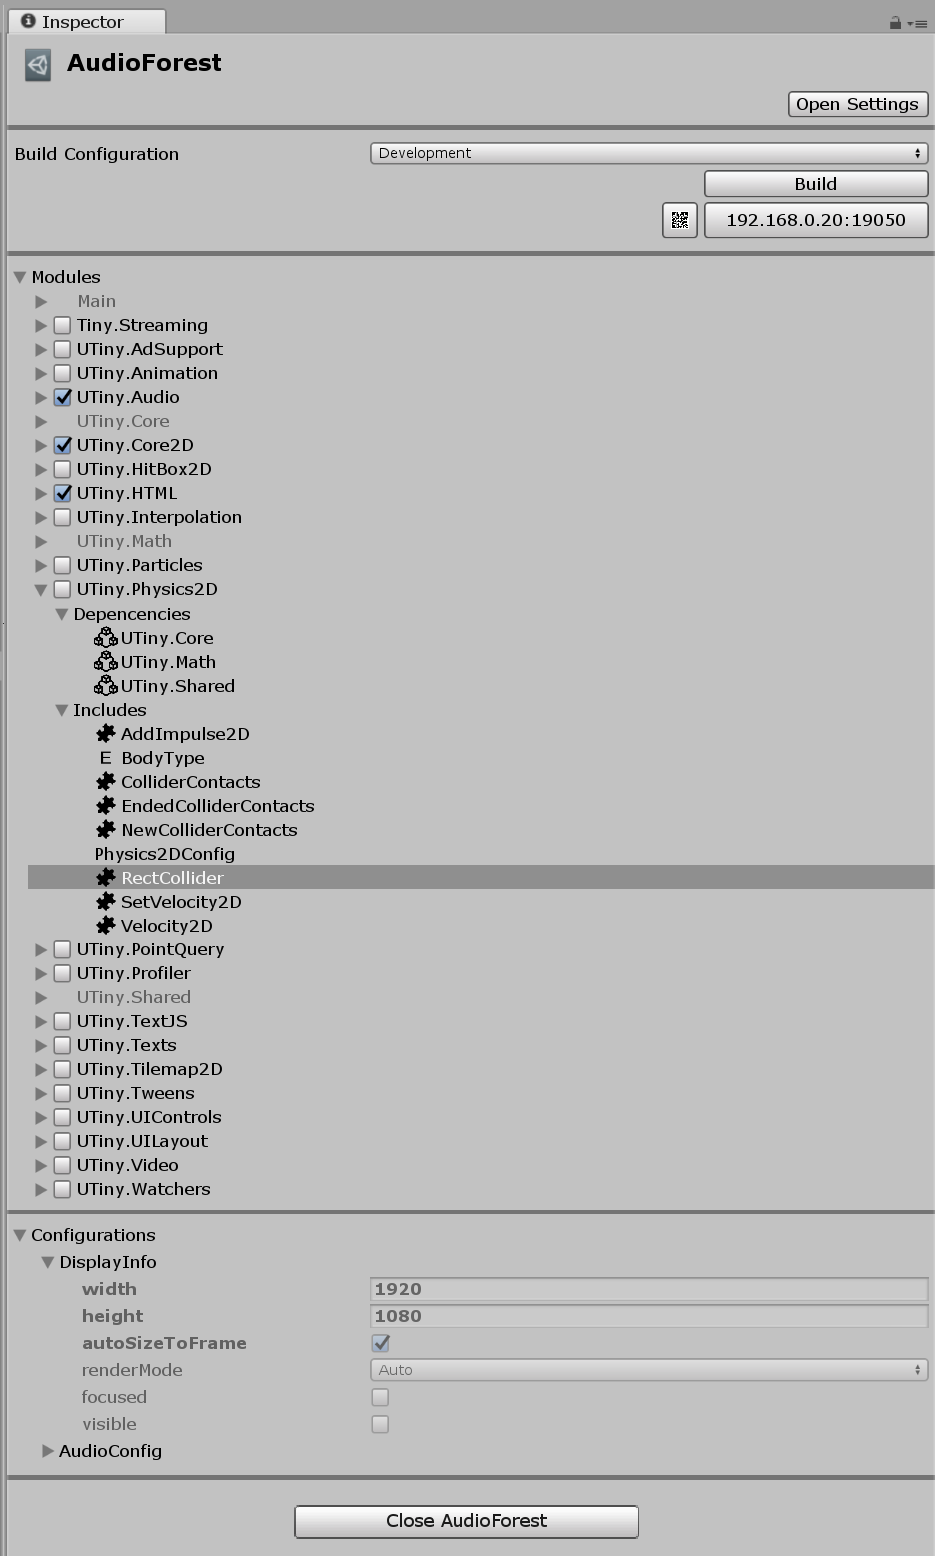
For more control over your build, and to test it on mobile devices, you can use the Build Configuration section of the Tiny Mode Project inspector.
To find this, click on your Tiny Mode project asset in the project window. The inspector window then displays settings for your project.
Note: If you select a Tiny Mode project asset that is not currently open, the inspector is empty except for an open button which allows you to open that project.

At the top is the Build Configuration section.
The dropdown menu allows you to select whether your build runs in Debug mode, Development mode, or Release mode.
There is also a Build button which builds the project according to the current configuration. This is the same as clicking the Play Button.
The local host IP address and port number are not shown until you build your project for the first time.
Once you have built your project, it is hosted on a local server on your computer. The local host IP address and port number are shown on a button underneath the build button. You can use a mobile device on your local network to connect to this address and run the app for testing purposes.
Clicking on local host button re-opens the project in your default browser. You can enter the local host IP address and port number in a browser on a mobile device on your local network to test it on that device.
To make testing easier, you can click the small QR code button to the left of the local host button. This displays a QR code which you can scan with a mobile device (such as your phone) to automatically open the local host IP address and port number on that device. This is a shortcut which saves you from having to manually type out the IP address and port number.