VR Template Quick Start Guide
Unity’s VR Project Template provides a starting point for virtual reality development in Unity. The template configures project settings, pre-installs the right packages, and includes various pre-configured Example Assets to demonstrate how to set up a project that is ready for VR. Please refer to the XR Project Setup documentation for additional information.
The VR Template uses the following Unity features:
- XR Interaction Toolkit - A high-level, component-based, interaction system for creating XR experiences. It provides a framework that makes 3D and UI interactions available from Unity input events.
- OpenXR - A scalable package that enables cross-platform support for multiple hardware environments.
Unity directly supports the following Virtual Reality platforms:
Important
Known Issue: If your project is using OpenXR version 1.16.0-pre.1, 1.16.0-pre.2 or 1.16.0 with Meta Quest devices, the controllers will appear upside-down. To work around this issue, it is recommended to update to 1.16.1 or roll back to version 1.15.1 of the OpenXR package in Package Manager.
Using the Sample Scene
The VR Template contains a Scene named SampleScene located in Assets/Scenes. This scene’s Hierarchy is pre-configured with GameObjects that allow your application to manage controller and head tracking, locomotion, and interaction with spatial UI and virtual objects.
You can use this scene as a reference, or you can remove the example Assets from it and use it as a starting point for your own Project.
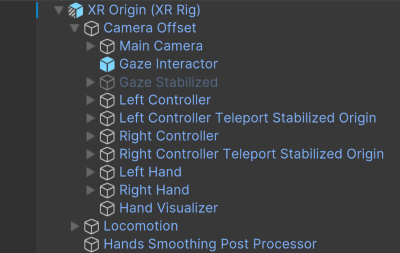
Sample Scene Hierarchy Overview

XR Origin
The XR Origin is currently configured to support both hands and controllers. There is a controllers only XR Origin variant named Complete XR Origin Set Up Variant which can be found at Assets/VRTemplateAssets/Prefabs/Setup.
Interactables
There are various objects within the scene that the user is able to interact with. In XRI, they are called interactables. The grab interactable allows a user to pick up a GameObject using either a direct or ray interactor. Grab interactables need a Rigidbody and a Collider to define the interactable area.
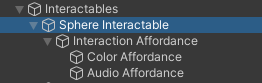
In addition, the Affordance system provides feedback for the user with visual and auditory cues. This requires the use of the XR Interactable Affordance State Provider with a specified interactable source. For the interactables included in the Sample scene, there is an Audio Affordance Receiver and a Color Affordance Receiver already set up.
Color Affordance Receiver Example
The color affordance receiver applies colors from the affordance theme datum to material property block color property. This allows you to define different color to apply for different interaction states.

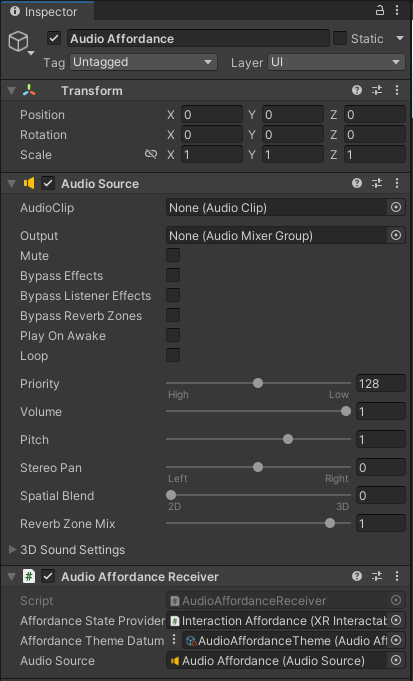
Audio Affordance Receiver Example
The audio affordance receiver plays audio clips stored in the audio affordance theme datum. It requires an audio source. This allows you to define different audio clips to be played for different interaction states.
These Affordance Receivers are driven by Affordance System Themes found in Assets > VR Template Assets > Themes.
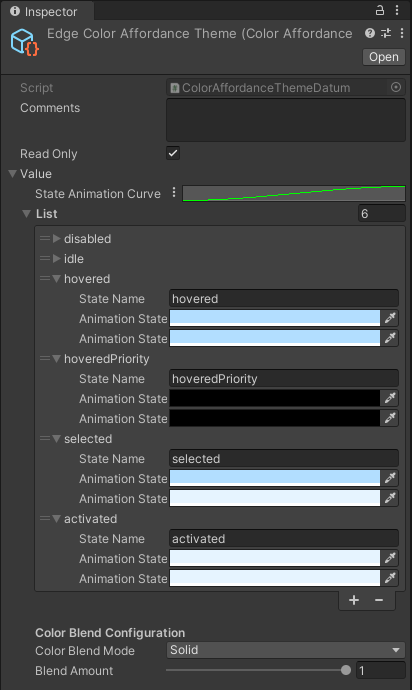
Edge Color Affordance Theme Example
This theme is used to define colors to apply to materials based on the interaction state. The animation curve is used to lerp the color between animation states.
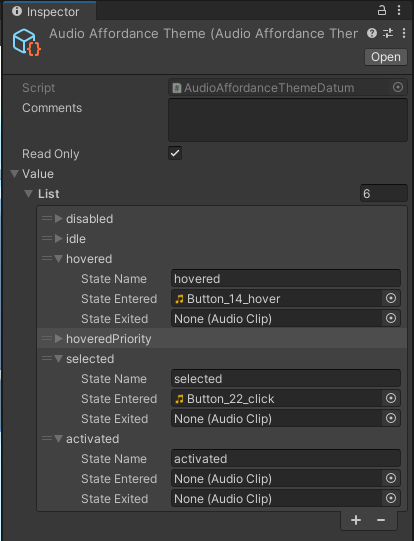
Audio Affordance Theme Example
This theme is used to define the audio clips to play based on interaction state. You can configure different clips for state entered or state exited.
Teleportation
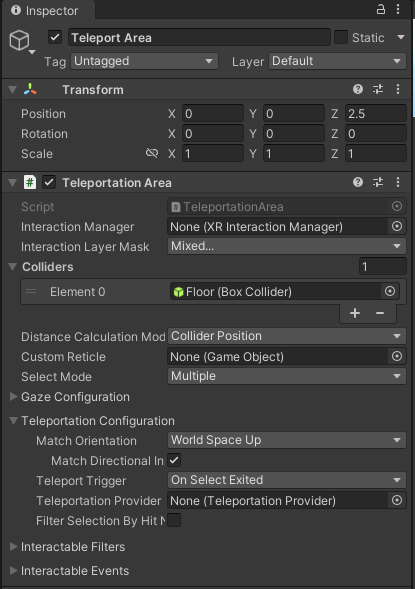
Teleportation allows users to move within the Sample Scene without experiencing the discomfort common while walking in VR. Teleportation Areas designate specific surfaces for the user to move. The teleportation area is configured with specific colliders from the scene.
Teleportation Area
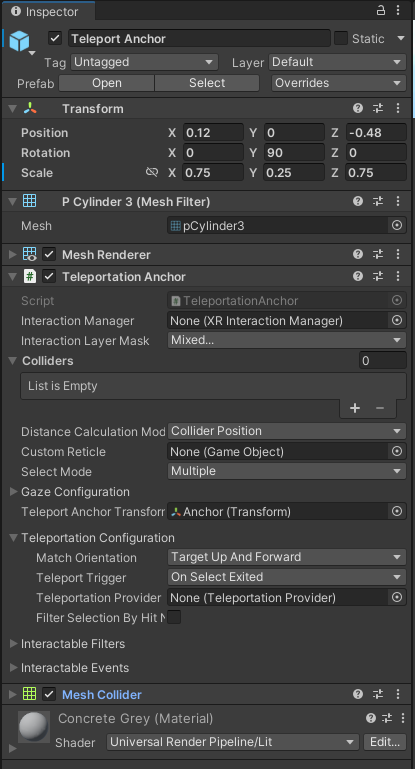
Teleport Anchors, on the other hand, constrain the user’s view in terms of position and rotation while teleporting. One is already set up for you in the scene.
Teleportation Anchor
Spatial UI
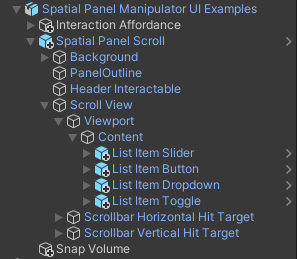
The Sample Scene contains various world space UI examples which allows both near and far interactions with UI elements such as sliders, dropdown menus, toggles, and buttons. In addition, users have the ability to move the canvas in space with the Spatial UI Panel prefab, which affords the ability to grab the canvas by either the header or handle at the bottom of the canvas. Bill-boarding with the Turn To Face component is on the prefab by default, with the positional transformation of the canvas being determined by the direct/ray interactor.
Spatial UI Example
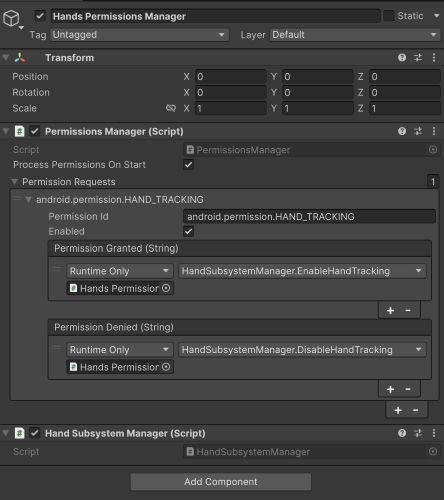
Permissions Manager
The Hands Permissions Manager should have the android.permission.HAND_TRACKING permission request enabled and configured to call HandsManagerSubsystem.EnableHandTracking when permissions are granted.
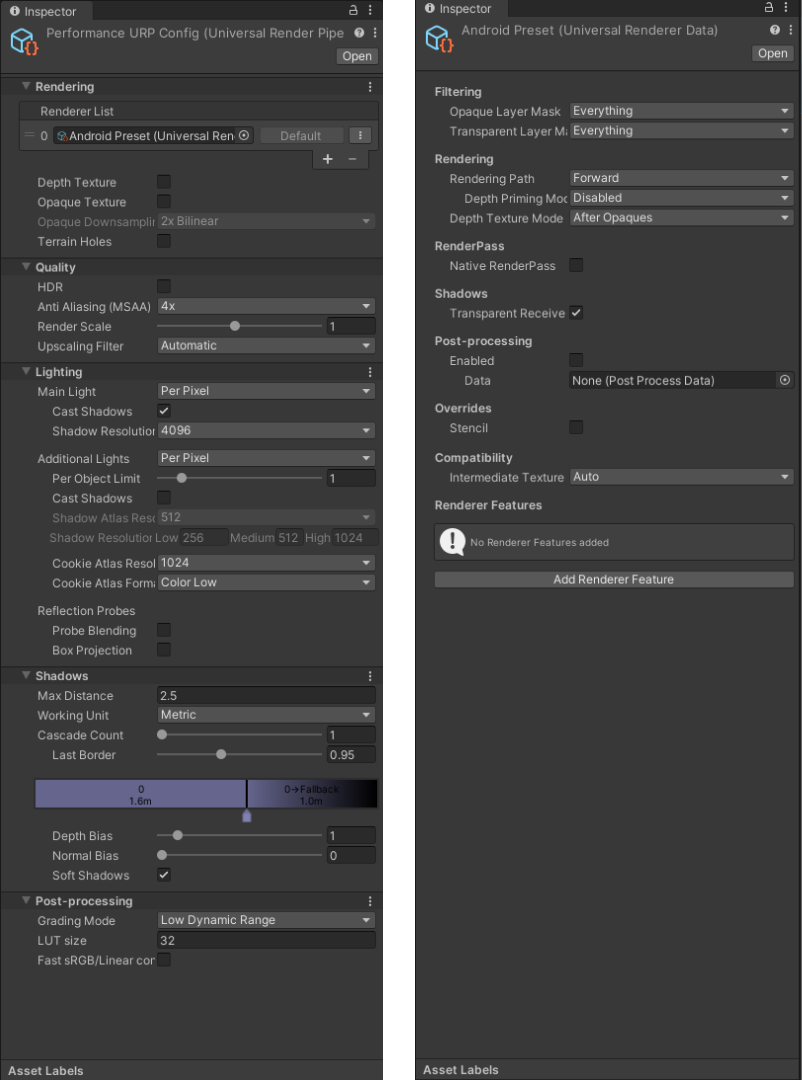
Project Configuration
Various presets are used to accommodate graphics & rendering requirements for different platforms. By selecting the target platform in the Build Settings, i.e. Windows, Mac, Linux or Android, different URP Config Settings are automatically updated for the user. The presets can be found in Assets/Settings/Project Configuration.
For Android, the Android Preset and Performance URP Config assets provide a good baseline of graphics settings for low powered headsets such as the Quest.
Additional information can be found in the URP documentation.
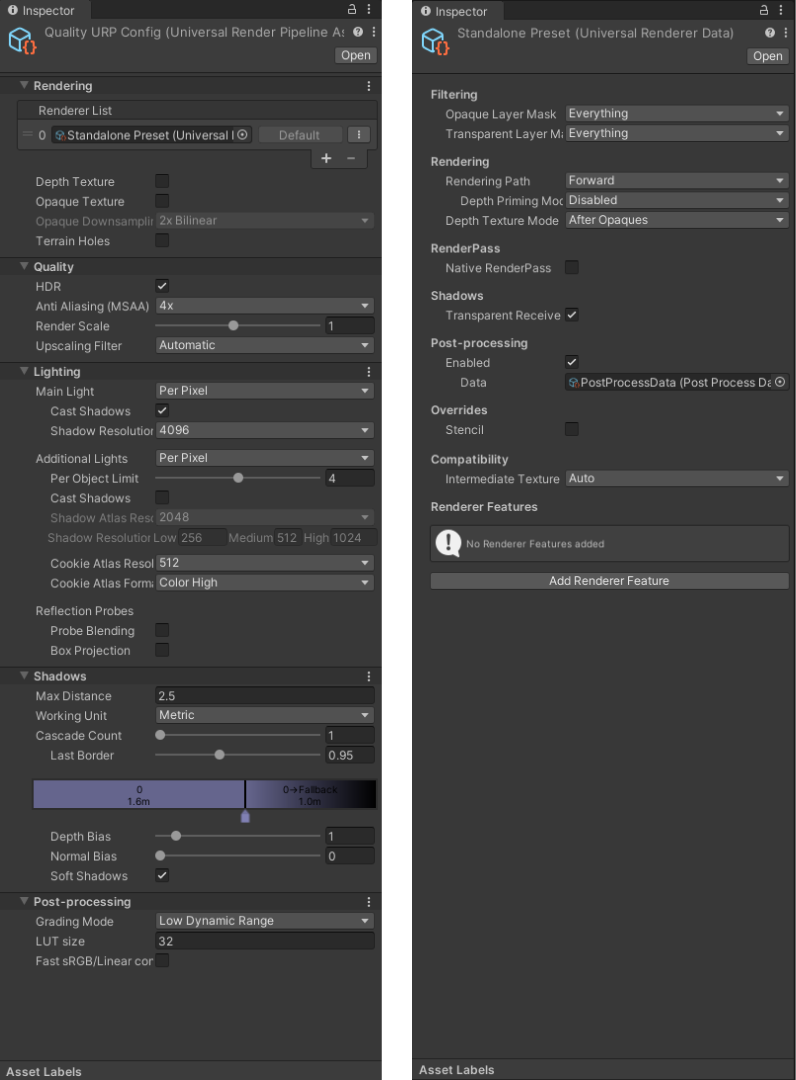
For standalone PC VR, the Standalone Preset and Quality URP Config assets allow for a higher quality experience.
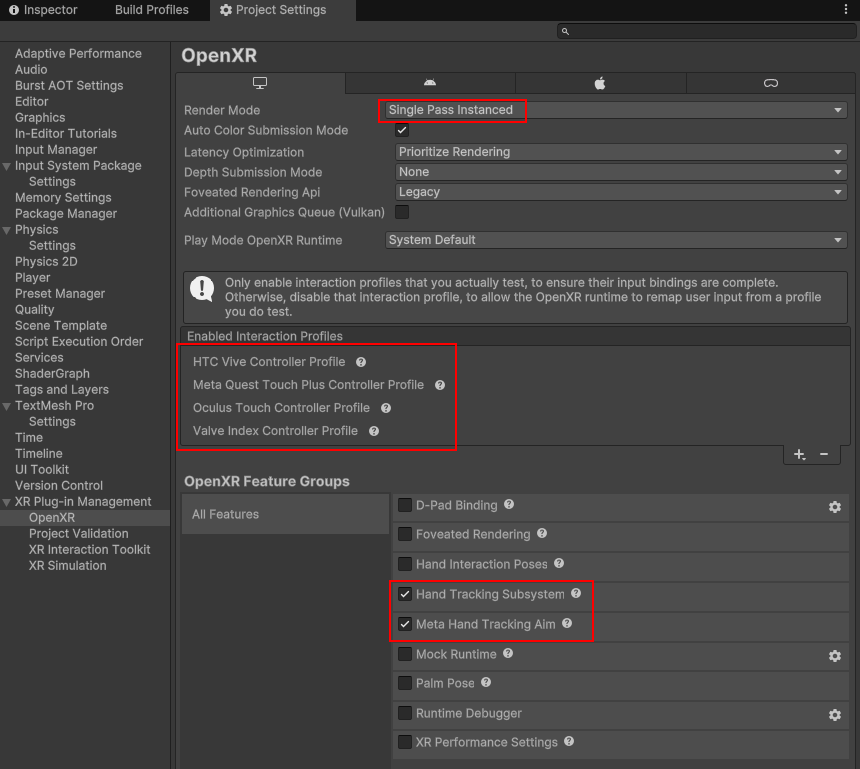
Meta Quest
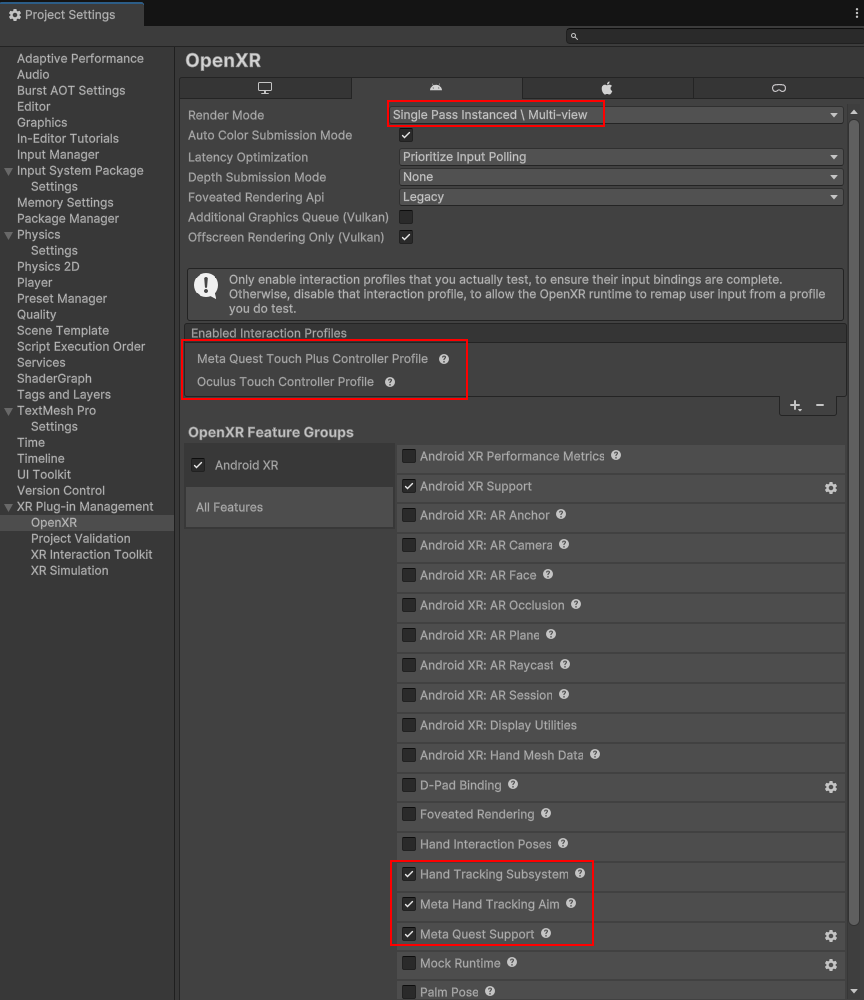
In addition, by selecting the target platform in Build Settings, OpenXR feature groups and interaction profiles are preconfigured. By default, the Android build target updates the settings for Meta Quest support. You can also add hand support by enabling Hand Tracking Subsystem and Meta Hand Tracking Aim. Additional information can be found in the OpenXR documentation.
Android XR
If you want to change the configuration to deploy to an Android XR device, there are some additional setup options to verify. By default, the Unity OpenXR Android XR package will be installed with a newly created project using the VR Template. You should verify the Project Settings when deploying to an Android XR device.
Navigate to Project Settings by going to Edit > Project Settings. In the Project Settings window navigate to the XR Plug-in Management > OpenXR settings window. Under the Android build target, the settings to support both hands and controllers should be configured for the Android XR platform:
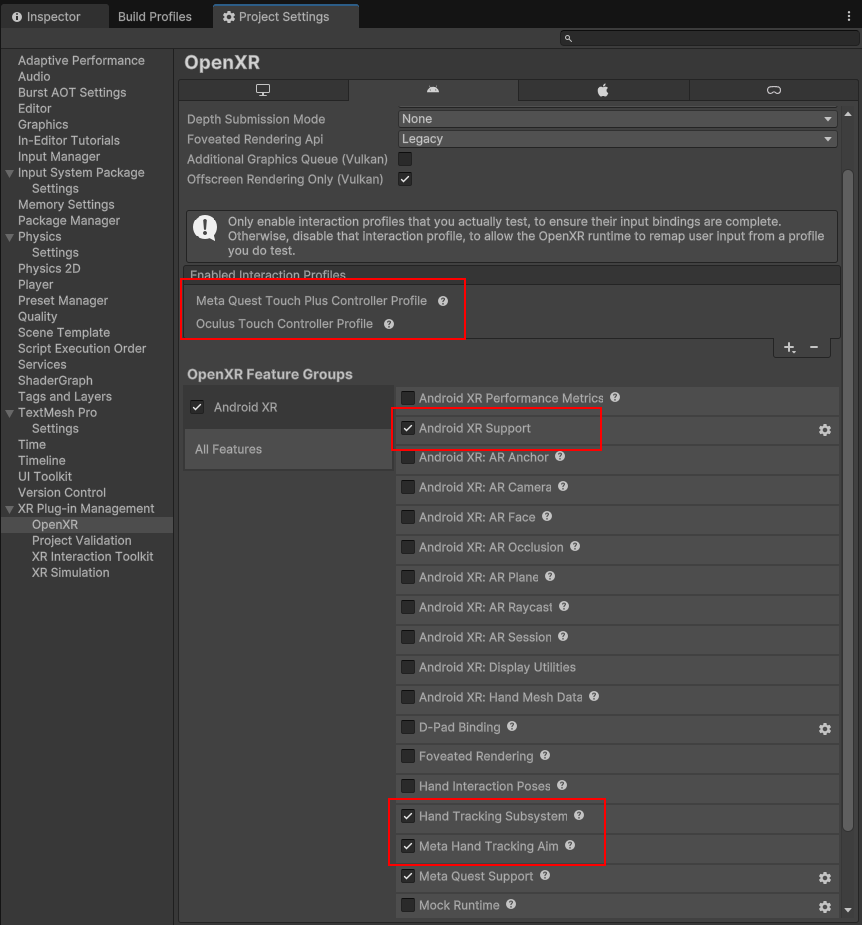
Note
If you do not see the Android XR option in the OpenXR Feature Groups, make sure to enable the Android XR feature group in the XR Plug-in Management settings window. This step is documented above.
PCVR
For standalone PC VR, numerous interaction profiles are already configured for the user. If you don't see your platform listed, add your interaction profile manually by clicking the + button.
Graphics APIs
The last setting you may need to adjust if you are using the Android build target is the Graphics API. By default, the VR Template uses the Vulkan graphics API for compatibility and performance reasons, including reduced build times. If you are targeting a device that does not fully support the Vulkan API, you may have to add OpenGLES3 to the list:
- Go to Edit > Project Settings.
- Click Player in the left-hand pane.
- Click on the Android tab.
- Expand Other Settings.
- Locate the Graphics APIs list and click the + symbol.
- In the drop-down click on OpenGLES3 to add it to the list.
- Click on File > Save Project to save these changes.
Building to Device
Additional configuration may be required depending on the target platform selected for deployment.
Meta Quest Devices
For Meta Quest devices, the project should be configured appropriately, but you will still need to switch to the Android build target. After switching to the Android build target, click the Build and Run button in the Build window to deploy directly to your device. For updated information and additional build options, visit the Meta documentation for build and configuration.
Alternatively, we recommend using Meta Quest Link to play your games directly to device inside the Unity Editor to enable rapid development. For more information on how to get started with Meta Quest Link, please review the Meta documentation for Meta Quest Link in Unity.
Android XR Devices
Be sure to read and configure the Android XR project settings before building.
For Android XR supported devices, the project should be configured appropriately, but you will still need to switch to the Android build target. After switching to the Android build target, click the Build and Run button in the Build window to deploy directly to your device.
Note
AndroidXR OpenXR Features and Meta Quest OpenXR Features are mutually exclusive. You must disable all features from one group in order to run the other.