Adding New Inputs (Dash)
In the previous tutorial, we used the Primary Action input (usually Left Click) to trigger our Dash. This was a temporary setup to get things working. Now, we will create a dedicated Dash input (e.g., E Button) to handle this properly.
We will achieve this in 4 Steps:
- Input Actions: Defining the input in Unity's Input System.
- Input Handler: Updating the code to read this input.
- Game Event: Creating the event channel.
- Wiring: Connecting the new event to our Dash implementation.
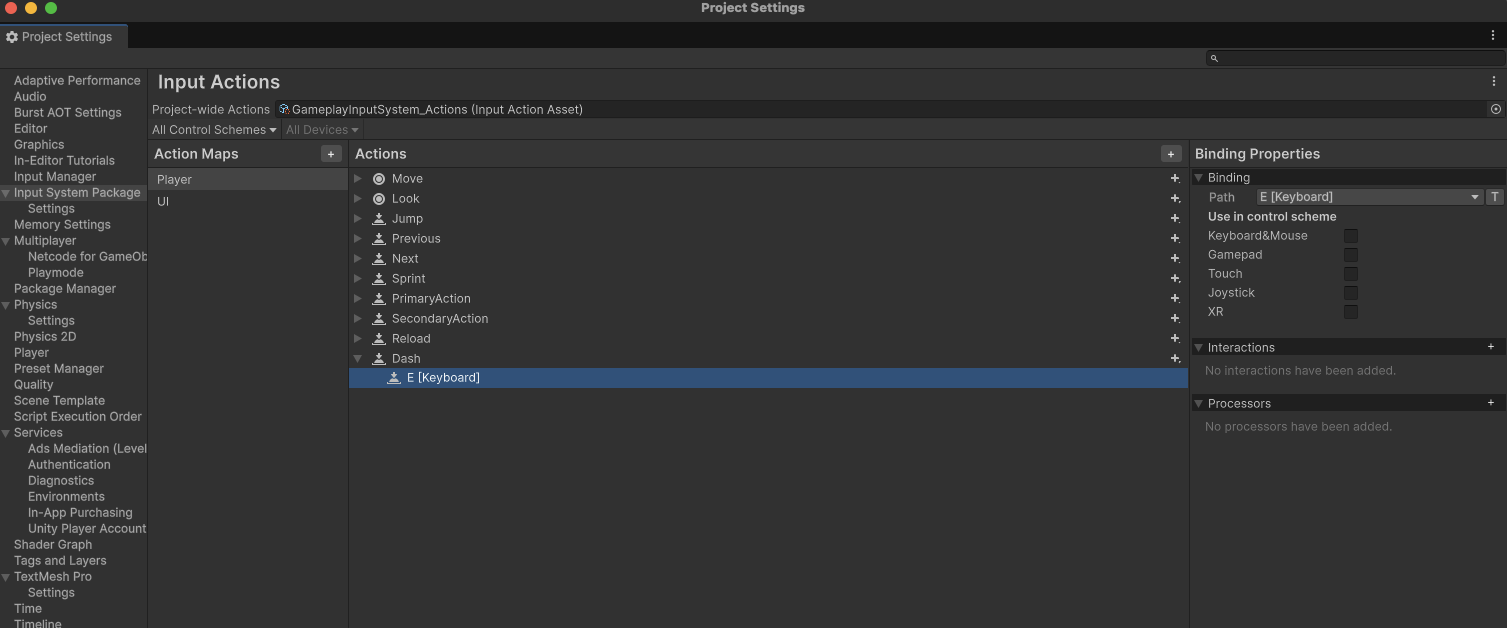
Step 1: Add the Input Action
First, we need to tell Unity what "Dash" means (which key triggers it).
- Go to
Edit->Project Settings->Input System Package - Under the Player Action Map, click the + (Plus) icon to add a new Action.
- Name it
Dash. - Add a binding (e.g., E Button).
- Wait for editor to compile the changes.
Step 2: Update CoreInputHandler
Now we need to update our script to listen for this new Dash action.
You can create a separate Input Handler for modularity (like ShooterInputHandler), but for core movement abilities like Dash, it makes sense to add it to the existing CoreInputHandler.cs.
Open CoreInputHandler.cs and add the following changes:
1. Add the Game Event Field
Add a new field to store the reference to our Game Event.
[Header("Core Game Events")]
// ... existing events ...
[Tooltip("Raised when the dash button is pressed.")]
[SerializeField] private GameEvent onDashPressed;
2. Register the Input
In RegisterInputActions(), link the input action to a handler function.
private void RegisterInputActions()
{
    // ... existing registration ...
    m_InputActions.Player.Dash.performed += HandleDashPressed;
}
3. Unregister the Input
In UnregisterInputActions(), make sure to clean up.
private void UnregisterInputActions()
{
    // ... existing unregistration ...
    m_InputActions.Player.Dash.performed -= HandleDashPressed;
}
4. Implement the Handler
Finally, add the function that raises the event.
private void HandleDashPressed(InputAction.CallbackContext context) => onDashPressed?.Raise();
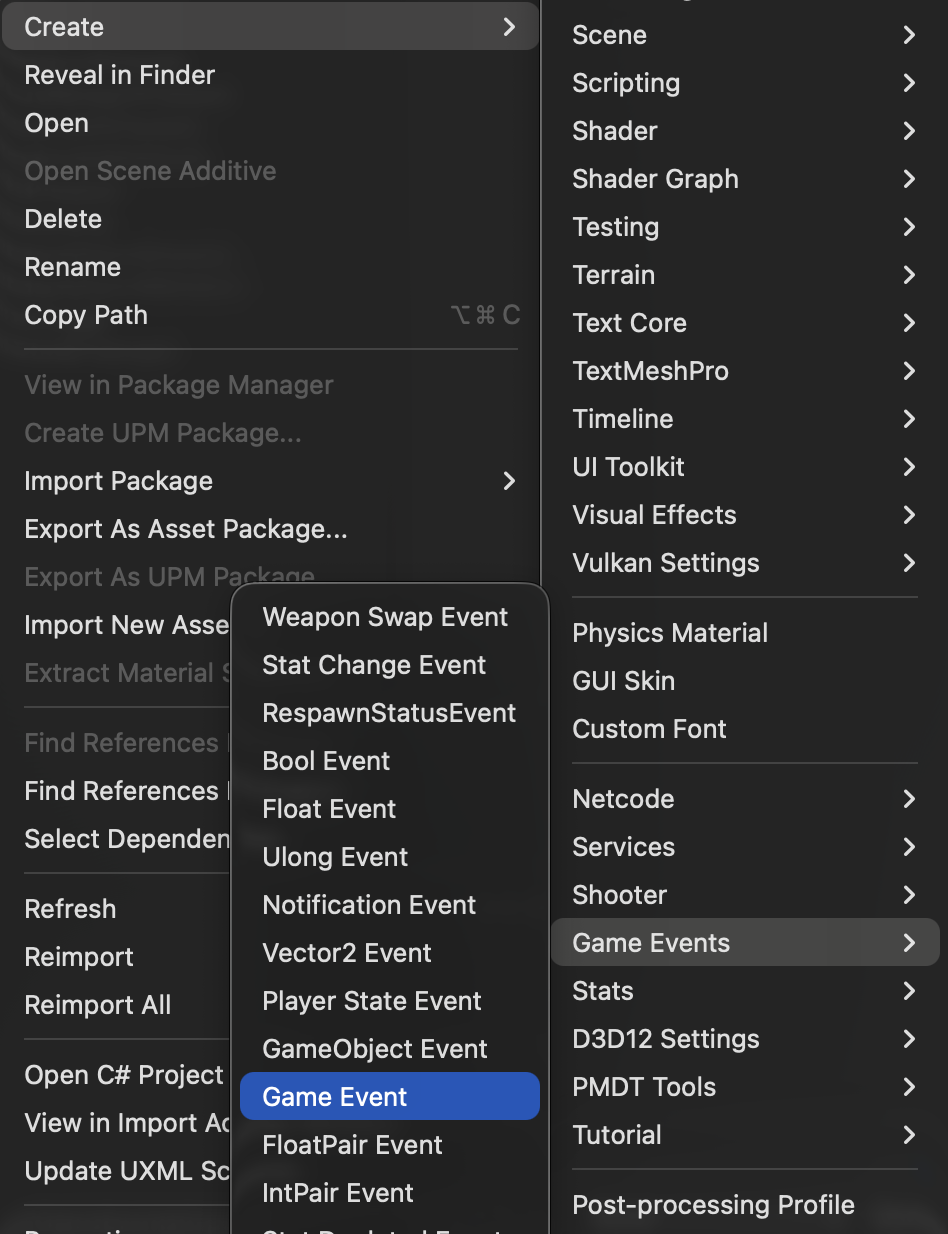
Step 3: Create the Game Event Asset
We need the actual "signal" that connects the Input Handler to the Dash Ability.
- Right-click in your Project window (e.g., in
Assets/Core/GameEvents). - Select Create -> Game Events -> Game Event.
- Name it
OnDashPressed.
Step 4: Connect the Logic
The final step is to update our DashAddon script to listen for this new specific event instead of the generic primary action.
1. Update DashAddon.cs
Open DashAddon.cs and rename the input field to be more specific.
public class DashAddon : NetworkBehaviour, IPlayerAddon
{
    [Header("References")]
    [SerializeField] private DashAbility dashAbility;
    // CHANGED: Renamed from onPrimaryActionPressed
    [SerializeField] private GameEvent onDashPressed;

    // ...

    public void OnPlayerSpawn()
    {
        if (!m_PlayerManager.IsOwner) return;
        // CHANGED: Use the new reference
        if (onDashPressed != null)
        {
            onDashPressed.RegisterListener(HandleDashInput);
        }
    }

    public void OnPlayerDespawn()
    {
        if (!m_PlayerManager.IsOwner) return;
        // CHANGED: Use the new reference
        if (onDashPressed != null)
        {
            onDashPressed.UnregisterListener(HandleDashInput);
        }
    }

    // ... rest of the script
}
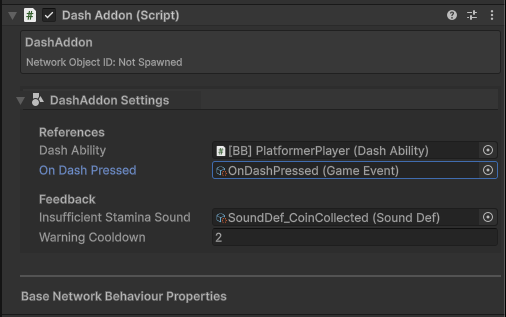
2. Assign References in Inspector
- Select your Player Prefab.
- Find the Core Input Handler component.
- Drag your new
OnDashPressedasset into the On Dash Pressed slot.
- Drag your new
- Find the Dash Addon component.
- Drag the same
OnDashPressedasset into the On Dash Pressed slot.
- Drag the same
Note
CoreInputHandler sends the signal and DashAddon receives it. Ensure both components reference the exact same Game Event asset.
The input is only processed for the local player (Owner). To allow inputs from other players, you would need to modify CoreInputHandler to remove the IsOwner check.
Now, pressing E (or your chosen key) will trigger the Dash!