Scene Management (sample)
Important
Support for the Sequences package is scheduled to end as of Unity 6.1.
Use this sample to practice with Scene Activation tracks and Scene loading features in Sequences.
Before you begin: Make sure to have the Sequences and Timeline windows open in the Editor.
Getting the sample
To get and open the sample:
Open the Package Manager and select the Sequences package in the list.
In the right pane, expand the Samples section and next to Scene Management, click on Import.
In the Project window, from the
Assets/Samples/Sequences/.../Scene Managementfolder, open theSceneManagementSample.unityScene.
Testing the sample
The sample demonstrates the possibility to activate/deactivate separate Scenes through a simple Sequences structure. To be able to see the Scene activation/deactivation effects in the Unity Editor, it is necessary to first load the targeted Scenes.
To load the Scenes and test the sample:
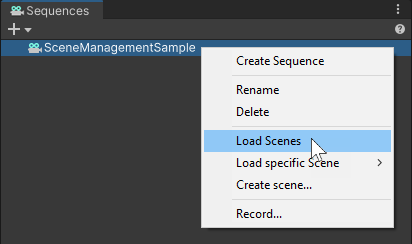
- In the Sequences window, right click on SceneManagementSample and select Load Scenes.
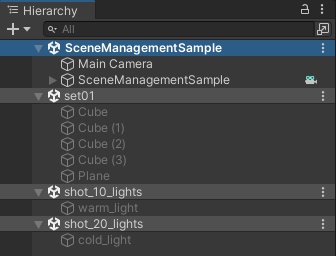
- In the Hierarchy, notice the three new loaded Scenes: set01.unity, shot_10_lights.unity and shot_20_lights.unity.
- In the Timeline window, hit the Play button or scrub the playhead to observe how the various Scenes are activated and deactivated throughout the Master Sequence.
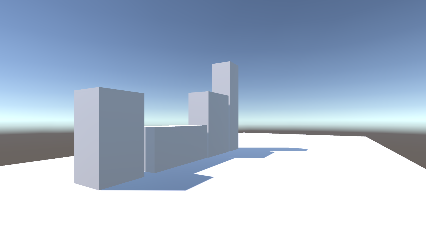
- The set01.unity Scene (four cubes on a plane) remains active all the time.
- The shot_10_lights.unity Scene (lighting the set from the left) is active only during the first half of the Master Sequence.
- The shot_20_lights.unity Scene (lighting the set from the right) is active only during the second half of the Master Sequence.
Understanding scene activation
The activation/deactivation of each Scene in the sample is driven through a Scene Activation track in Timeline.
- In the Sequences window, expand SceneManagementSample and select seq_001.

In the Timeline window, the yellow track named set01 is a Scene Activation track. It drives the activation of the set01.unity Scene during the seq_001 Sequence time range.
- In the Sequences window, expand seq_001 and select shot_10.

In the Timeline window, notice that shot_10 also has a Scene Activation track. This track drives the activation of the shot_10_lights.unity Scene during the shot_10 Sequence time range.
- In the Sequences window, select shot_20, and notice it also has a Scene Activation track. This track drives the activation of the shot_20_lights.unity Scene during the shot_20 Sequence time range.
See also:
Understanding scene loading
A Scene Activation track can't activate a Scene if this Scene isn't first loaded. You can load Scenes in the Unity Editor through the Sequences structure, but you can also set up a Scene Loading policy that automatically loads Scenes when you enter the Play mode or when you run a Player build of your project.
Note: This sample was not designed for being built as a standalone player. To avoid unwanted behaviors, don't try to run a Player build with it.
To understand how a Scene Loading Policy works in the Play mode context:
In the Hierarchy, right-click on the shot_20_lights.unity Scene and select Unload Scene.
In the Sequences window, select seq_001, and in the Timeline window, hit the Play button or scrub the playhead.
Notice the shot_20_lights.unity Scene is no longer activated when you reach the shot_20 Sequence.
- In the Hierarchy, in the SceneManagementSample Scene, select the SceneManagementSample GameObject.
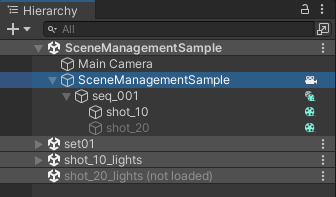
- In the Inspector, in the Sequence Filter component, click on Add Scene Loading Policy.
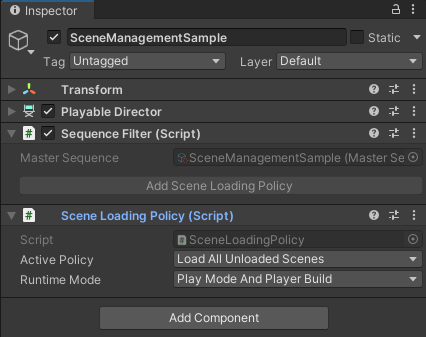
This adds the Scene Loading Policy component. Leave the properties set to their default values.
- Enter the Play mode.
Notice the shot_20_lights.unity Scene automatically loads in the Hierarchy at the beginning, and activates when expected.
- Exit the Play mode.
Notice the shot_20_lights.unity Scene is unloaded, as it was before you entered the Play mode.
See also: