Requirements and setup
Install the following Editor and package versions to begin working with the 2D Renderer:
Unity 2019.2.0b1 or later
Universal Render Pipeline version 6.7 or higher (available via the Package Manager)
2D Renderer Setup
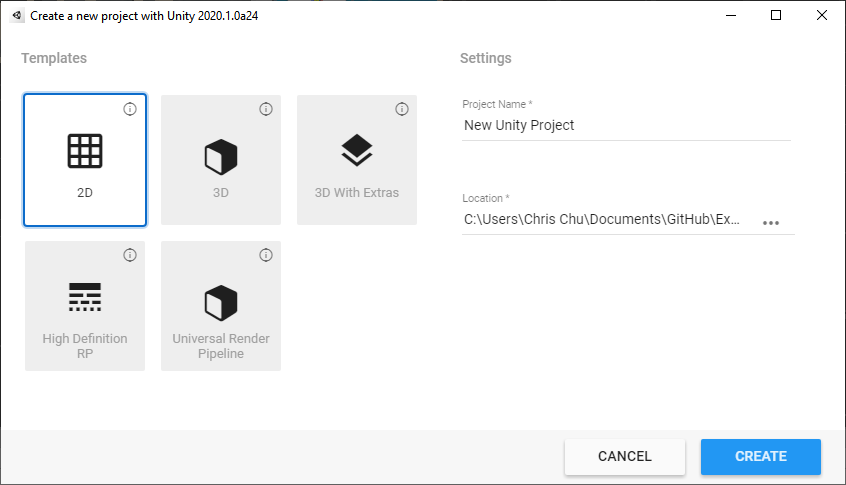
Create a new Project using the 2D template.

Create a new Pipeline Asset by going to the Assets menu and selecting Create > Rendering > Universal Render Pipeline > Pipeline Asset and then name the Asset.

Create a new 2D Renderer by going to Assets > Create > Rendering > Universal Render Pipeline > 2D Renderer. Give it a name when prompted.

Assign the 2D Renderer as the default Renderer for the Render Pipeline Asset. Drag the 2D Renderer Asset onto the Renderer List, or select the circle icon to open the Select Object window and then select the 2D Renderer Asset from the list.
Set the graphics quality settings:
Option 1: For a single setting across all platforms

- Go to Edit > Project Settings and select the Graphics category.
- Drag the Pipeline Asset created earlier to the Scriptable Render Pipeline Settings box, or select the circle icon to the right of the box to open the Select Object window and then select the Asset from the list.
Option 2: For settings per quality level

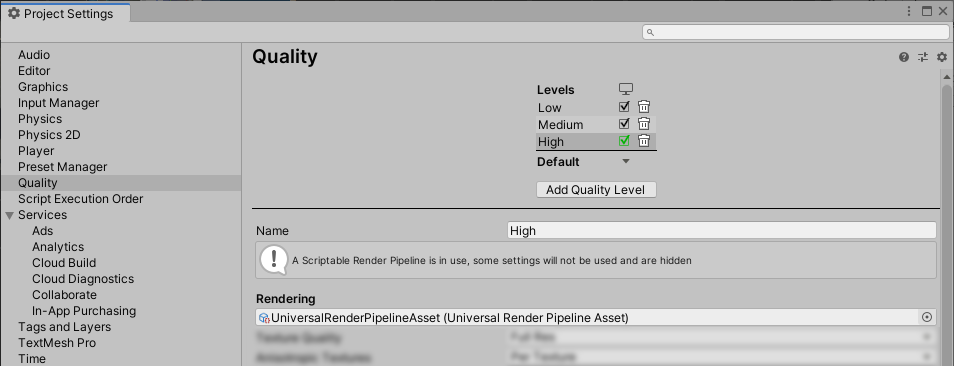
- Go to Edit > Project Settings and select the Quality category.
- Select a quality level to be included in your Project.
- Drag the Pipeline Asset created earlier to the Rendering box, or select the circle open to the right of the box to open the Select Object window and then select the Asset from the list.
- Repeat steps 2-3 for each quality level and platform included in your Project.
The 2D Renderer is now set up for your Project.
Note: If you use the 2D Renderer in your Project, some of the options related to 3D rendering in the Universal Render Pipeline Asset will not have any impact on your final app or game.