Decal Renderer Feature
With the Decal Renderer Feature, Unity can project specific Materials (decals) onto other objects in the Scene. The decals interact with the Scene's lighting and wrap around Meshes.
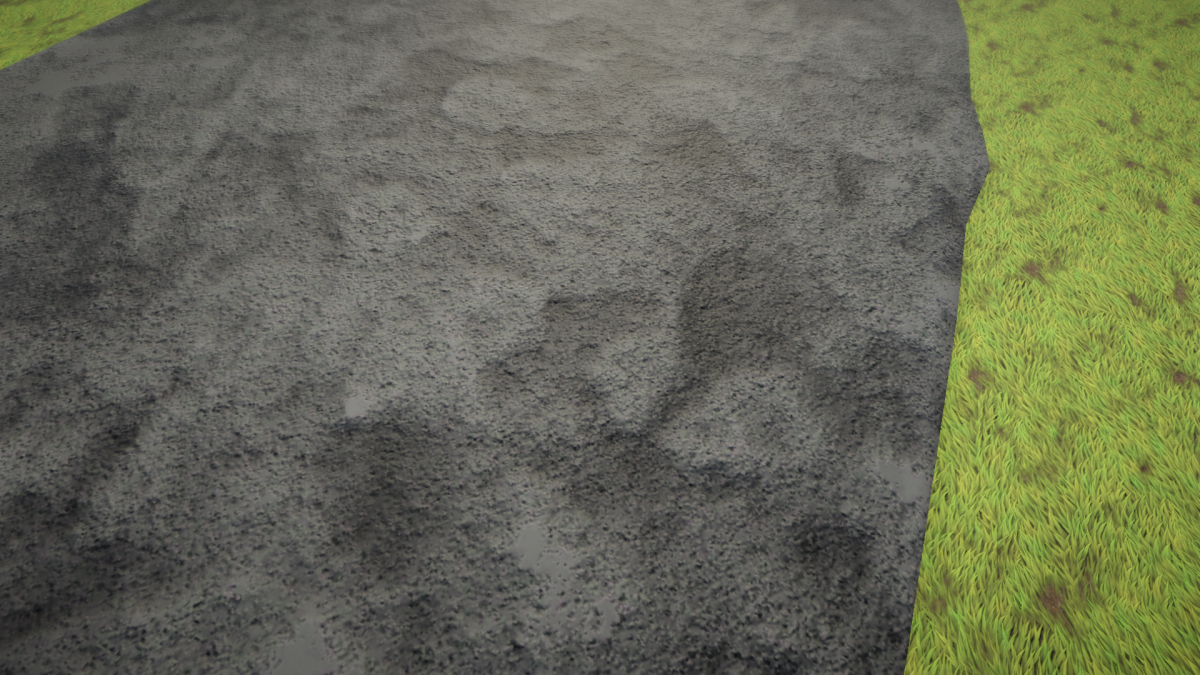
Sample scene without decals
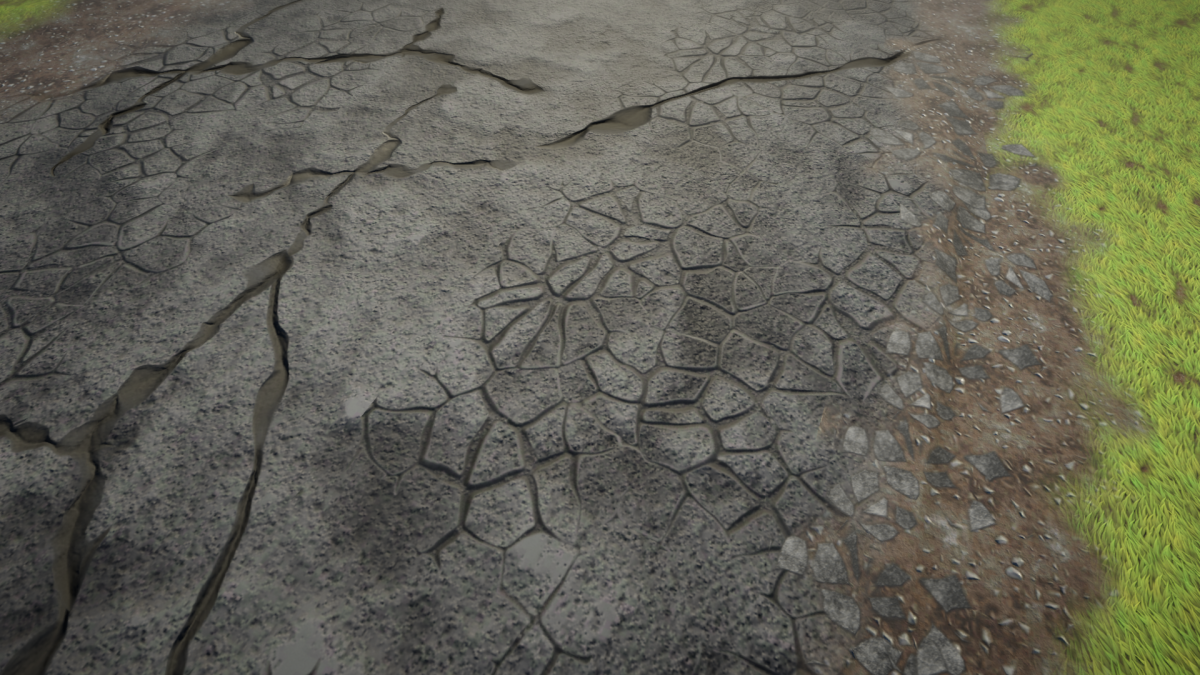
Sample scene with decals. The decals hide the seams between materials and add artistic details.
For examples of how to use Decals, refer to the Decals samples in URP Package Samples.
How to use the feature
To add decals to your Scene:
Add the Decal Renderer Feature to the URP Renderer.
Create a Material, and assign it the
Shader Graphs/Decalshader. In the Material, select the Base Map and the Normal Map.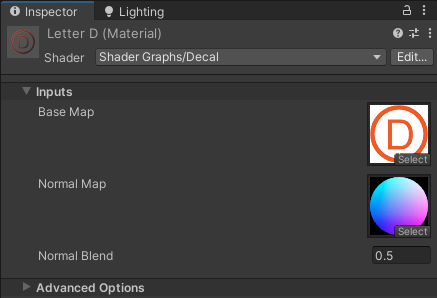
Create a new Decal Projector GameObject, or add a Decal Projector component to an existing GameObject.
The following illustration shows a Decal Projector in the Scene.
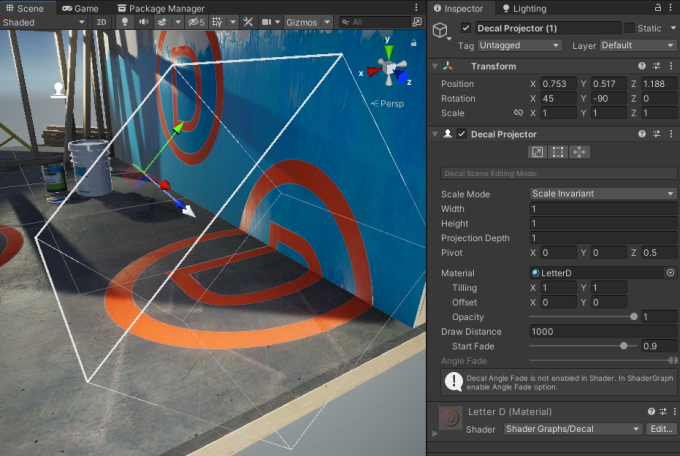
For more information, refer to Decal Projector component.
An alternative way to add decals to a Scene:
Create a Quad GameObject.
Assign a Decal Material to the GameObject.
Position the Quad on the surface where you want the decal to be. If necessary, adjust the mesh bias value to prevent z-fighting.
Limitations
This feature has the following limitations:
- The decal projection does not work on transparent surfaces.
Decal Renderer Feature properties
This section describes the properties of the Decal Renderer Feature.

Decal Renderer Feature, Inspector view.
Technique
Select the rendering technique for the Renderer Feature.
This section describes the options in this property.
Automatic
Unity selects the rendering technique automatically based on the build platform. The Accurate G-buffer normals option is also taken into account, as it prevents normal blending from working correctly without the D-Buffer technique.
DBuffer
Unity renders decals into the Decal buffer (DBuffer). Unity overlays the content of the DBuffer on top of the opaque objects during the opaque rendering.
Selecting this technique reveals the Surface Data property. The Surface Data property lets you specify which surface properties of decals Unity blends with the underlying meshes. The Surface Data property has the following options:
- Albedo: decals affect the base color and the emission color.
- Albedo Normal: decals affect the base color, the emission color, and the normals.
- Albedo Normal MAOS: decals affect the base color, the emission color, the normals, the metallic values, the smoothness values, and the ambient occlusion values.
Limitations:
This technique requires the DepthNormal prepass, which makes the technique less efficient on GPUs that implement tile-based rendering.
This technique does not work on particles and terrain details.
Screen Space
Unity renders decals after the opaque objects using normals that Unity reconstructs from the depth texture, or from the G-Buffer when using the Deferred rendering path. Unity renders decals as meshes on top of the opaque meshes. This technique supports only the normal blending. When using the Deferred rendering path with Accurate G-buffer normals, blending of normals is not supported, and will yield incorrect results.
Screen space decals are recommended for mobile platforms that use tile-based rendering, because URP doesn't create a DepthNormal prepass unless you enable Use Rendering Layers.
Selecting this technique reveals the following properties.
| Property | Description |
|---|---|
| Normal Blend | The options in this property (Low, Medium, and High) determine the number of samples of the depth texture that Unity takes when reconstructing the normal vector from the depth texture. The higher the quality, the more accurate the reconstructed normals are, and the higher the performance impact is. |
| Low | Unity takes one depth sample when reconstructing normals. |
| Medium | Unity takes three depth samples when reconstructing normals. |
| High | Unity takes five depth samples when reconstructing normals. |
Max Draw Distance
The maximum distance from the Camera at which Unity renders decals.
Use Rendering Layers
Select this check box to enable the Rendering Layers functionality.
For more information, refer to How to use Rendering Layers with Decals.
If you enable Use Rendering Layers, URP creates a DepthNormal prepass. This makes decals less efficient on GPUs that implement tile-based rendering.
Decal Projector component
The Decal Projector component lets Unity project decals onto other objects in the Scene. A Decal Projector component must use a Material with the Decal Shader Graph assigned (Shader Graphs/Decal).
For more information on how to use the Decal Projector, refer to How to use the feature.
The Decal Projector component contains the Scene view editing tools and the Decal Projector properties.
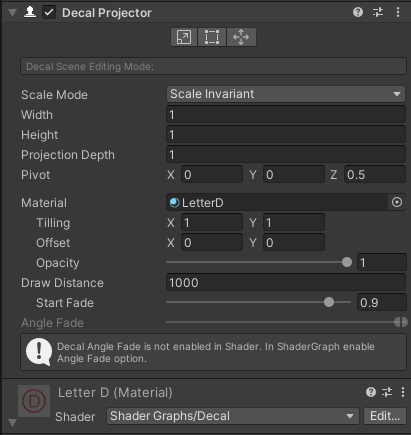
Decal Projector component in the Inspector.
NOTE: If you assign a Decal Material to a GameObject directly (not via a Decal Projector component), then Decal Projectors do not project decals on such GameObject.
Decal Scene view editing tools
When you select a Decal Projector, Unity shows its bounds and the projection direction.
The Decal Projector draws the decal Material on every Mesh inside the bounding box.
The white arrow shows the projection direction. The base of the arrow is the pivot point.
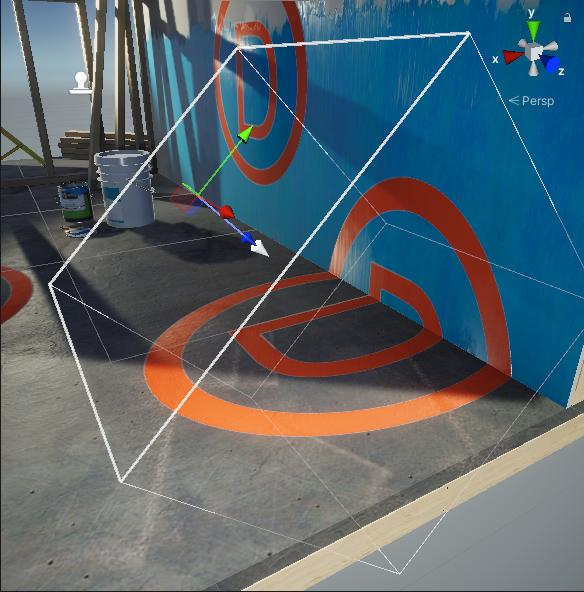
The Decal Projector component provides the following Scene view editing tools.

| Icon | Action | Description |
|---|---|---|
 |
Scale | Select to scale the projector box and the decal. This tool changes the UVs of the Material to match the size of the projector box. The tool does not affect the pivot point. |
 |
Crop | Select to crop or tile the decal with the projector box. This tool changes the size of the projector box but not the UVs of the Material. The tool does not affect the pivot point. |
 |
Pivot / UV | Select to move the pivot point of the decal without moving the projection box. This tool changes the transform position. This tool also affects the UV coordinates of the projected texture. |
Decal Projector component properties
This section describes the Decal Projector component properties.
| Property | Description |
|---|---|
| Scale Mode | Select whether this Decal Projector inherits the Scale values from the Transform component of the root GameObject. Options: • Scale Invariant: Unity uses the scaling values (Width, Height, etc.) only in this component, and ignores the values in the root GameObject. • Inherit from Hierarchy: Unity evaluates the scaling values for the decal by multiplying the lossy Scale values of the Transform of the root GameObject by the Decal Projector's scale values. Note: since the Decal Projector uses the orthogonal projection, if the root GameObject is skewed, the decal does not scale correctly. |
| Width | The width of the projector bounding box. The projector scales the decal to match this value along the local X axis. |
| Height | The height of the projector bounding box. The projector scales the decal to match this value along the local Y axis. |
| Projection Depth | The depth of the projector bounding box. The projector projects decals along the local Z axis. |
| Pivot | The offset position of the center of the projector bounding box relative to the origin of the root GameObject. |
| Material | The Material to project. The Material must use a Shader Graph that has the Decal Material type. For more information, refer to the page Decal Shader Graph. |
| Tiling | The tiling values for the decal Material along its UV axes. |
| Offset | The offset values for the decal Material along its UV axes. |
| Opacity | This property lets you specify the opacity value. A value of 0 makes the decal fully transparent, a value of 1 makes the decal as opaque as defined by the Material. |
| Draw Distance | The distance from the Camera to the Decal at which this projector stops projecting the decal and URP no longer renders the decal. |
| Start Fade | Use the slider to set the distance from the Camera at which the projector begins to fade out the decal. Values from 0 to 1 represent a fraction of the Draw Distance. With a value of 0.9, Unity starts fading the decal out at 90% of the Draw Distance and finishes fading it out at the Draw Distance. |
| Angle Fade | Use the slider to set the fade out range of the decal based on the angle between the decal's backward direction and the vertex normal of the receiving surface. |
Performance
Decals do not support the SRP Batcher by design because they use Material property blocks. To reduce the number of draw calls, decals can be batched together using GPU instancing. If the decals in your Scene use the same Material, and if the Material has the Enable GPU Instancing property turned on, Unity instances the Materials and reduces the number of draw calls.
To reduce the number of Materials necessary for decals, put multiple decal textures into one texture (atlas). Use the UV offset properties on the decal projector to determine which part of the atlas to display.
The following image shows an example of a decal atlas.
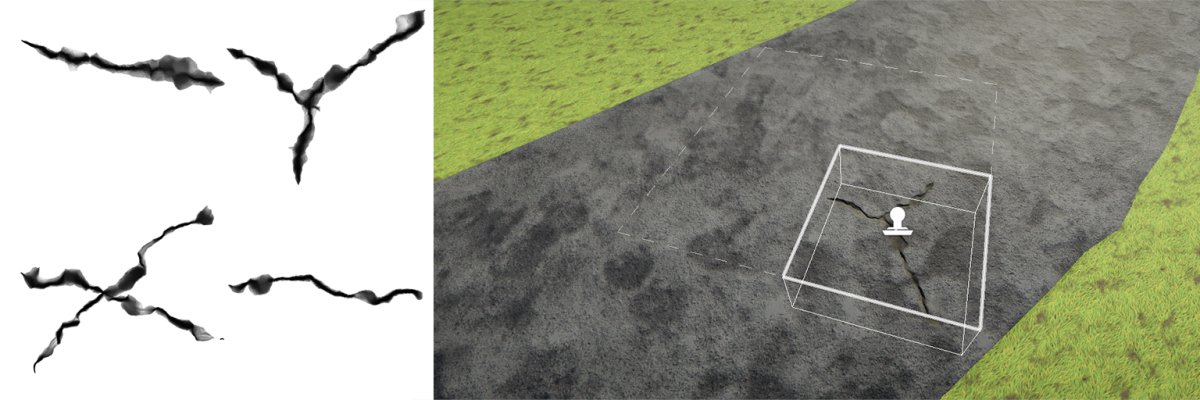
left: decal atlas with four decals. Right: a decal projector is projecting one of them. If the decal Material has GPU instancing enabled, any instance of the four decals is rendered in a single instanced draw call.