Configuring Unity Distribution Portal
So you’ve chosen which way you are going to implement UDP.
To configure UDP in your game:
- Set up UDP
- Generate a UDP client
Setting up UDP
- Open the Unity Editor and log in with a Unity account. If you don’t have a Unity account yet, create one in https://id.unity.com.
- Create or open a Unity project in the Editor.
- Install UDP.
Generating a UDP client
Your Unity project needs to be linked to a UDP client. You can create a new UDP client from the Unity Editor, or link your project to an existing UDP client. Note that a Unity project can only be linked to a single UDP client.
- Create a UDP Settings file by selecting Window > Unity Distribution Portal > Settings.
- In the UDP Settings inspector window, link your project with an existing UDP client or generate a new UDP client:
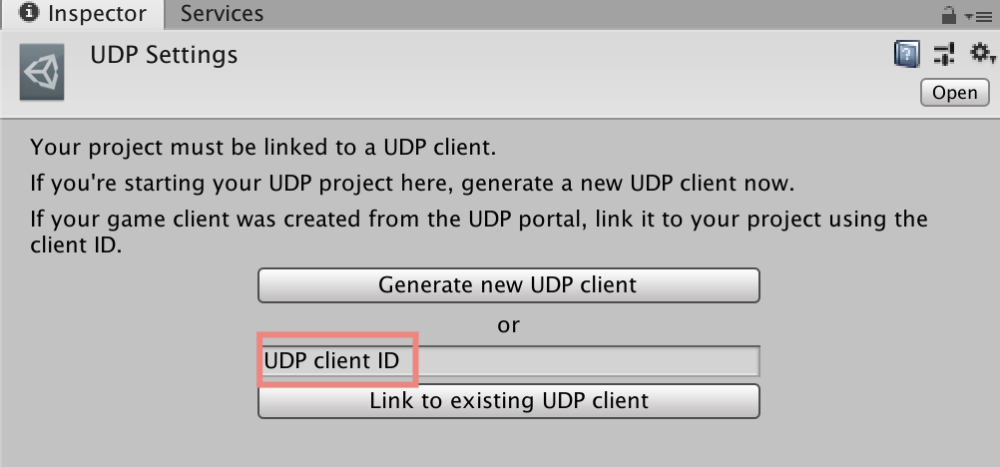
If your game was first created from the UDP console, link it this way:
- On the UDP console, go the Game Info section of your game
- Copy the value in Client ID from the Integration Information section
- Paste it into the UDP Client ID field of the UDP Settings window (cf. above)
- Press the button “Link to existing UDP client”
The user interface of the UDP Settings inspector window is different depending on which implementation you choose (via Unity IAP, or with the UDP Package).
In both cases you will find in the UDP Settings window a section for general UDP settings and a section for UDP Sandbox Test Accounts.
General UDP settings
| Property | Function | Editable |
|---|---|---|
| Game ID | The identifier for the game | No |
| Client ID | The UDP client identifier | No |
| Client Key | Used when initializing the UDP SDK | No |
| Client RSA Public Key | Used to verify the callback notification | No |
| Client Secret | A Unity key to signing your request that your game send to the UDP server | No |
| Callback URL | Specifies the URL for the server that [receives the callback notification](Server-side implementation of UDP.md) | Yes |
UDP Sandbox Test Accounts
You can create test accounts for users to test your game in the UDP Sandbox environment. Think of the UDP Sandbox as a pretend “Store” where you can verify that your IAP implementation is correct before pushing your game to the real stores.
Sandbox test accounts only work on the generic UDP build, they will NOT work on repacked builds. Repacked builds can be tested separately (see here), but should only be generated once your IAP implementation clears the Sandbox.
Refer also to this section of the Troubleshooting guide.
Your testers will run the generic UDP build on an emulator or a real Android device, gaining access with the credentials that you define in the UDP Sandbox Test Accounts.
| Property | Function | Editable |
|---|---|---|
| The email address for the sandbox test account. It is used as the login name. | Yes | |
| Password | The password for the test account. | Yes |
Sandbox test accounts can also be added / edited from the UDP console.