Distributed authority and WebGL quickstart
Use this guide to learn how to create your first distributed authority Netcode for GameObjects WebGL project.
This guide is intended as an addition to the distributed authority general quickstart page, which provides more details about setting up Netcode for GameObjects to use distributed authority.
Note
The distributed authority service provided by the Multiplayer Services package offers a free tier for bandwidth and connectivity hours, allowing you to develop and test without immediate cost. Refer to the Unity Gaming Services pricing page for complete details.
Prerequisites
Before you begin, you need the following general requirements to use the distributed authority network topology:
- An active Unity account with a valid license.
- The Unity Hub.
- A supported version of the Unity 6 Editor. Refer to the Netcode for GameObjects requirements.
- When installing the Editor, make sure to include the WebGL Build Support module.
You also need the following packages and minimum versions for a WebGL distributed authority session:
- Netcode for GameObjects version 2.1.1+
- Unity Transport version 2.3.0+
- Note that you don't need to create a self-signed certificate to connect to a distributed authority session.
- Multiplayer Services version 1.0.2+
Create and set up your project
Follow the instructions on the distributed authority general quickstart page.
Configure the transport to use websockets
Enable the Use Web Sockets checkbox on the DistributedAuthorityTransport component that was added to the NetworkManager object. 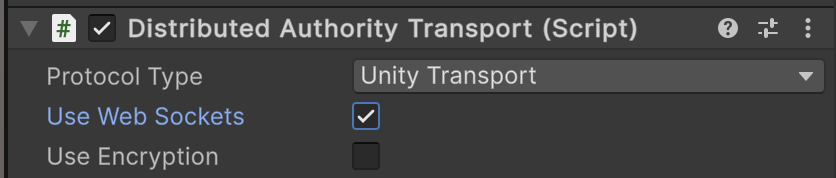
Build and run with WebGL
- Navigate to File > Build Profiles to open the Build Profiles window. Select WebGL as your target platform.
- From the Build Profiles window, click Build and Run.
- Unity launches a small web hosting app to provide the HTTP services required to launch the WebGL application in your browser.
- Once you have one instance of your WebGL project running, you can copy the URI from your browser and paste it into another window or tab, which creates and connects another player to the same session.