Unity MARS UI overview
This page provides an overview of the different windows that Unity MARS adds to the Unity Editor. It covers different ways to add MARS-specific GameObjects to your Project. It also runs through the Simulation view, Device view, and Simulation Test Runner, which allow you to test your content against simulated environments.
Overview of the Unity MARS UI
MARS adds its own sub-menus in Unity's Window and GameObject menus. The two primary views in the MARS workflow are the Simulation/Device View and the MARS Panel. As a best practice, you should keep both of these views open while using Unity MARS. When you create apps, you typically use both of them often.
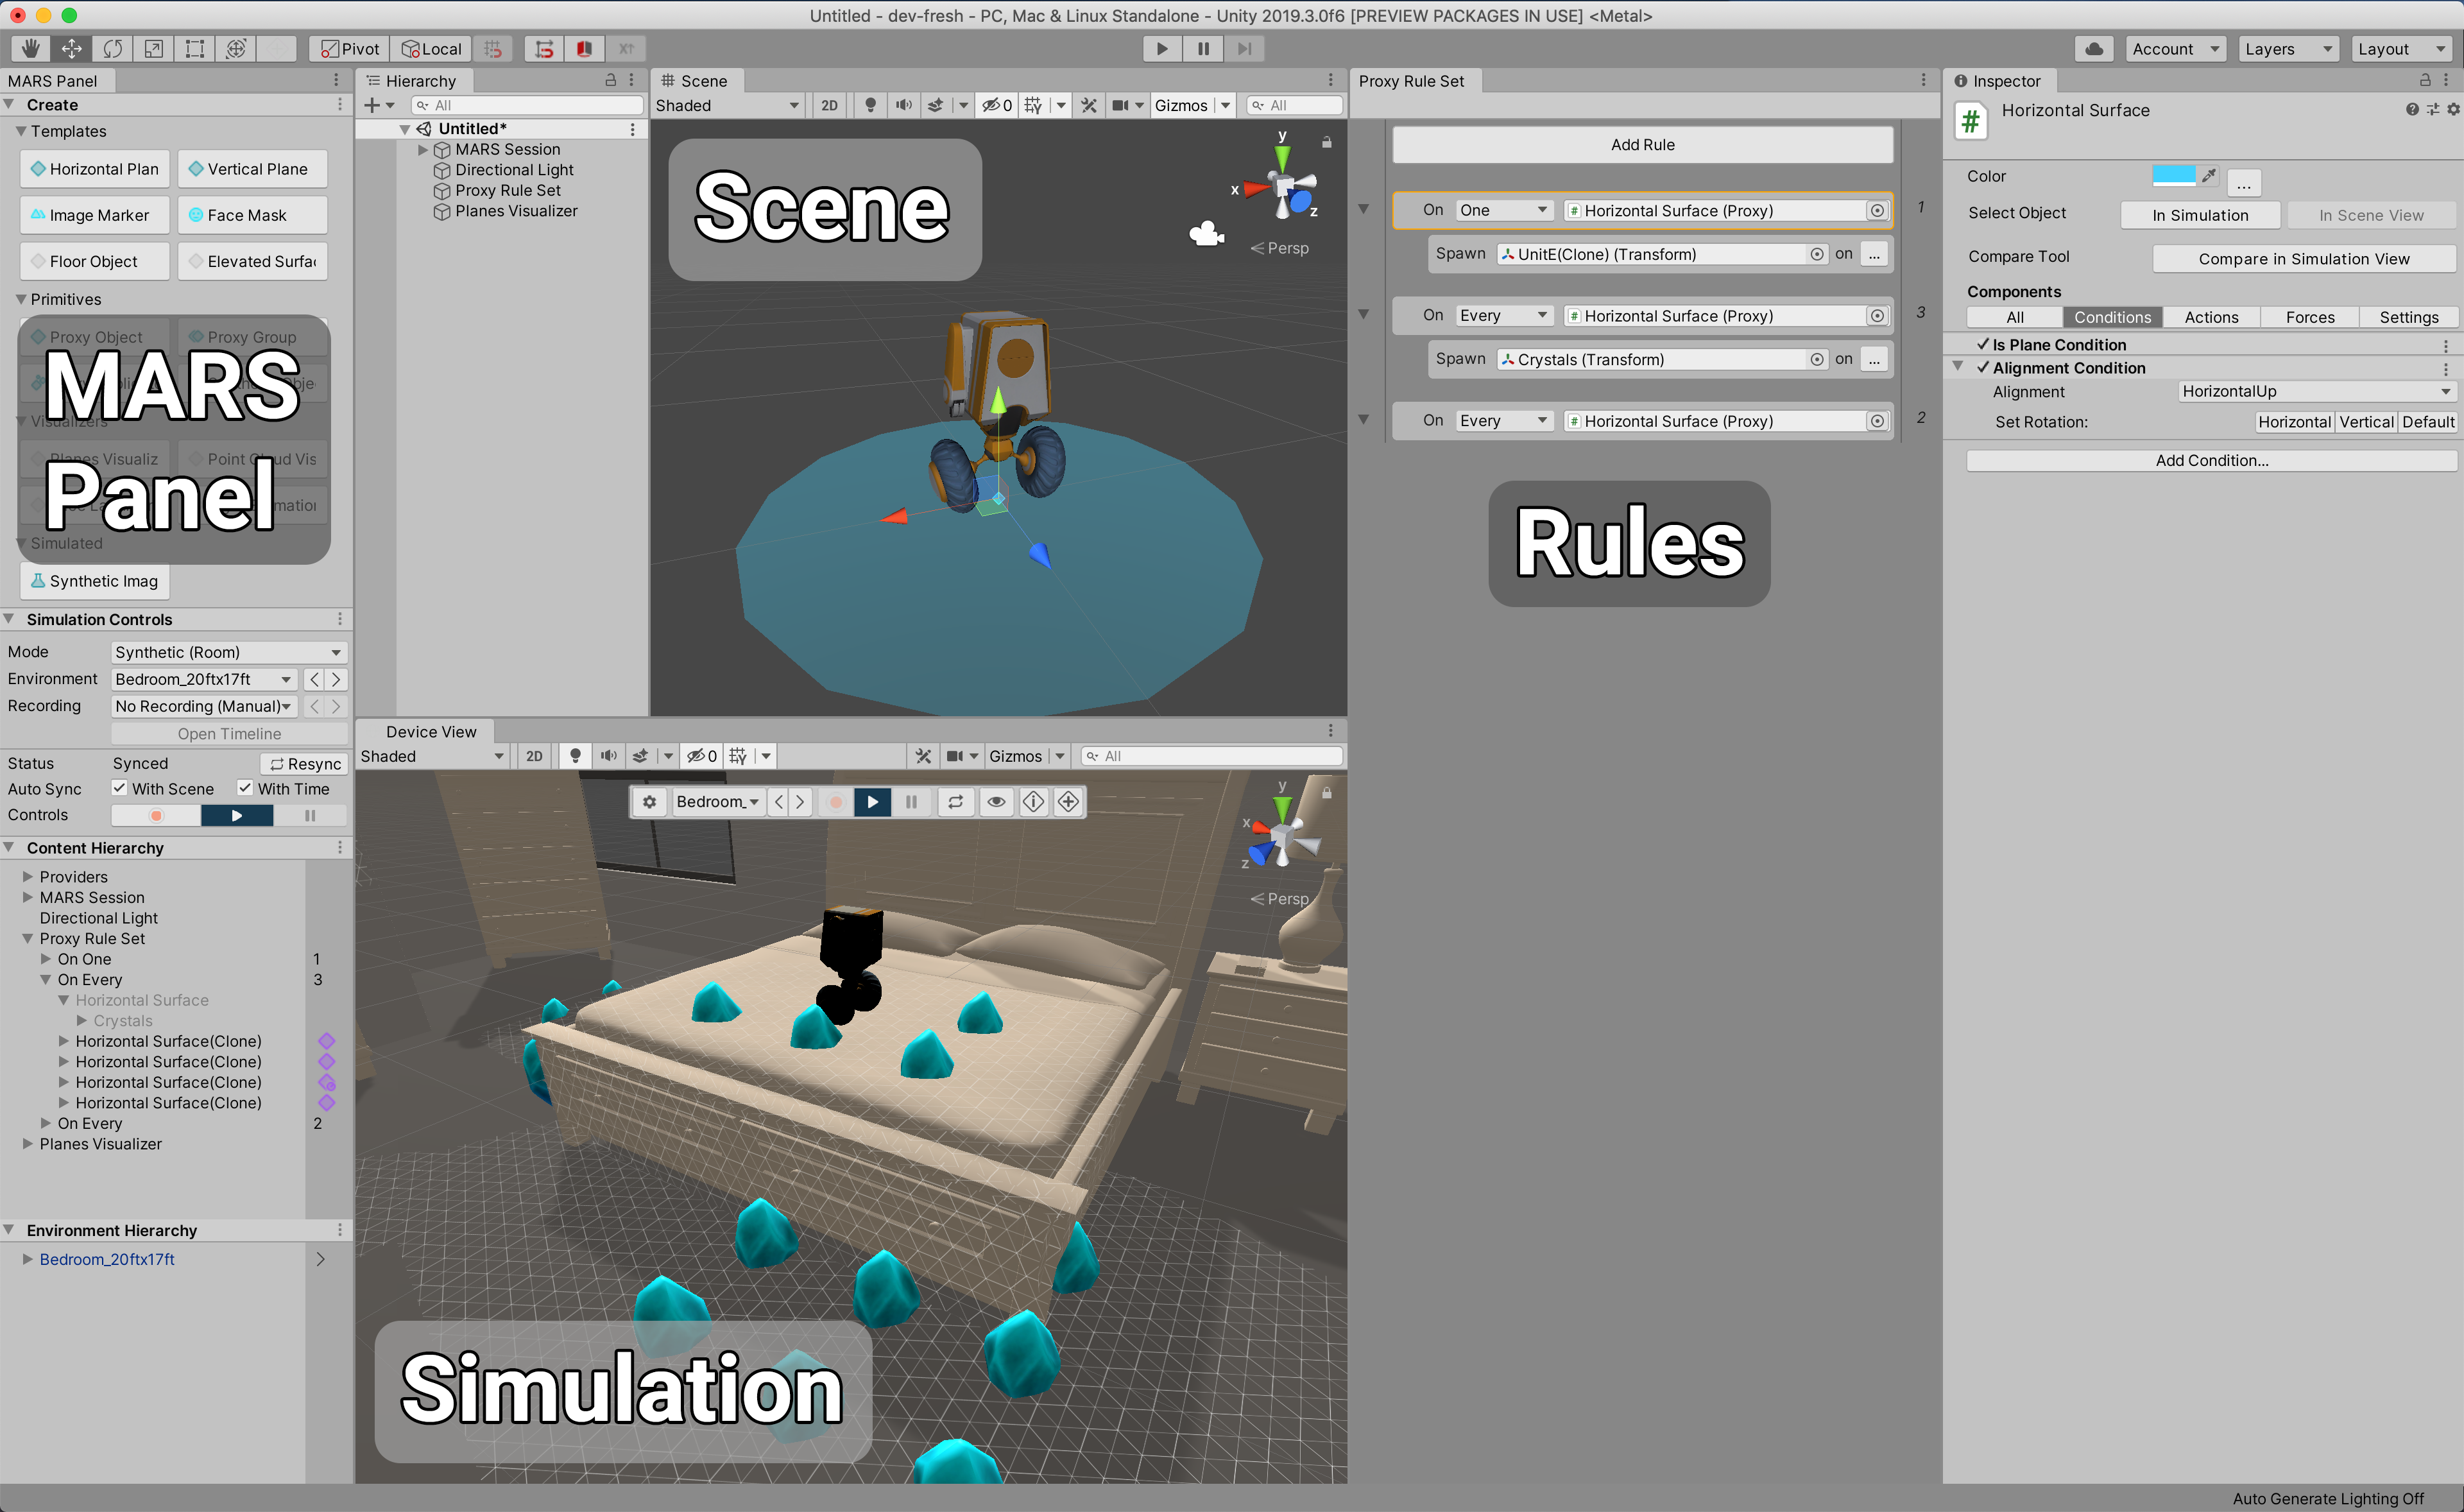
You can access most MARS-specific windows from the Unity menu Window > MARS. This sub-menu gives you quick access to the MARS Panel, the Simulation and Device views, the Simulation Test Runner, and several other options.
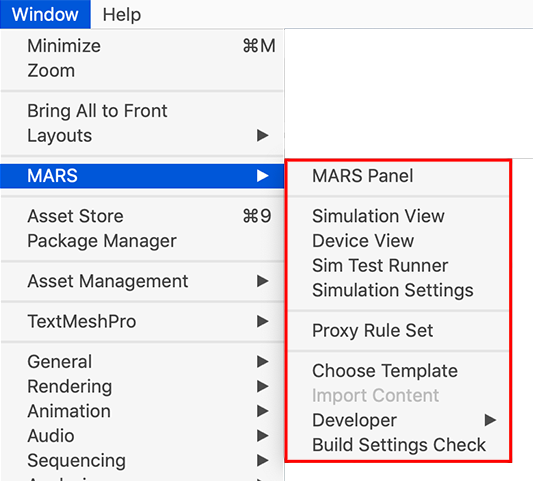
Rules workflow
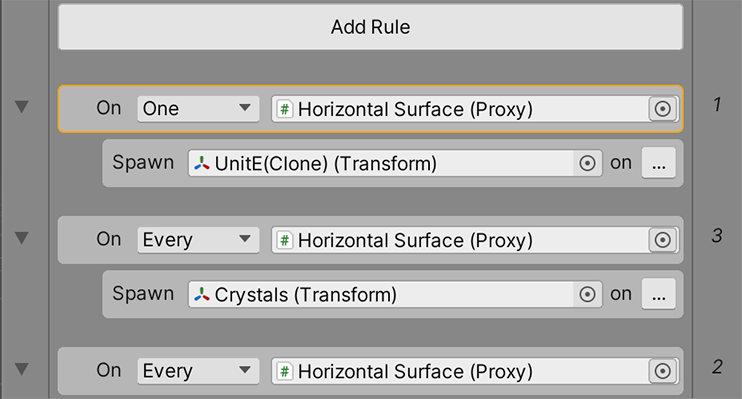
The Rules workflow describes AR layout and behavior concisely in plain language. This simplified, dedicated UI provides a clear starting point for new users, and also a central authoring experience for more advanced MARS functionality. Through this UI, you can set up Proxies, Replicators, Proxy Groups, and Landmarks. See the Rules documentation for a detailed walkthrough of this functionality and UI interaction.
MARS panel
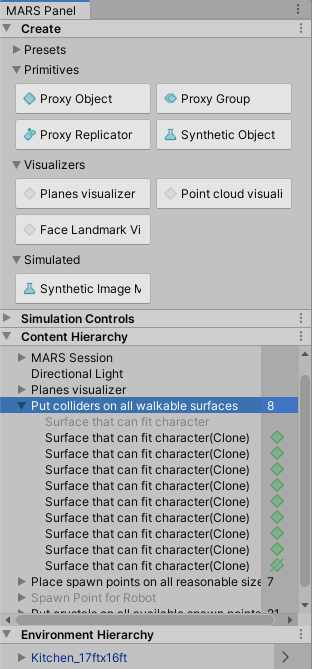
The MARS panel is the main entry point for accessing all Unity MARS capabilities. It is divided into four main sections: Create, Simulation Controls, Content Hierarchy, and Environment Hierarchy.
Create
This panel offers shortcuts for common MARS objects and is subdivided into three categories: Presets, Primitives, and Visualizers.
The Presets category contains pre-assembled common Proxies that are useful for different purposes, such as plane detection, image markers, and face tracking.
The Primitives category has shortcuts to create empty Proxies, Proxy Groups, Replicators, and Synthetic Objects. These are the core types that Unity uses to build complex MARS GameObjects.
The Visualizers section provides options to create visualizers for planes, points, and face landmarks. The plane and points visualizers are useful because they provide visual representations of the environment data you have scanned. The face landmarks visualizer also displays points that track your face movements so you can attach your created content to it. These GameObjects are not Proxies but instead hook directly into MARS data.
Simulation Controls
This panel contains controls for changing the simulation mode, environment, and recorded sessions or walkthroughs. You can also access it from the Simulation Scene/Device view toolbar.
At the top of the Simulation Controls panel is the status of the current Simulation in relation to the active Scene. There are two possible statuses:
- Synced: The GameObjects in the Simulation are up-to-date copies of the GameObjects in the active Scene.
- Out of Sync: The simulated GameObjects are out-of-date copies, and Simulation must be resynced for the latest changes to apply.
To resync manually, navigate to the Simulation Controls panel and click the Resync button. You can also find this button in the Simulation Scene/Device view toolbar. You can also enable the Auto Sync option to resync the Simulation automatically whenever you make changes to the active Scene. As a best practice, disable this option when you work on complex Scenes where re-simulation would take a long time.
Content Hierarchy
This panel shows the GameObjects currently being simulated in the Simulation view. Each GameObject has an icon that matches the Proxy's associated Gizmo in the Scene view. This lets you differentiate Proxies easier between hierarchies.
The icons on the right side indicate the matched state of simulated objects, as follows:
![]() - The GameObject has found a match in the environment.
- The GameObject has found a match in the environment.
 - No match exists.
 - The query is still evaluating.
The base icon varies depending on what type of data the GameObject is trying to match, and whether the GameObject is a ProxyGroup or a Proxy. For Replicators, icons also display a number that shows how many matches of the replicated GameObject that was created in this simulation.
If a Proxy isn’t matching against an environment, it might be because the conditions you’ve created on the GameObject are too strict to be met in the simulated environment. You can select the unmatched Proxy to ping its associated Scene GameObject, which you can then use to adjust condition values in the Inspector.
The Content Hierarchy section also shows instances created by Replicators. When you select any Replicator instance, the Content Hierarchy view selects the Replicator that created it.
Environment Hierarchy
This view shows the GameObjects in the simulated environment. It behaves in the same way as Unity's Hierarchy view, but it only displays GameObjects that are in the simulated environment. This separation reduces the clutter in Unity's Hierarchy view.
Simulation View
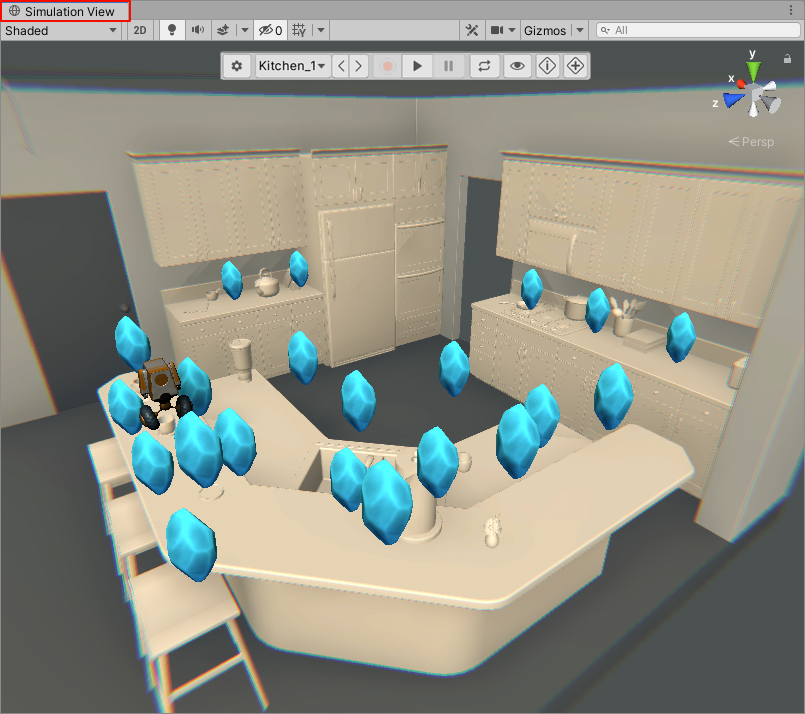
Unity MARS uses the Simulation View to test your content against synthetic or recorded world-tracked environments, such as rooms with surfaces and other features. This reduces the need for you to compile your app to a device and test it in the real world while you iterate. The screenshot above shows an example of how virtual content is placed in the real world.
Open the Simulation view from Unity's main menu: Window > MARS > Simulation View.
You can also access video streams (both live and recorded) inside the Simulation View for use with facemask workflows. This feature is only available if you have installed compatible third-party face tracking plug-ins. If you're interested in face tracking, contact the Unity MARS team directly at mars@unity3d.com.
Device View
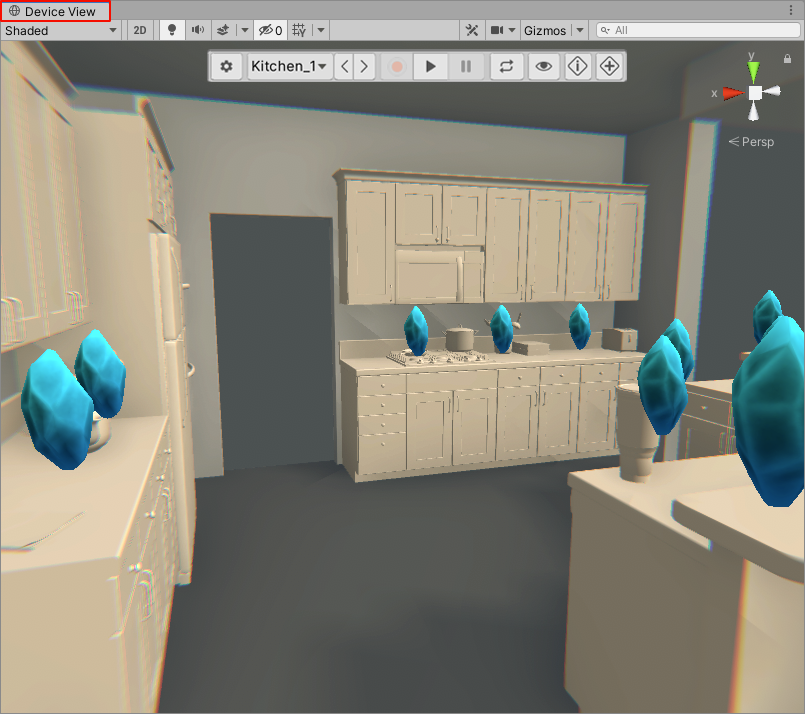
The Device View is a sub-mode of the Simulation View. You can use it to test your app from the perspective of a simulated camera. The MARS Database populates as simulated data comes into view. Think about the Device View workflow like holding or wearing an AR device in the real world and seeing content appear as you scan or navigate your environment.
You can switch to the Device View from the Simulation View in two ways:
- From Unity's main menu, go to Window > MARS > Device View
- From the Simulation View toolbar, click the ... menu, then select View Type > Device (Camera controls).
To navigate your selected environment in this view, click the Play button on the Device View control panel to start the simulation.
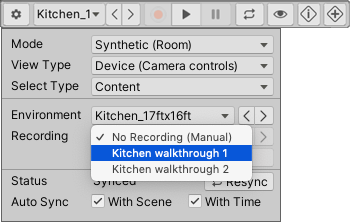
If you don't select a Recording in the control panel, you can drive the camera manually. To control the camera:
- Right-click inside the Device View and drag the mouse to turn.
- Use the WASD keys to move the camera.
- Hold the right mouse button and use Q and E to move the camera up and down.
- Hold Shift to move faster.
Note: If the Play button isn't active, you can't move the camera in the Device View.
Recording from the Device View
From the Device View, you can create walkthrough recordings of a simulated environment to test a feature in your Unity MARS app. To create a walkthrough recording, click the red Record button, and start moving the camera around while discovering planes. While you're recording, the Record button turns blue.

To stop the recording, click the Record button again. Unity then prompts you to save your recording as a Timeline Asset. To play back your recorded camera movement, click the ... menu, then select your saved recording from the Recording dropdown list.
Simulation Test Runner
The Simulation Test Runner offers a one-button method to test your content across multiple simulated environments. Unity MARS runs each simulation and captures a screenshot of the result into the Simulation Test Runner window, along with a count of matched and unmatched queries in that environment. This is useful to quickly see how your AR content appears in several environments.
Open the Simulation Test Runner from Unity's main menu: Window > MARS > Sim Test Runner.

Simulation Settings
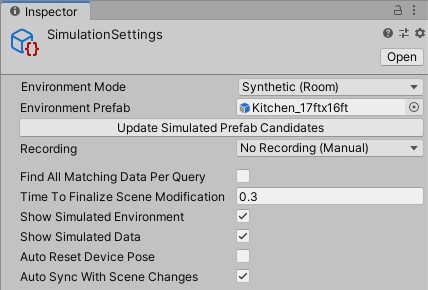
Use the Simulation Settings to make advanced changes via the Inspector. You can access some of these settings from the cog icon in the Simulation View menu bar, but the Simulation Settings panel offers additional settings that affect camera placement and query evaluation.
Open the Simulation Settings panel from Unity's main menu: Window > MARS > Simulation Settings.
MARS Templates
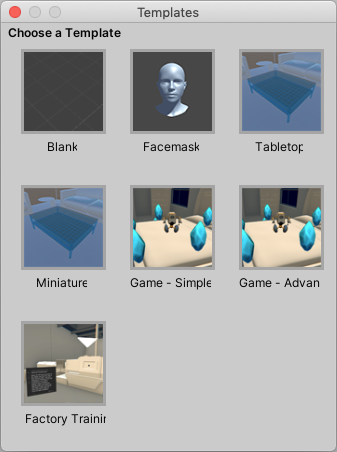
Templates are convenient ways to get started with building AR apps. They contain several GameObjects with preset settings that are fundamental for basic AR apps.
Currently, Unity MARS provides four basic templates and more advanced starter templates:
- A Blank template that contains a point cloud and plane visualizers to get visual queues when scanning the environment, and an empty Proxy
- A Facemask template for face tracking
- A Tabletop template and a Miniature template that contain a Proxy Group with basic rules for detecting a table that is within a range from the floor
- A Simple Game template and an Advanced Game template, which sets up a basic platforming character that can run and jump all over the detected world. The advanced scene uses more specialized layout techniques to ensure objects are not overlapping. Open the Templates window from Unity's main menu: Window > MARS > Choose Template, then select the template you want to work with.
- A Training template. This includes functionality to guide a user through a step-by-step process. Customize and extend by duplicating and modifying the objects. The default example is designed to work in the factory example environment.
MARS GameObject menu
If you don't want to have the MARS Panel open, you can also quickly access the main MARS entities through the Game Object sub-menu. From Unity's main menu, go to GameObject > MARS.
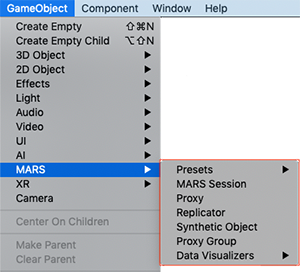
Use this menu to add MARS objects to your Project. This includes Proxies and synthetic objects, as well as other entities like data visualizers.