Rules workflow
The Rules workflow describes AR layout and behavior concisely in plain language. This simplified, dedicated UI provides a clear starting point for new users, and also a central authoring experience for more advanced MARS functionality.
The Rules view provides a plain-language description of the expected real world environment and the AR content to populate. For example, "On every horizontal surface, create grass", or "On an image marker, show UI".
In the example "On every horizontal surface, create grass", the functionality is defined internally in MARS using a hierarchy of objects: a Replicator ("On every"), its child Proxy ("horizontal surface"), and its child content ("create grass").
Getting started with Rules
To use the Rules workflow, open the Proxy Rule Set window from Unity's main menu: Window > MARS > Proxy Rule Set. It is recommended to also have the Scene view and MARS Simulation view visible.
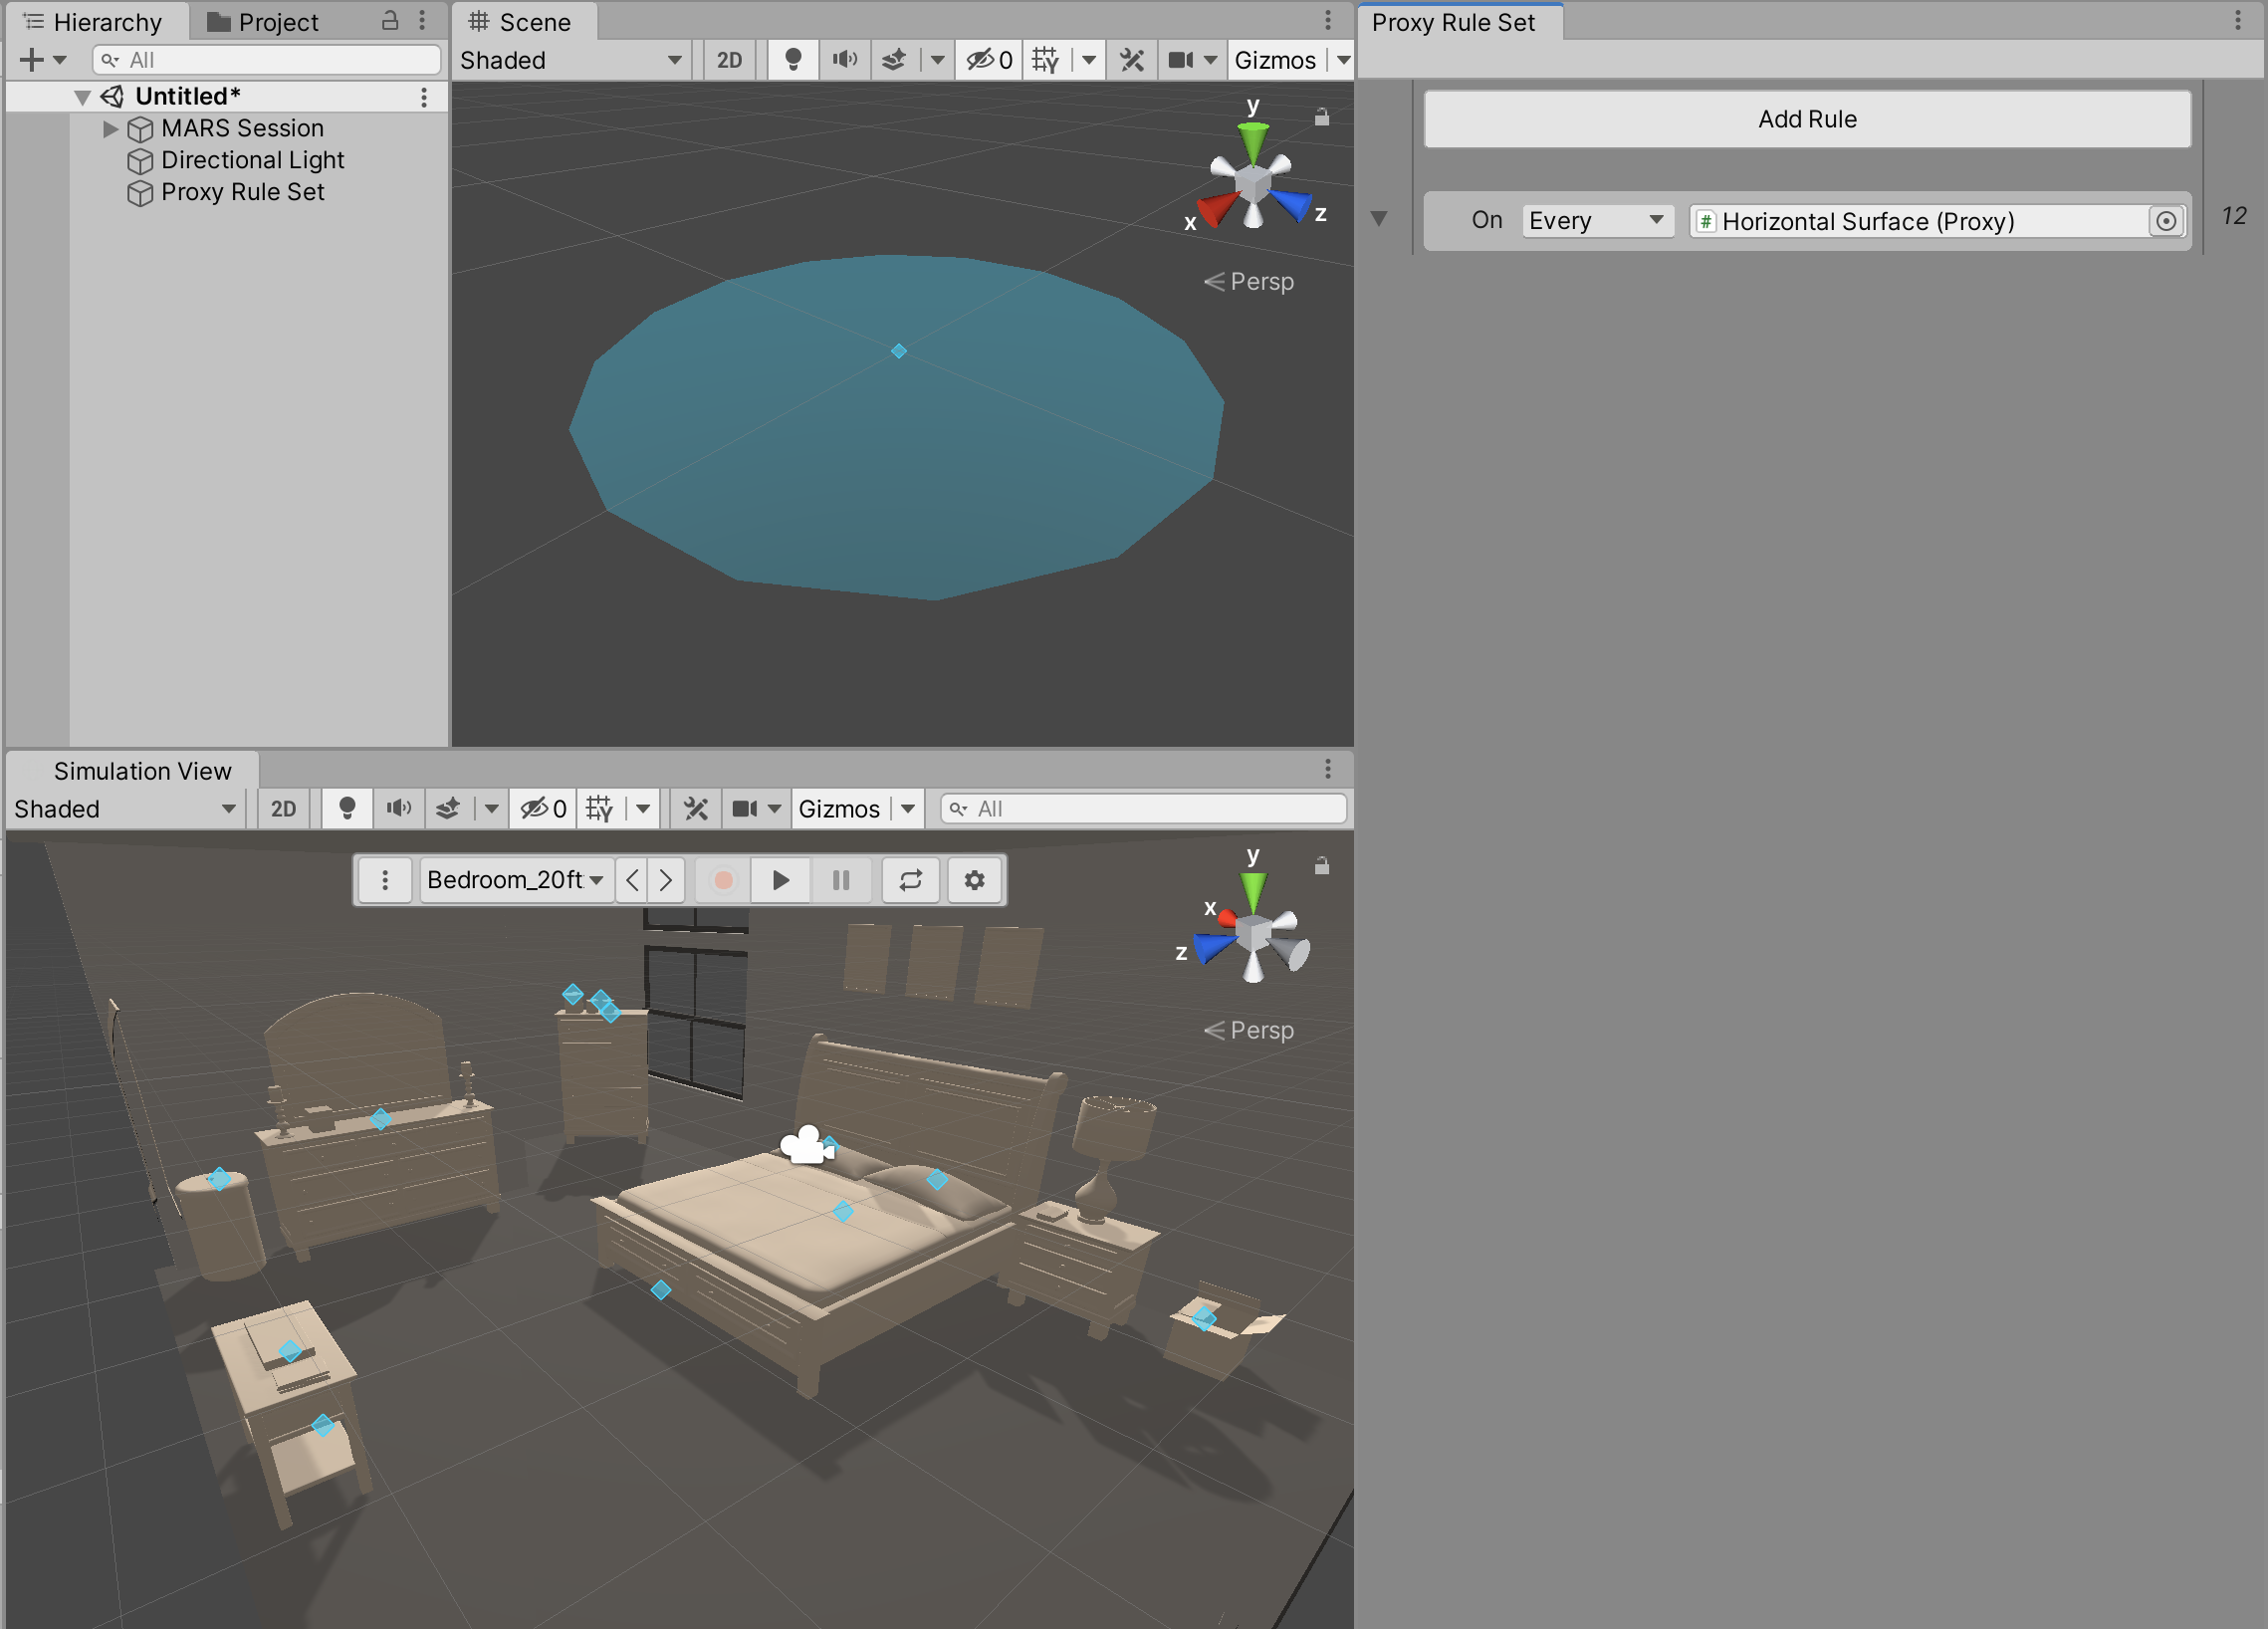
To create your first rule, click the Add Rule button. By default, MARS will create a rule that reads "On Every Horizontal Surface" and contains no content. You will see the plane Proxy visualizer in the Scene view, and see generic Proxy gizmos on every matched surface in the Simulation view.
There are a number of ways to add content to this rule:
- If you hover your mouse to the right side of the rule row, a + button will appear. Click this button to open the Add Content menu.

- If you hover your mouse under the rule row, a yellow bar will appear. Click this bar to open the Add Content menu.

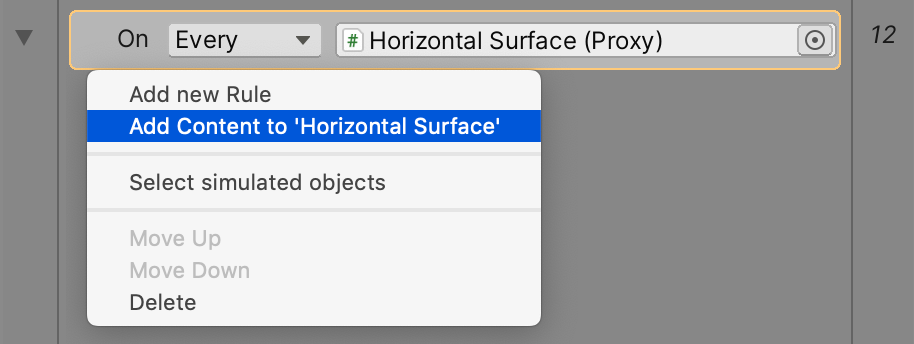
- Right-click anywhere on the rule row, and from the context menu, select Add Content to 'Horizontal Surface'.
- Click the rule row to select it and press the spacebar. Any of these options will open the Add Content menu.
The default options in the Add Content menu are:
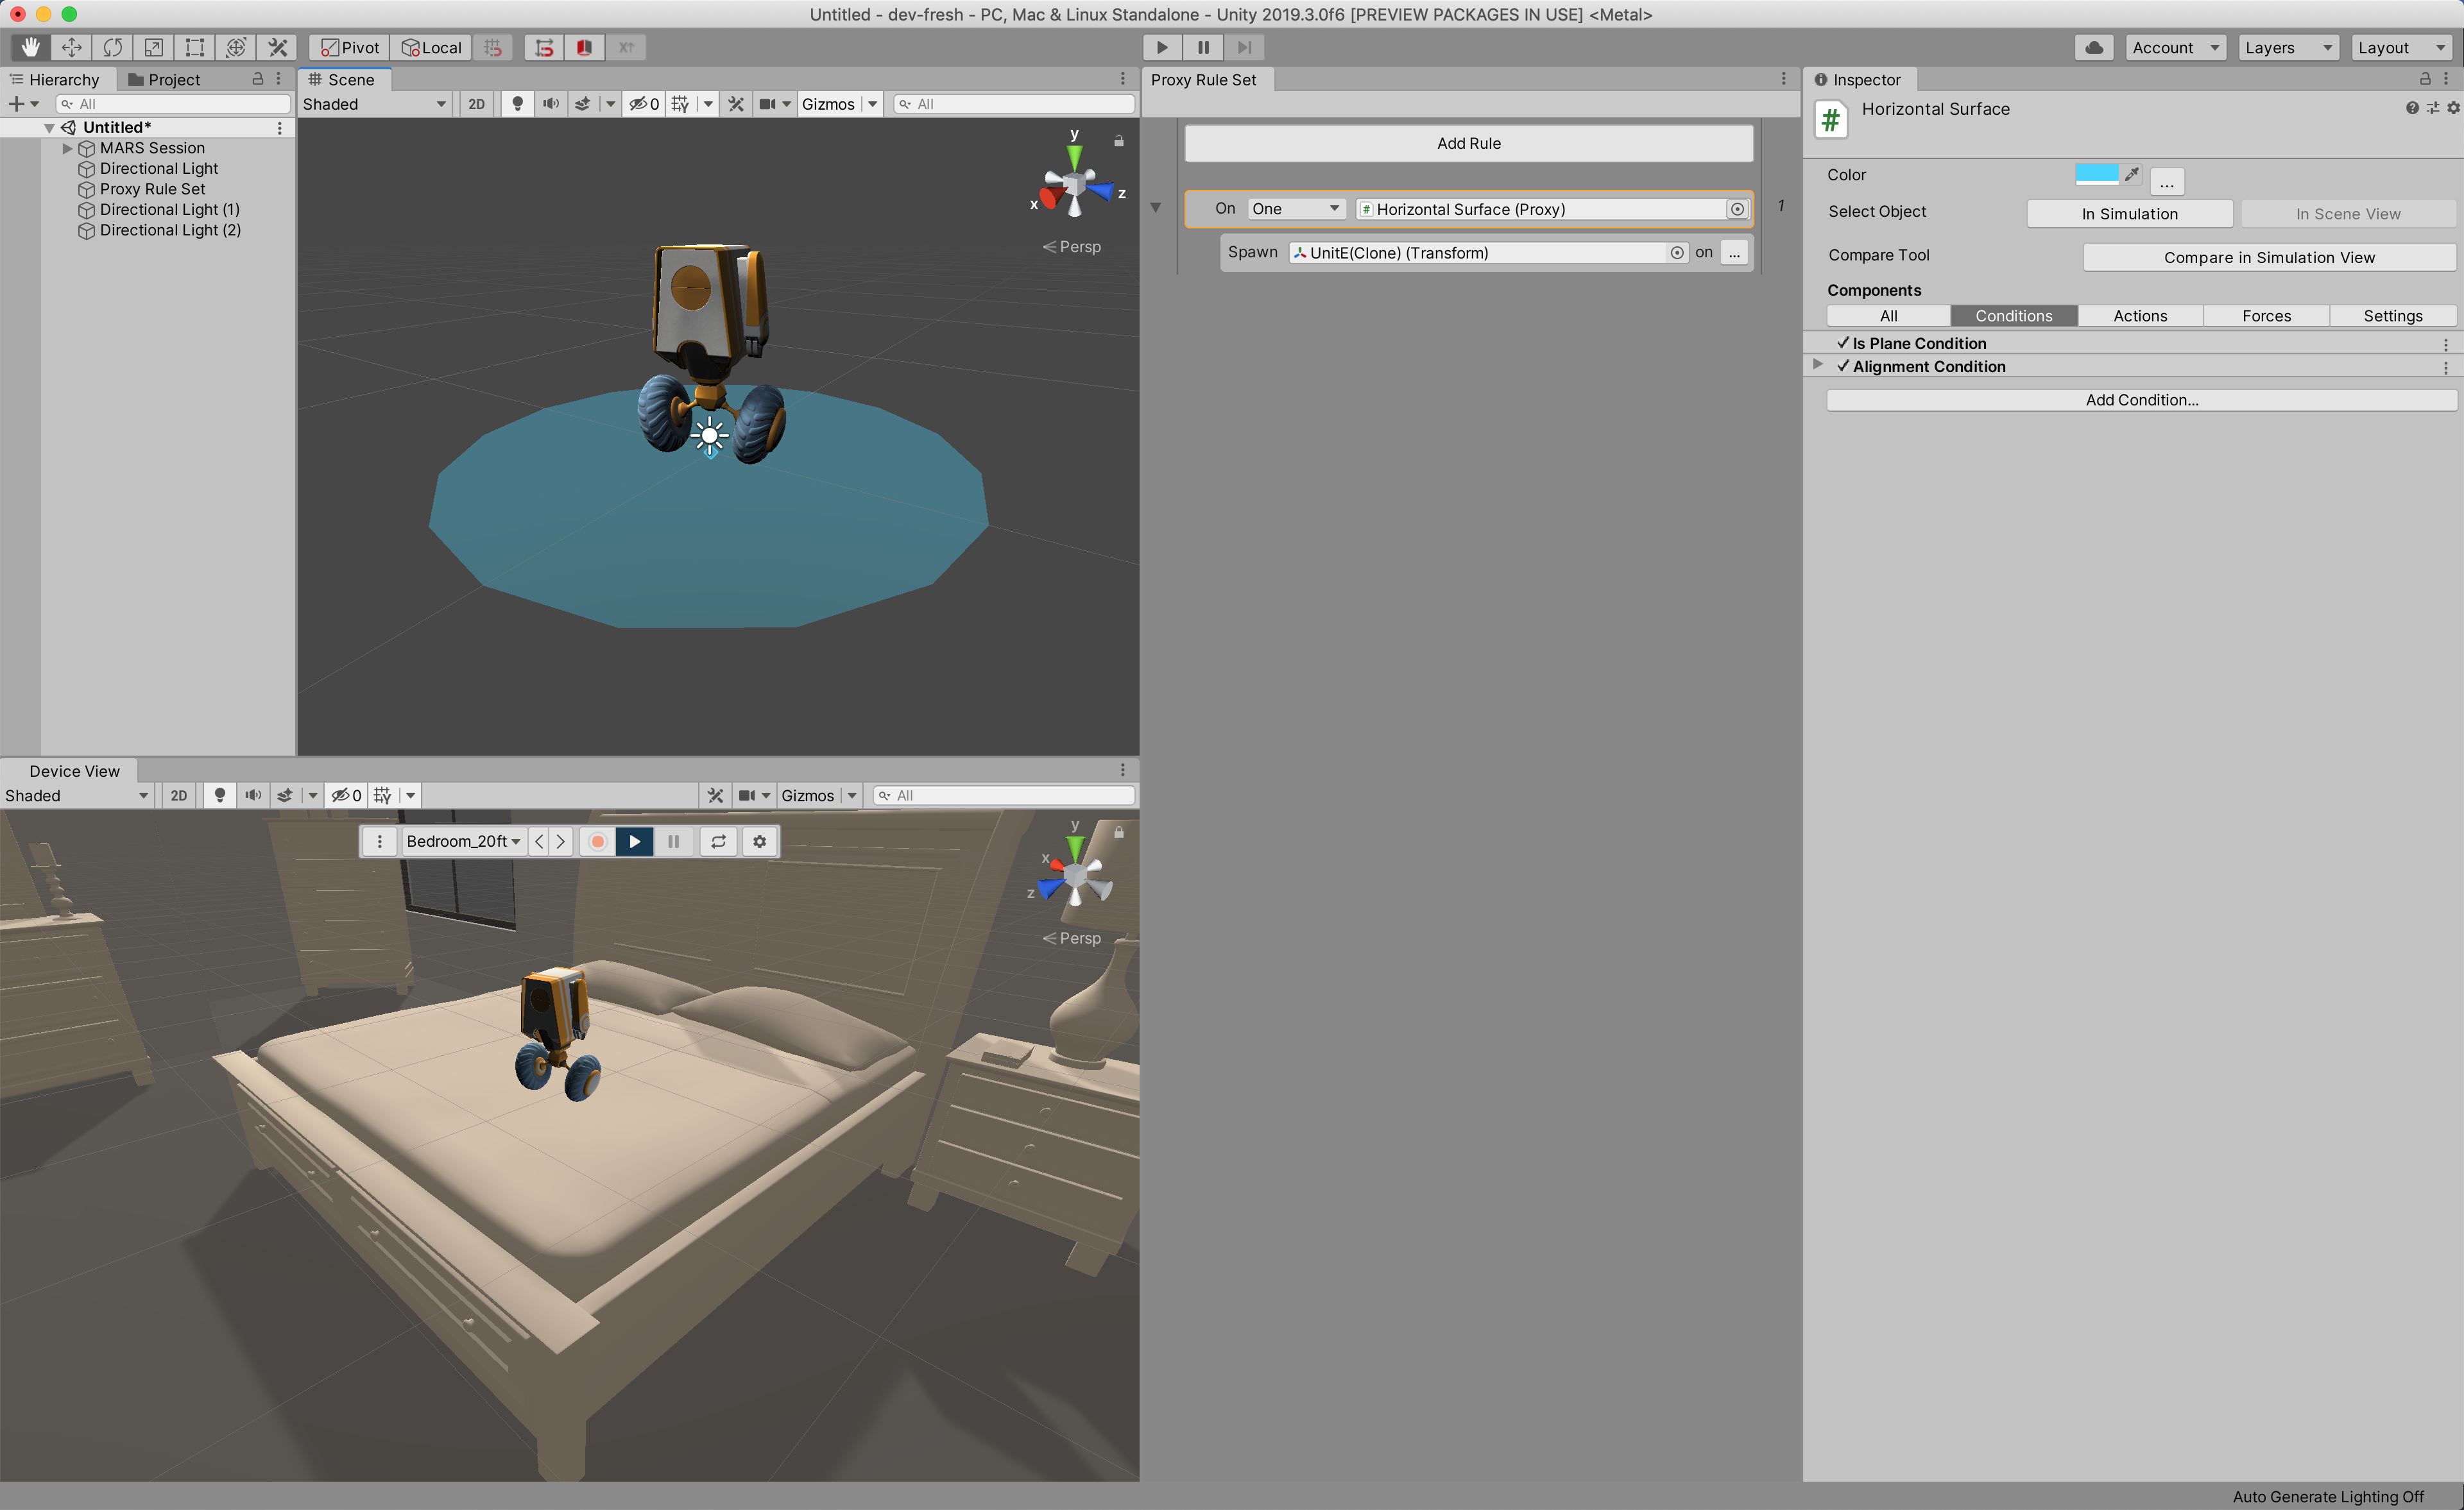
- Spawn Object: Adds a 'Spawn' row to the rule. This is a GameObject that will be created when your specified Proxy (by default, a Horizontal Surface) is found by the AR device or in simulation.
- Build Surface: Adds a 'Paint' row to the rule. This is an object configured to create a mesh using the surface data found by the device or simulation, and apply the specified material.

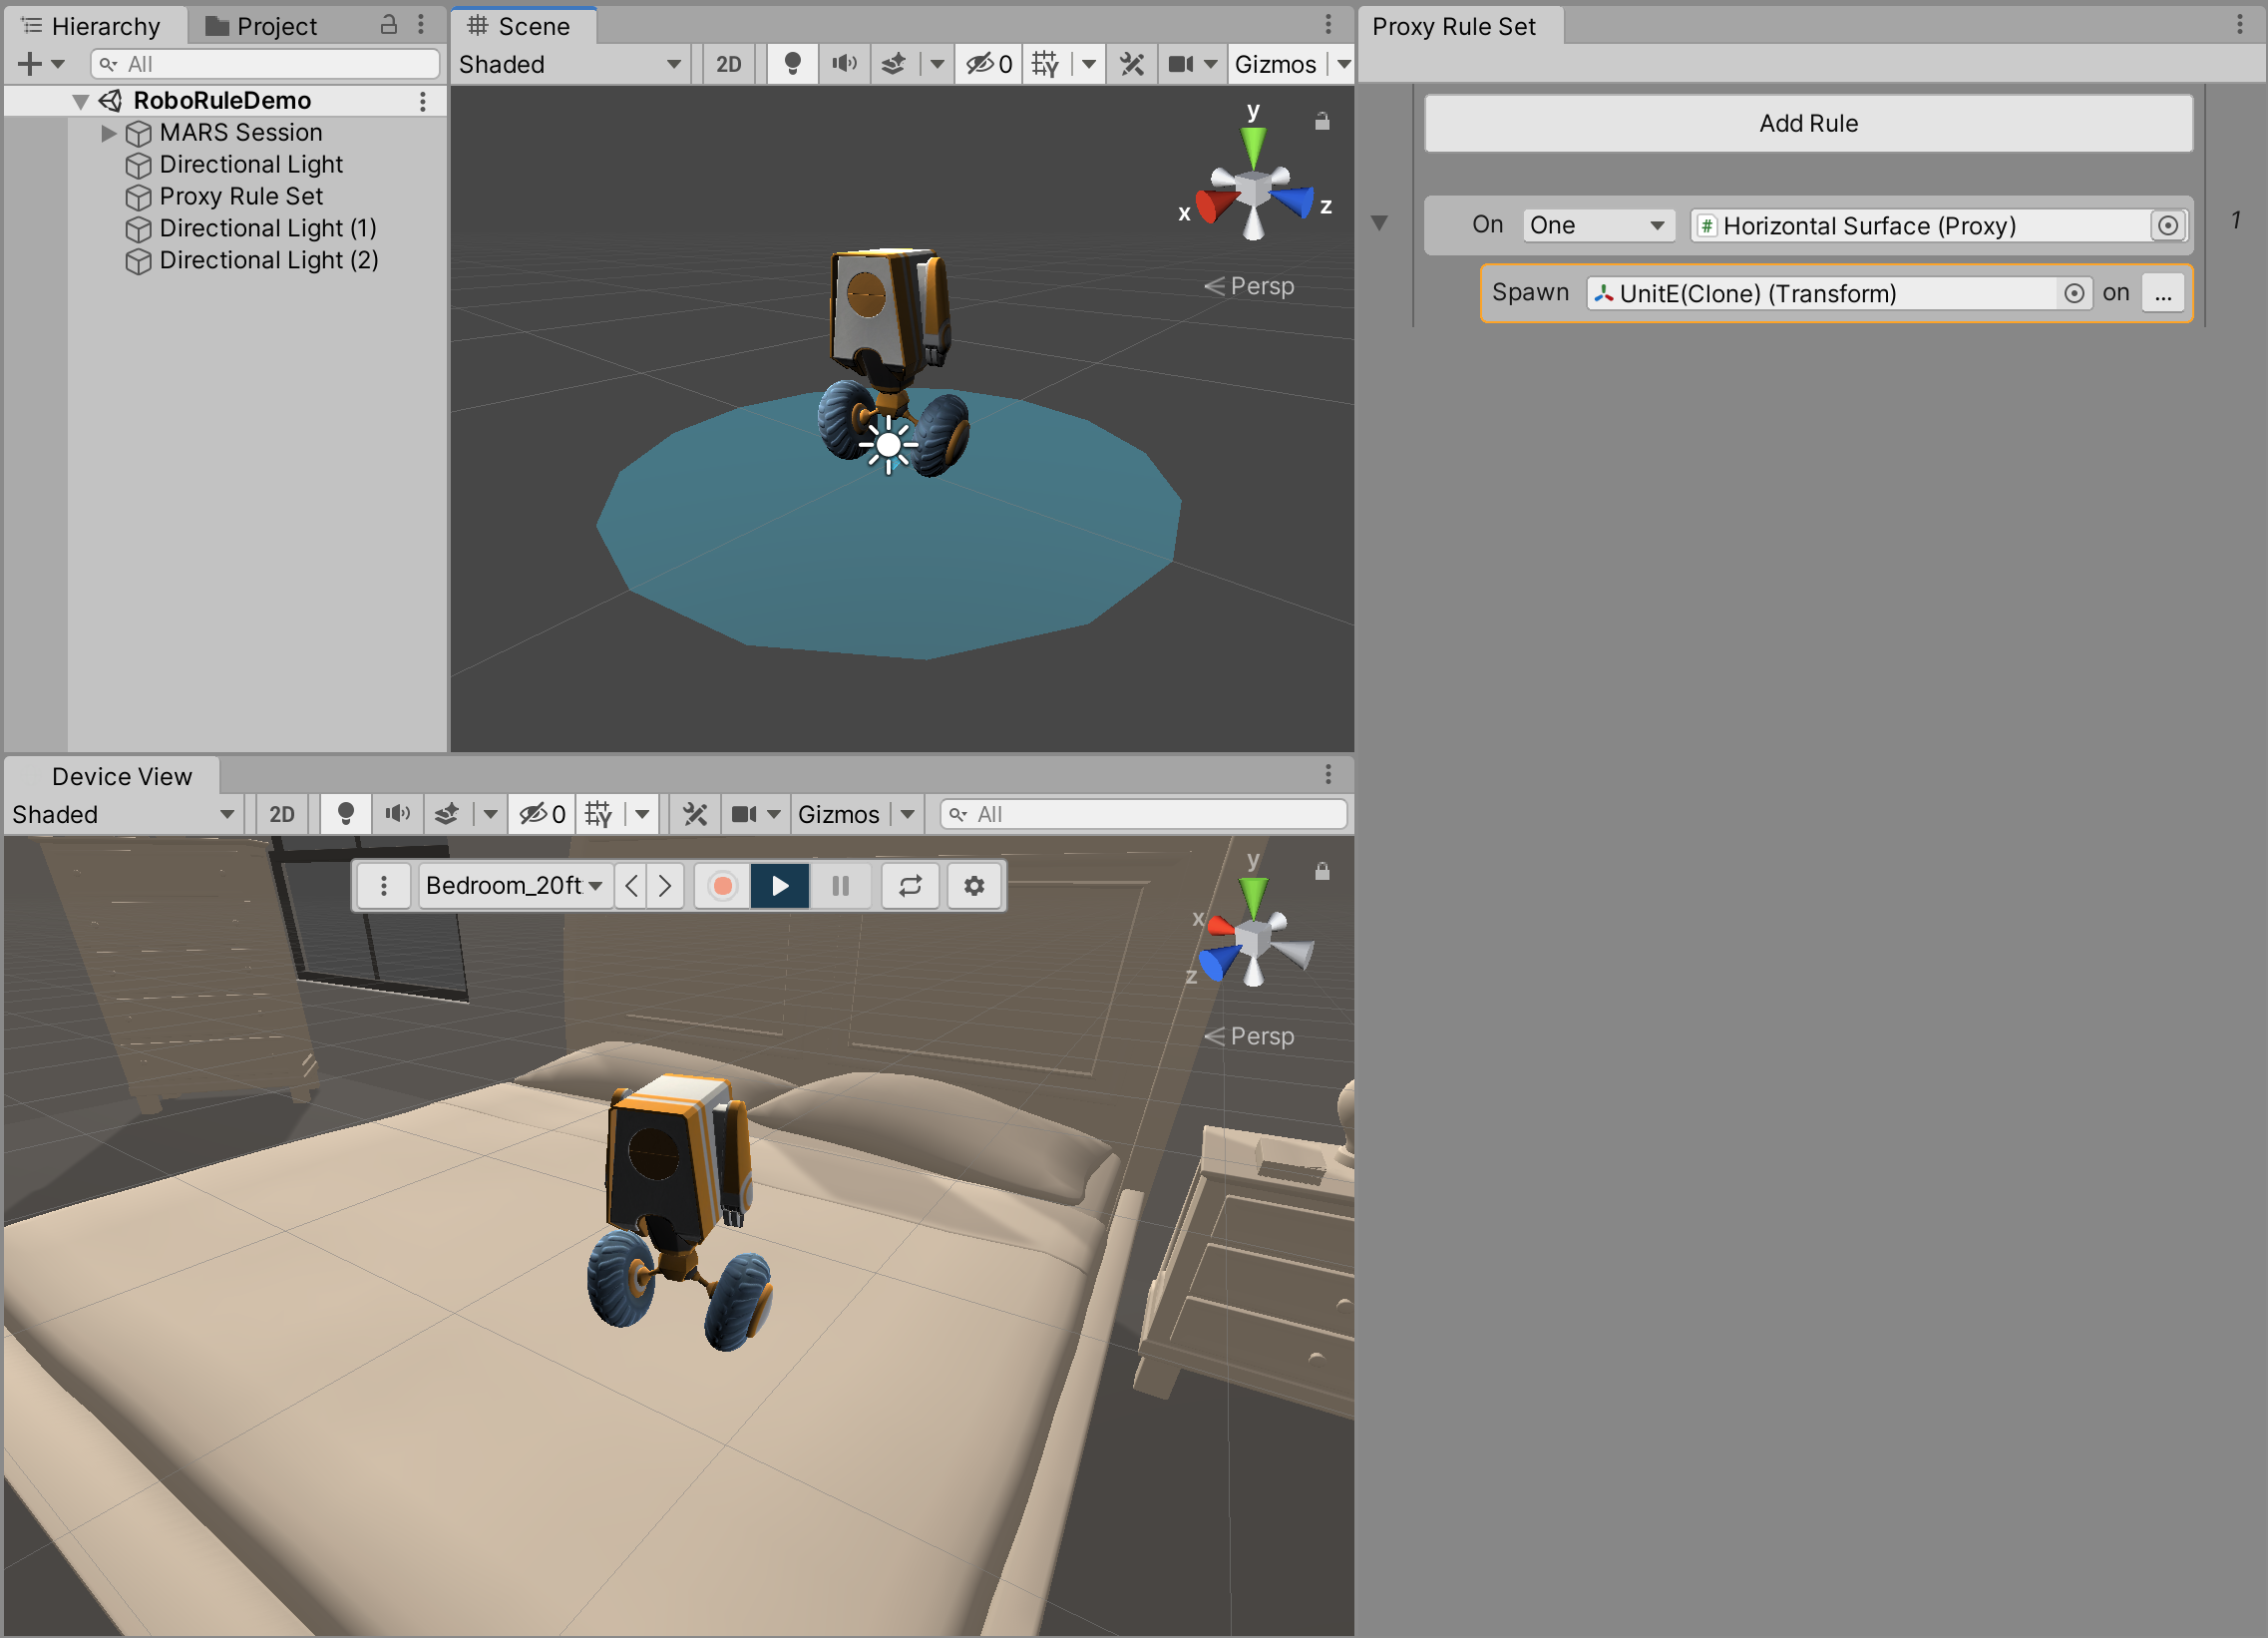
With either (or both) of these content options configured, you will see your content display in the Simulation view where the rule is matched.
Changing match count
To change the maximum number of instances that will be found, change the match dropdown. The options are:
- Every, which will match every available instance of your Proxy.
- One, which will spawn exactly one instance of your Proxy (if one available match exists).
- Up To, in which you can set a specific maximum match count in a field after the dropdown.

Changing Proxy type
You can change the Proxy field in the rule to change what kind of Proxy this rule will seek. You can do this in one of several ways:
- Use the selector button in the Proxy field to open a pop-up window where you can select from the preset Proxies. Note that these options are populated from the MARS Panel's Create section.
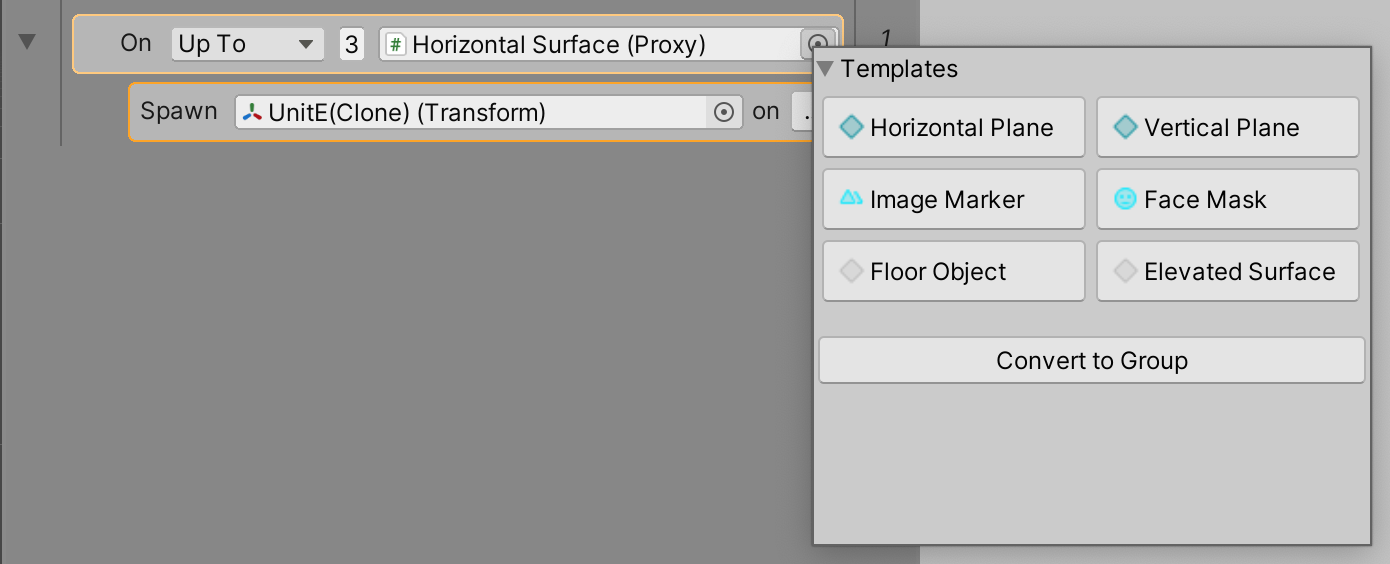
- If you already have a Prefab of a Proxy you want to use, drag and drop that Prefab from your Project view into the Proxy field in this rule.

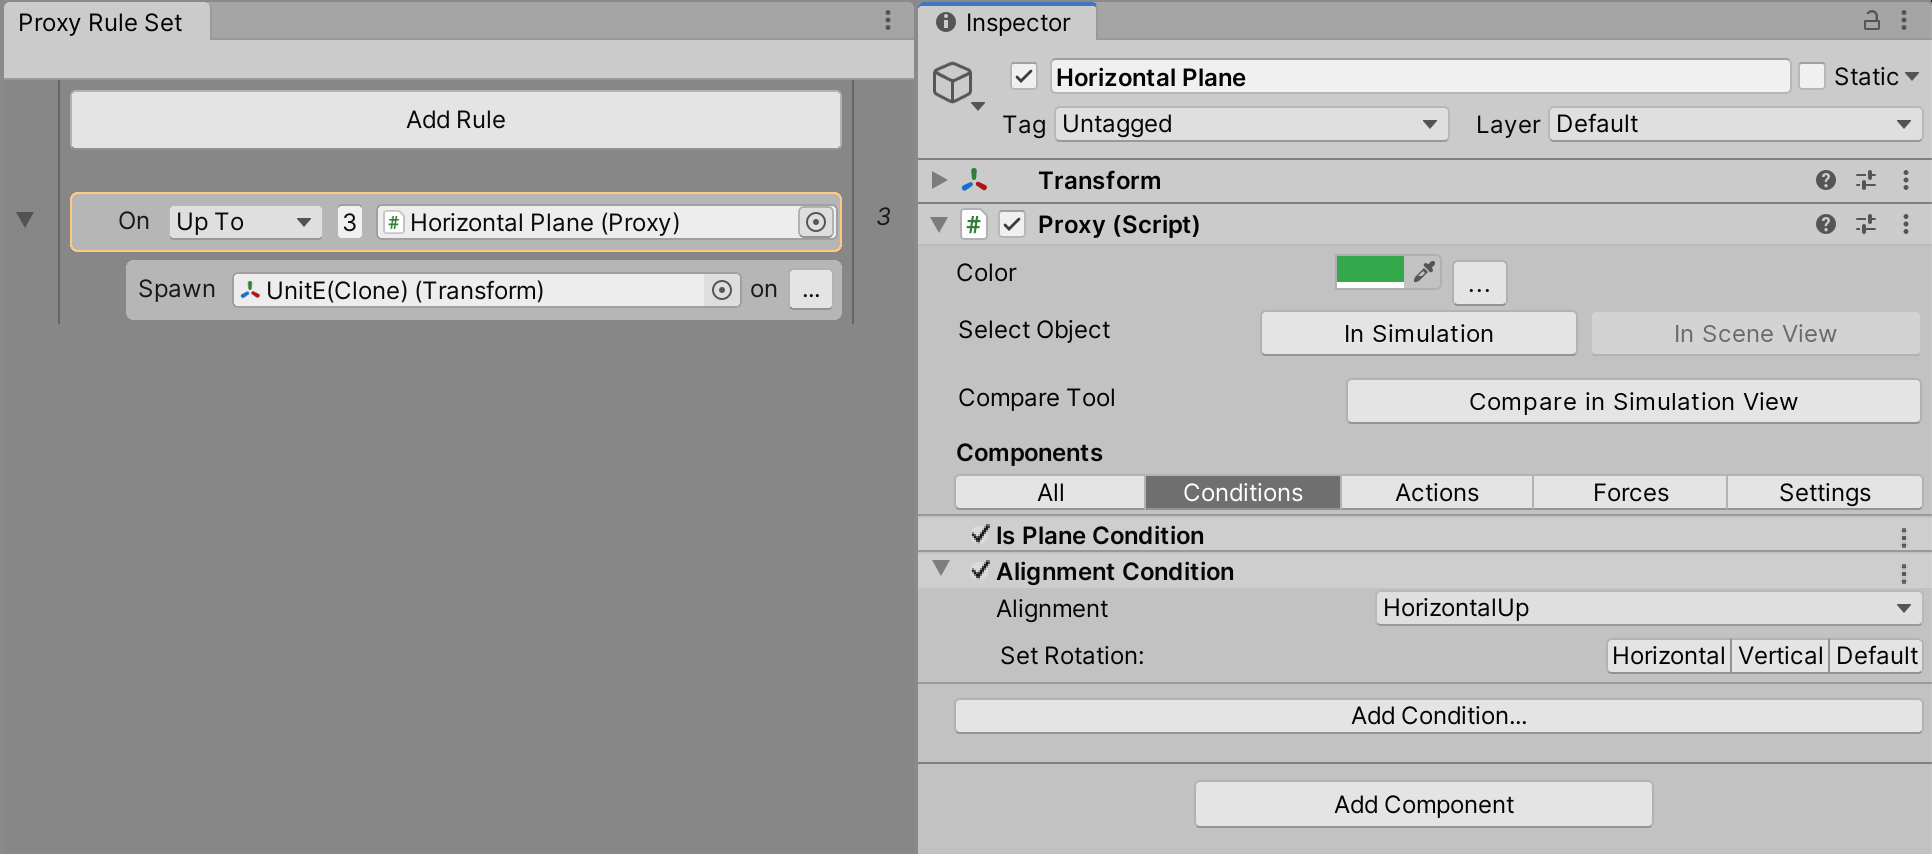
- You can also modify the rule's current Proxy without replacing it. To do this, select the rule row, then modify the Proxy in the Inspector.
Adding actions
'Spawn' content supports rule actions. Add actions to a 'Spawn' row using any of the same methods for adding Content to a rule:
- Hover over and click the + button to the right of the 'Spawn' row.
- Hover over and click the yellow bar below the 'Spawn' row.
- Right-click the 'Spawn' row and select Add Action to 'Content'.
- Select the 'Spawn' row and press the spacebar.
Any of these methods will open the Content Actions menu, from which you can pick the action to add.
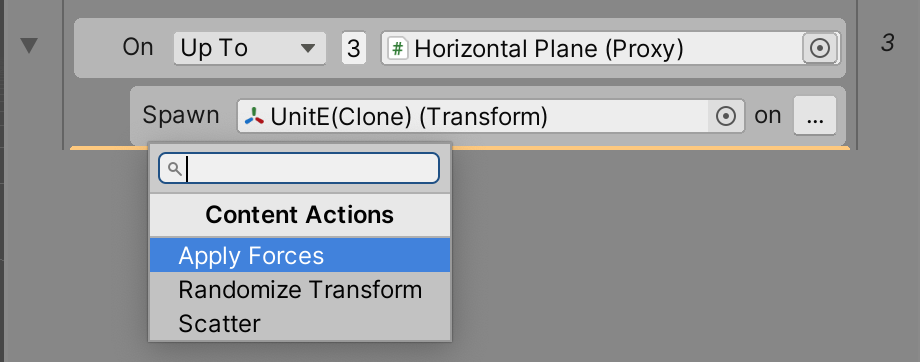
This action displays as an indented row below the 'Spawn' row. Selecting this action row will display settings for the action in the Inspector.

'Build Surface' content does not support actions.
Proxy Groups
Proxy Groups are a powerful MARS feature that lets you query for multiple objects in the environment and set conditions about this set of objects, such as required distance between objects. You can read more about Groups here.
The Rules workflow provides a simple way to set up and modify groups.
Converting a Proxy to a Group
To convert a single Proxy into a Proxy Group, click the selector button in the Proxy field, and select Convert to Group in the pop-up window that appears.
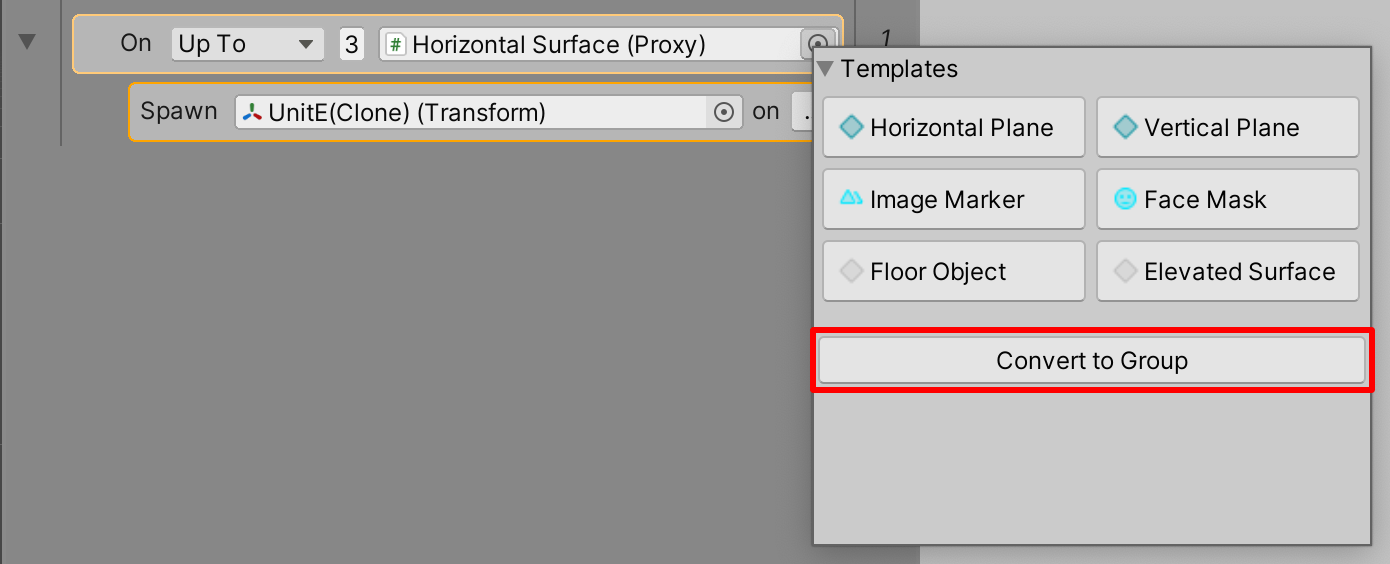
The rule will now display "New Group" in its object field, as well as an Edit Group button. Click this button to see the group in isolation in the Rules view. To return to the full rules list, click the back arrow in the window's toolbar.
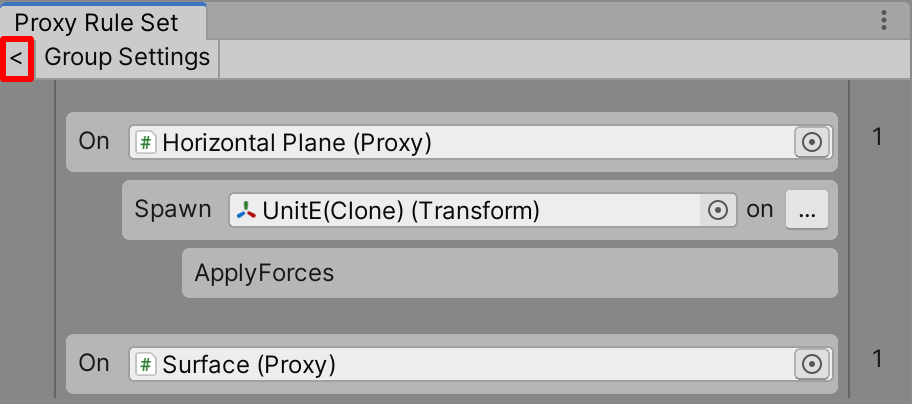
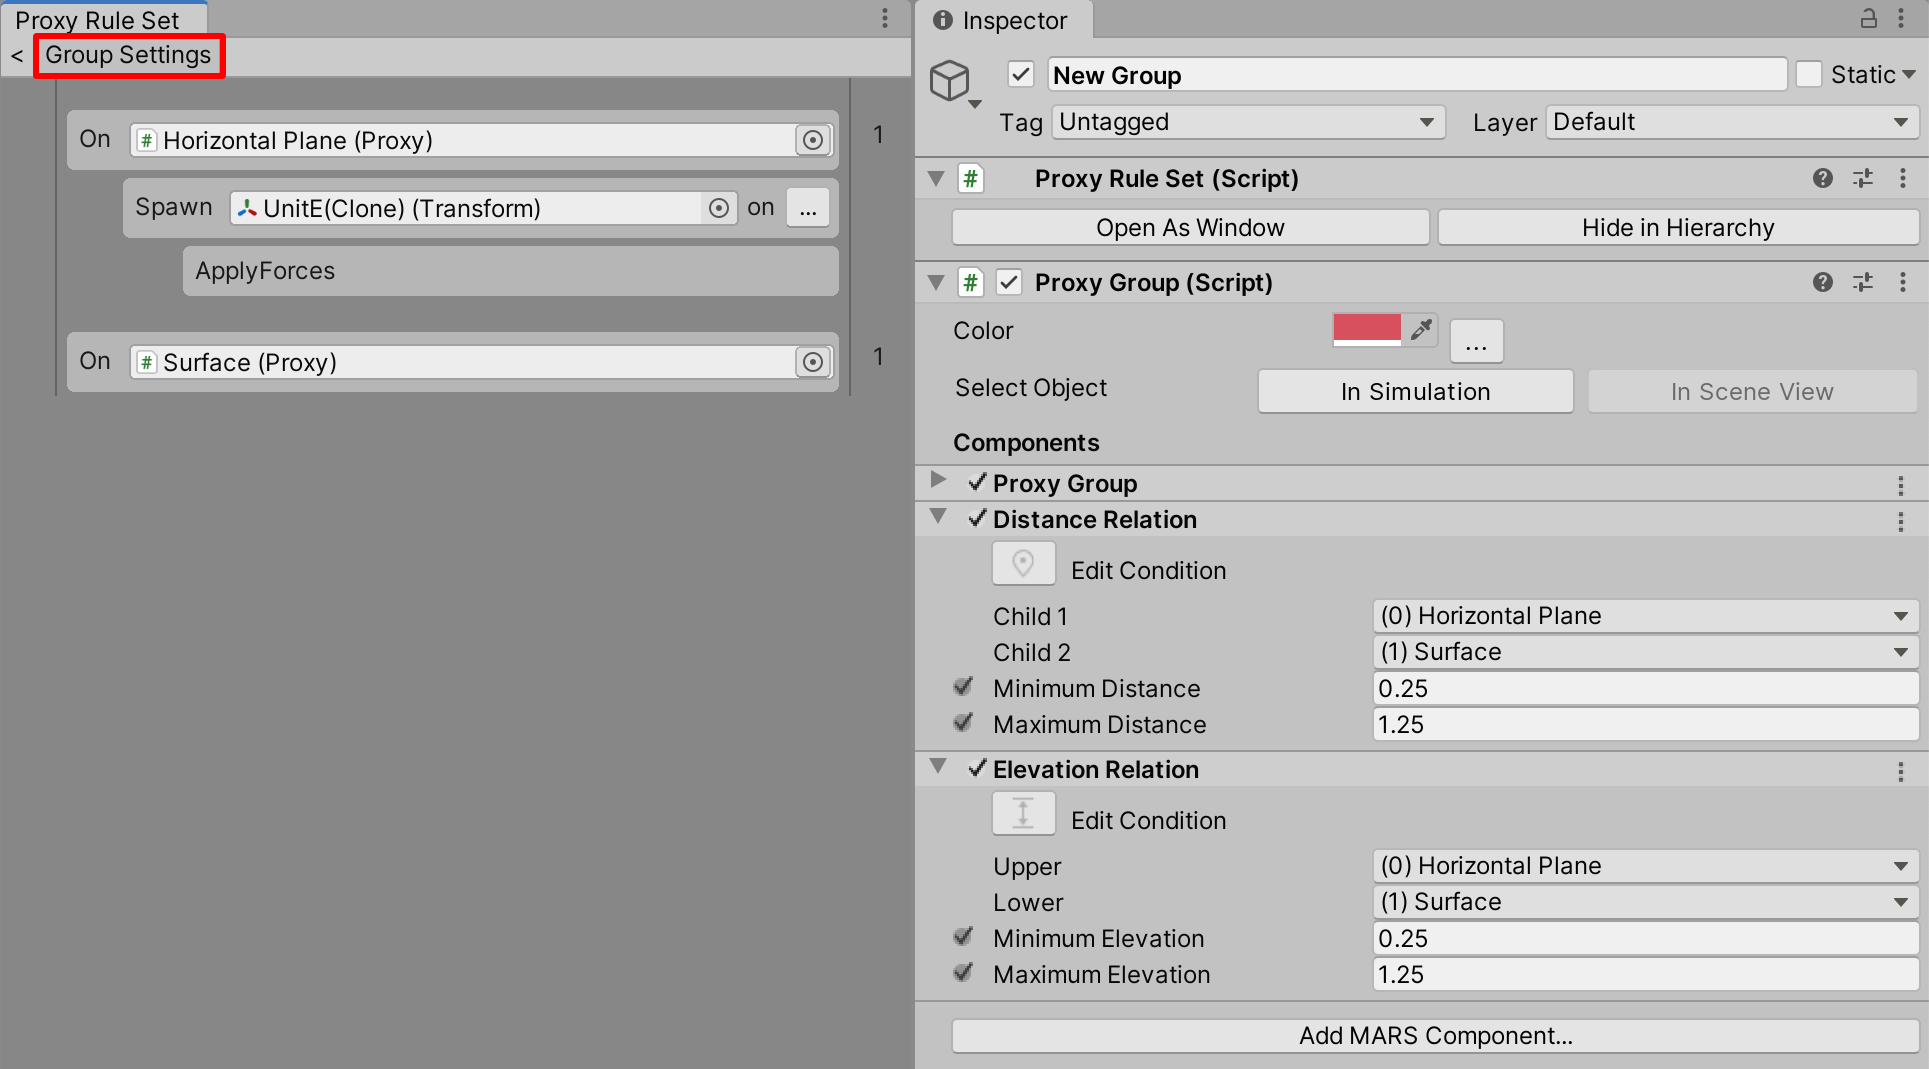
The group contains two objects: the Proxy you initially converted into this group, and a new Proxy (by default, a simple 'Surface' Proxy). You can adjust either of these Proxies as before. However, Replicator behavior (match on Every/Up To/One) is not available within a group.
To adjust settings for the entire group, including adding Relations, click the Group Settings button in the toolbar.
Landmarks
The Rules workflow also enables you to set up Landmarks. Landmarks are spatial data such as points, edges, or polygons, that break down data from the real world into useful parts for anchoring or aligning virtual content. See the Landmarks documentation for more information.
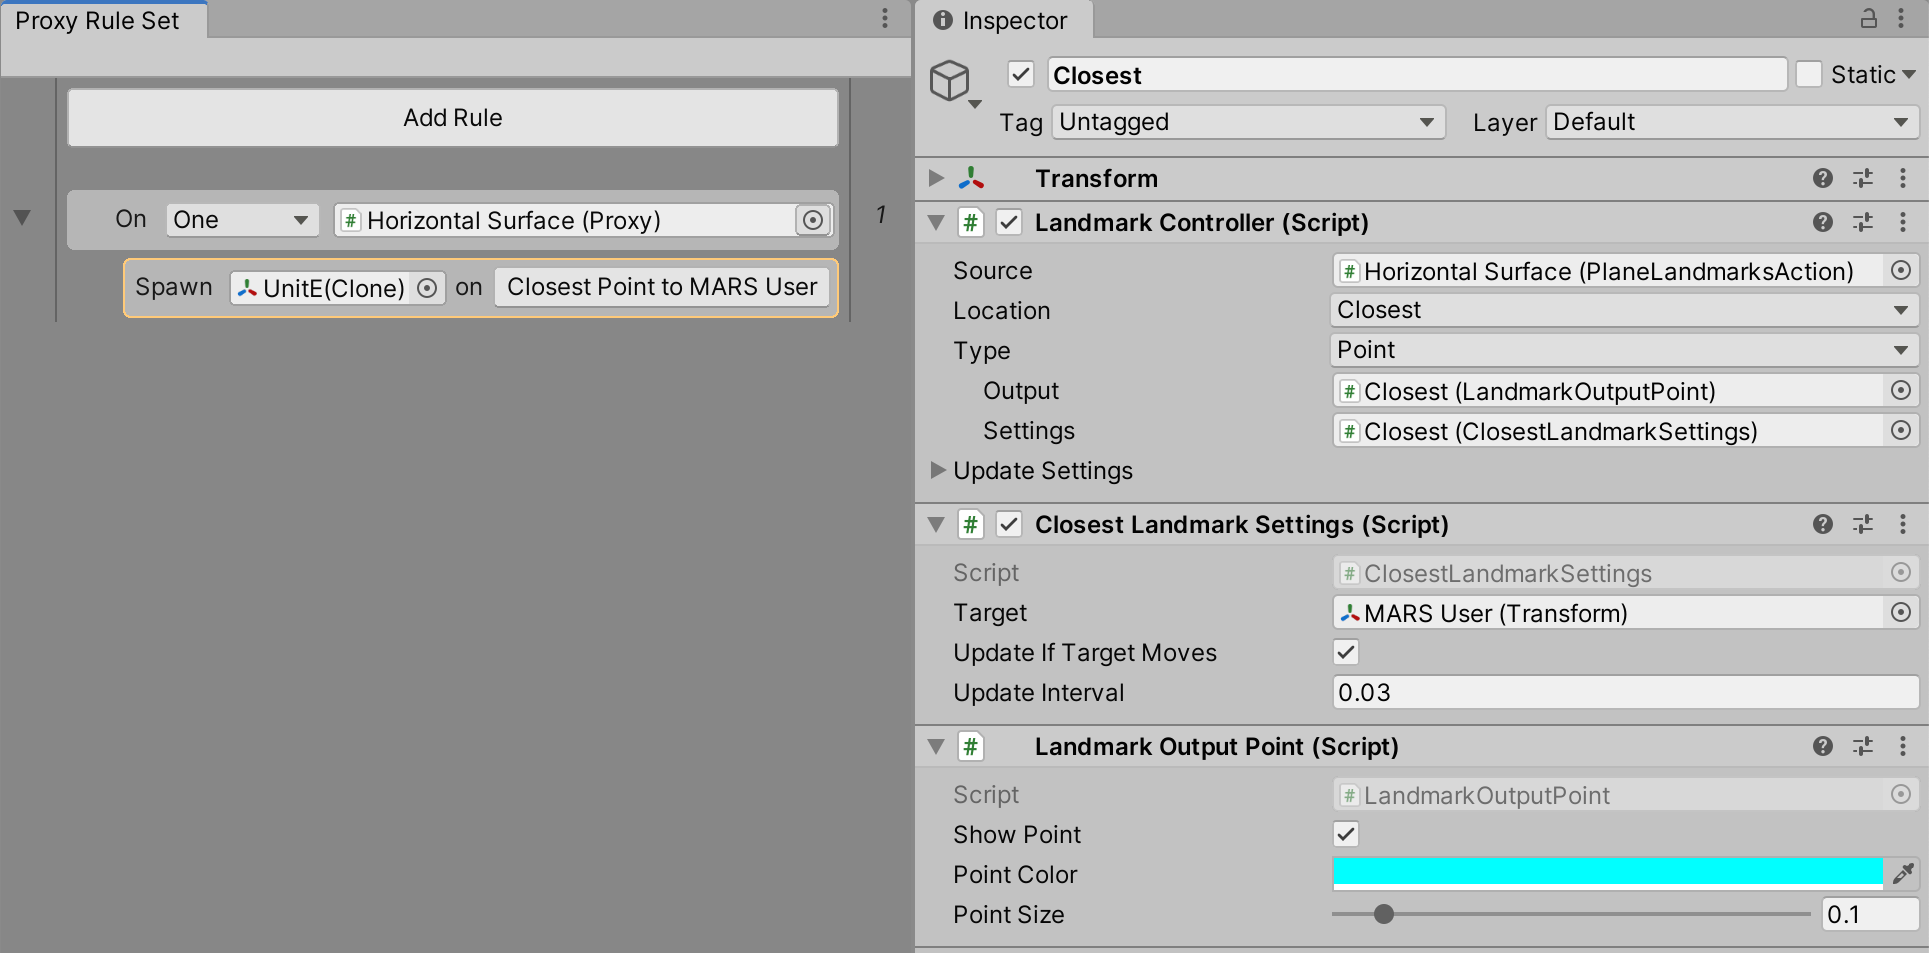
You can configured landmarks from 'Spawn' content rows. Each of these rows ends in a "on ..." button. Click the "..." button to open a context menu with available landmark types.

For example, if you select Closest > Point, a Landmark will be configured to target the Main Camera by default, meaning that your content will spawn on the closest point of that Proxy to the camera. To change the target object, select the 'Spawn' content row, and in the Inspector, change the Target field of Closest Landmark Settings.
Working with the backing objects
The Rules view presents the MARS scene data in a specialized format and convenient workflow, but the underlying MARS objects are still the same scene objects set up in the Hierarchy. When you create MARS content in the Rules workflow, these objects are hidden by default (using HideFlags), but you can re-enable them in the Hierarchy. This can be useful for more complex or unusual scene setups, or just as a way to learn about how the MARS object structure works. However, note that changes made to the exposed Hierarchy might cause instability or unexpected behavior in the Rules view. Therefore, it is recommended that you use this conversion to Hierarchy workflow as a one-way transition.
To display the ruleset as Hierarchy objects, select the Proxy Rule Set object in your Hierarchy, and in the inspector, click the Show In Hierarchy button.