Import your product
Before you can begin setting up the configurator, you must import your product (as an Asset) into Unity.
For a video demonstration of how to import a product into Unity Forma, see the Unity Resources video on Importing a Product to Unity Forma
Supported formats
Unity Forma lets you import assets such as 3D models, materials, and environments to build your configurator. The Pixyz Plugin Unity Forma can support more than 35 different 3D file formats.
Unity Forma comes with 300 sample materials, but you can also import your own material files (such as AxF and xTex) to create virtual replicas of your products and make them look more realistic.
When you import your product into Unity, the system can use any industry-standard data, structure, or Assets associated with your product to automatically create and organize Variants for your configurator.
Each supported format includes different data about your Asset, so the steps to import your product to Unity can differ.
Use a Unity Prefab to set up your configurator
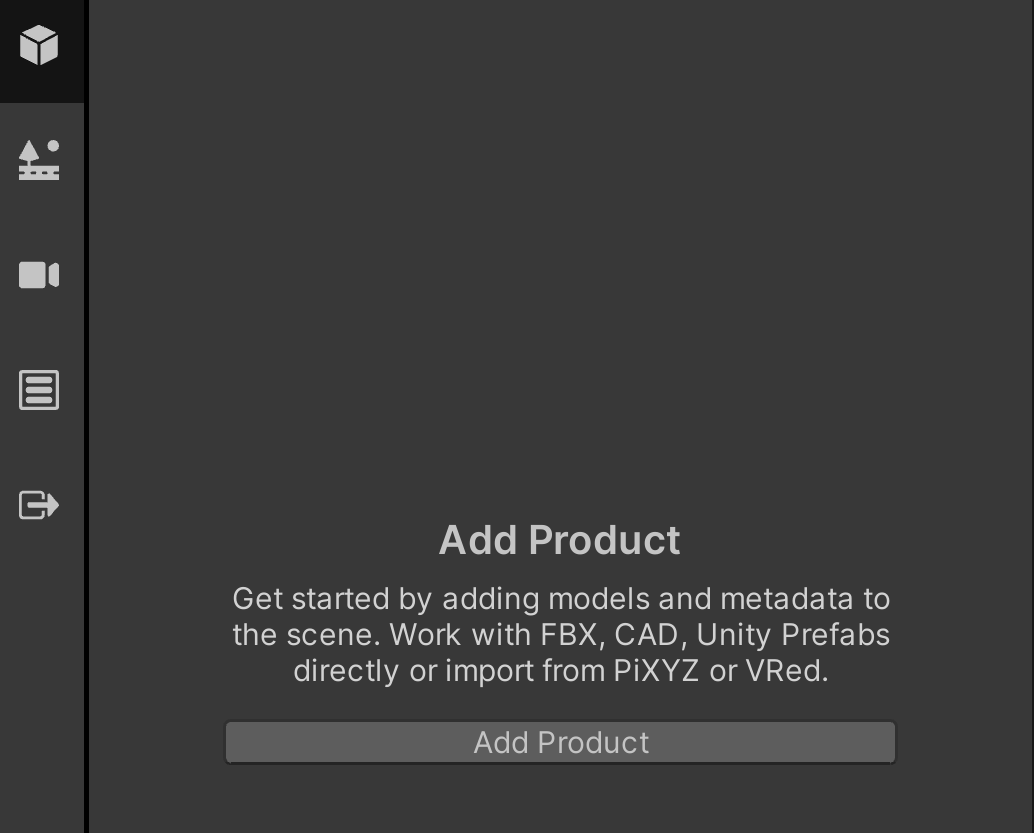
In the Configurator window, select the Product Setup tab.

Select Add Product, and then select Add from Unity project.
Select and open the Prefab you want to import.
Use an FBX file to set up your configurator
Tip: For information about preparing an FBX file that you can import to Unity, see Using FBX files in other applications
In the Configurator window, select Product Setup tab.

Select Add Product and then select Add from File.
Select and open the FBX file you want to import.
Use a Pixyz-supported file to set up your configurator: VRED example
Before you can import a Pixyz-supported file, such as a VRED model, you must install the Pixyz Plugin for Unity and import the VRED model to Pixyz Studio.
For information about installing and using the plugin, see: https://www.pixyz-software.com/plugin/.
To import a Pixyz-supported file into Unity and convert it to a product that you can use for your configurator, you must be in the regular Unity Editor interface.
Converting a Pixyz model into a product that you can use in your configurator involves these activities:
A. Using a Pixyz-specific menu to import the Pixyz model to the Unity Editor.
B. Converting the imported file to a Prefab Asset that you can use in Forma.
C. Importing data from the Prefab Asset to Forma to set up your configurator.
A. Import the Pixyz model to Unity
- To switch to the Unity Editor interface, in the upper left, select Forma and then select Switch Mode.
- In the Unity Editor interface, use the Pixyz menu options to import your VRED model. See Pixyz documentation here. The system converts the Pixyz VRED model into an Asset that you can convert to a Product Prefab in Forma.
B. Convert the imported file to a Unity Prefab Asset
- Switch back to the Forma interface (select Forma > Switch Mode).
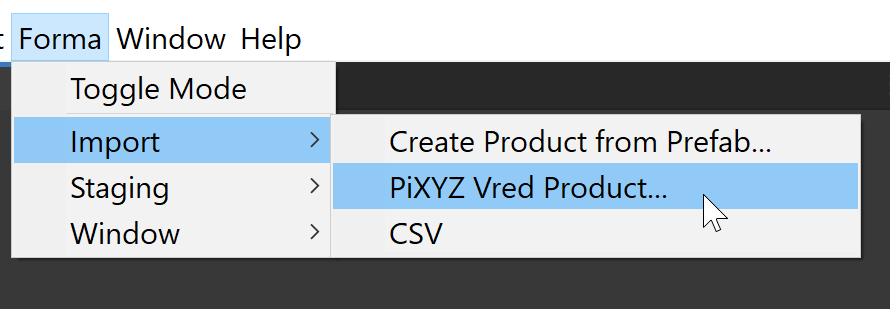
- Select Forma > Import > Pixyz VRED Product.

- Complete the Pixyz VRED Prefab field with your Pixyz VRED Asset.
- Select Import.
C. Import data from the Prefab Asset to Forma
- In the Configurator window, select the Product Setup tab.

- Select Add Product > Add From Unity Project.
- Select and open the Prefab.
After you import your product
After the system imports your files, your product appears in the Scene tab. You can see how the system structured your product in the Product Outline tab.
In the Configurator window, the Product Setup tab appears empty until you set up Variants.