Assembling Configurator Architecture
This information is for developers who want to assemble the different Configurator components as they are structured in the Unity Editor. Getting familiar with the Configurator architecture is useful if you need to better understand the technical details of how the components work together.
Forma is designed to help creators set up Configurators more quickly using a simplified interface (the Forma interface). Building a Configurator in the Unity Editor by assembling the hierarchy manually is more time consuming, but useful to developers who need to support creators in Forma.
Creating a Configurator Manually
To create a Configurator, follow these steps:
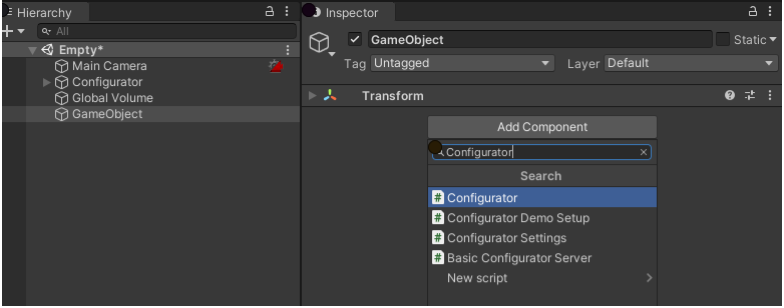
In the Editor, add an empty GameObject to your Scene and name it Configurator.
Add a Configurator component to the GameObject.
When you add a Configurator component to the GameObject, the following are also added by default:- a State Conductor component
- a Product Preview component
- a StagingManager GameObject (as a direct child)
Contains a StagingManager component.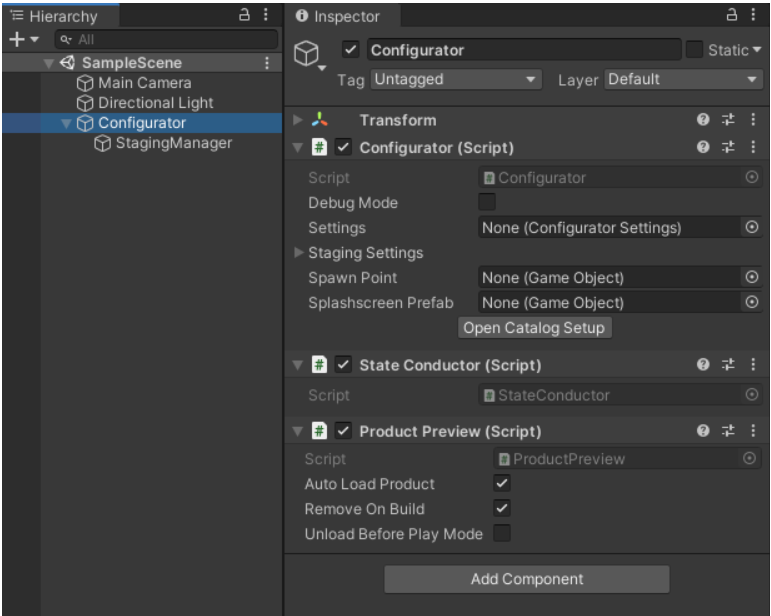
Creating Configurator Settings
To create Configurator settings, follow these steps:
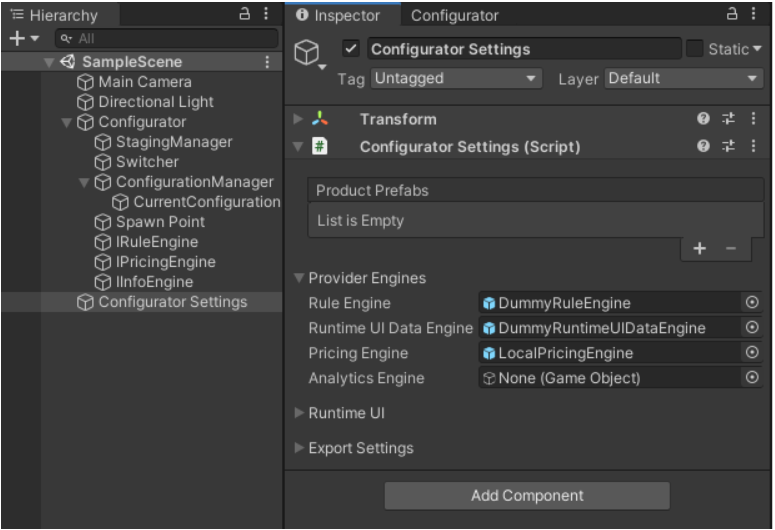
- Add a Configurator Settings component to the Configurator GameObject.
Note: By default, Provider Engine properties in the Configurator Settings component contain default values or links to Prefabs with default Provider Engines. In the Configurator component, select Configurator > Settings to create a link to the Configurator Settings component.
Creating a link to the Configurator Settings component automatically links the Spawn Point property of the Configurator GameObject to the SpawnPoint GameObject. It also adds the following child GameObjects to the Configurator GameObject:- Switcher
Contains a Switcher component - ConfigurationManager
Contains a ConfigurationManager component and the following child GameObject:- CurrentConfiguration
Contains a CurrentConfiguration component.
- CurrentConfiguration
- Spawn Point
- IRuleEngine
Contains a component that the Provider Engines property references under the Configurator Settings GameObject. - IPricingEngine
Contains a component that the Provider Engines property references under the Configurator Settings GameObject. - IInfoEngine
Contains a component that the Provider Engines property references under the Configurator Settings GameObject.
- Switcher
Creating a Product that is compatible with the Configurator
To create a product that will be compatible with Unity Forma, follow these steps:
- Add an empty GameObject and give it a recognizable name. For example, Configurable Product.
- Add your Product Prefab (the Prefab that includes your CAD model) as a child of the Configurable Product GameObject.
- Drag your Configurable Product GameObject into the Project window to make it a GameObject Prefab.
- Remove the Configurable Product prefab from the scene hierarchy.
- Open the Profiles Window from Forma -> Profile Settings in the top bar menu.
- Set the selection to Products.
- From your Project window, drag the Configurable Product GameObject prefab into the right hand subwindow. This will automatically create a product for the Configurable Product and add it to the active profile. If you have Autoload enabled in the Product Preview component, the new product will be loaded into your scene.
Instantiating the Product Without Profiles
- Select the Configurator GameObject and add a Mixed Product Source component.
- In the Inspector, go to Configurator Settings > Product Sources and select +.
Element 0 appears in the list. - Link the new Element 0 to the Mixed Product Source component.
- In the Mixed Product Source > Product Prefabs, select +. A new element appears in the list.
- Link the Product to the new element in the Mixed Product Source.
- If Auto Load is enabled for Product Preview of the Configurator component, the system instantiates the Configurable Product Prefab in your current Scene under Configurator > Spawn Point > Product Spawn Point. Otherwise, use the Product Previews dropdown button and select the added product.