Introduction to the Visual Novel Director sample
About the sample
The Visual Novel Director sample showcases the process of creating a Unity Graph ToolKit graph tool that drives runtime behaviour (executing code in PlayMode or in builds based on the graph).
This sample is a basic graph tool that plays through a typical 'Visual Novel' style game and shows you how to use Graph Toolkit to:
- Build a custom runtime asset from the graph asset using a Scripted Importer
- Bind a runtime asset to your Graph Toolkit graph asset
Note
This sample is intended as a learning resource and is not designed to function as a fully-featured visual novel game. Certain architectural decisions were made to keep the sample simple and focused on demonstrating key concepts.
Thanks to Olivia You-Tuon (@shumijin) for the visual novel assets used in this sample.
About the Visual Novel Director graph tool
With the Visual Novel Director, you can use a graph to direct a visual novel at runtime.
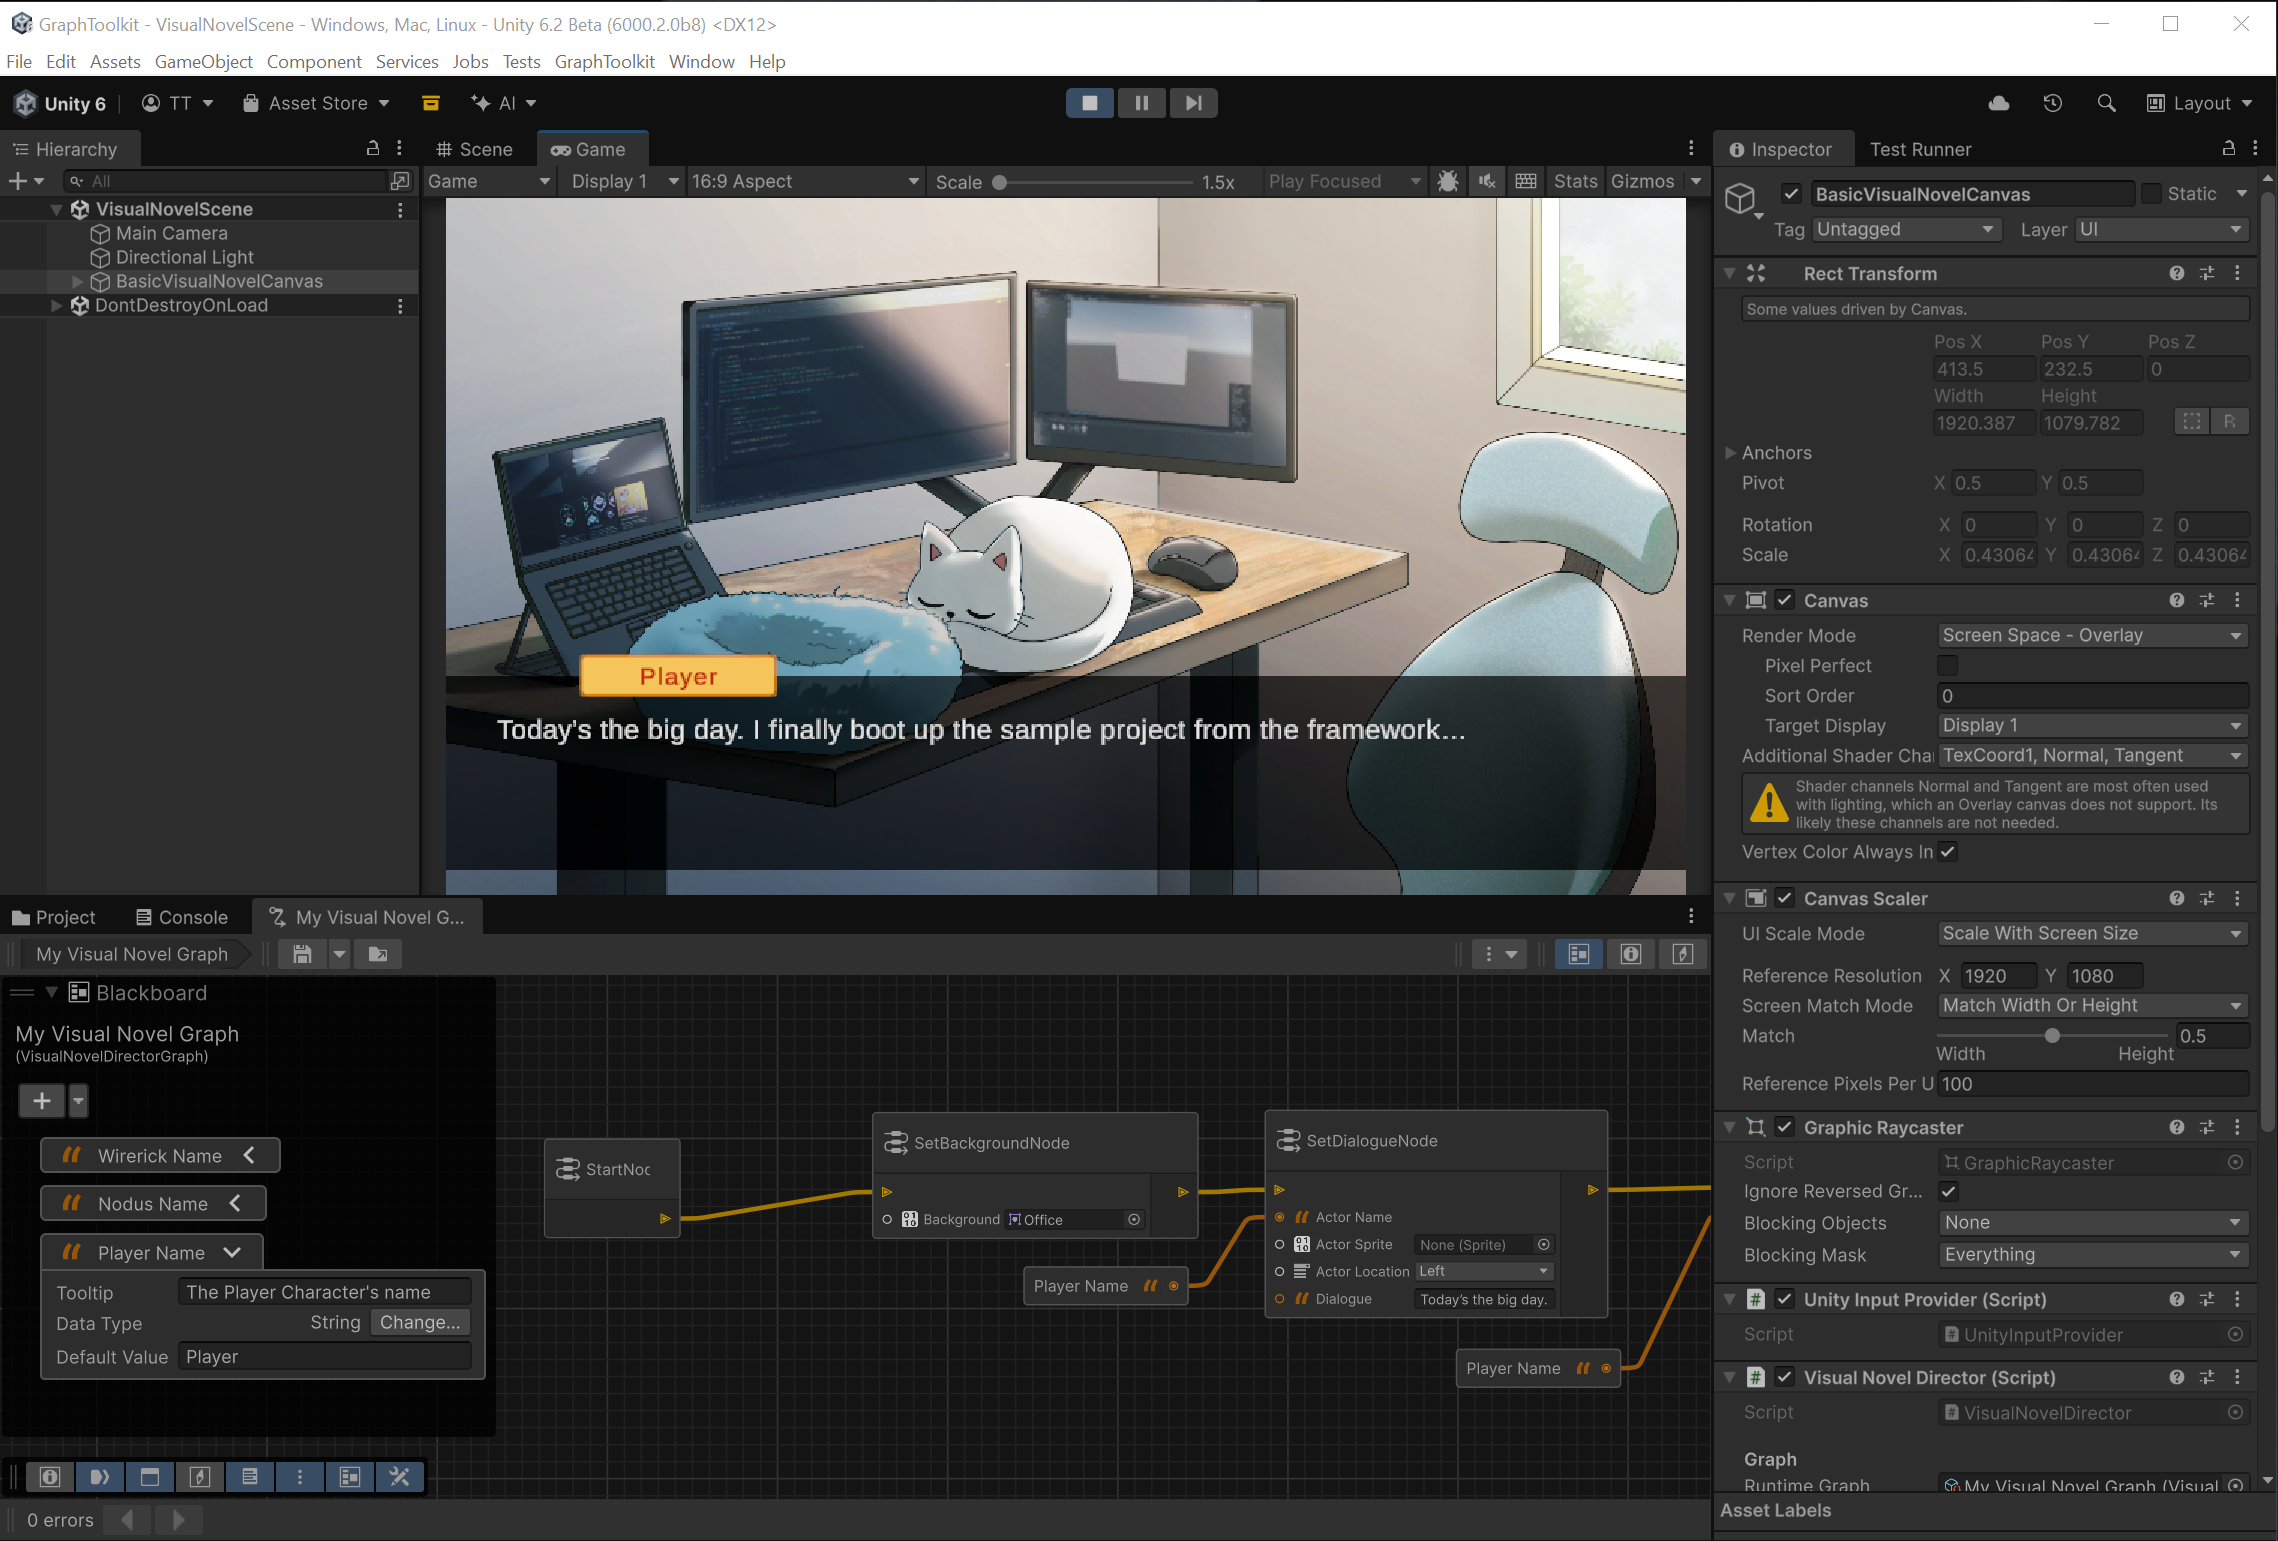
The tool contains four types of nodes:
- Start nodes - Indicates the starting point of the visual novel.
- SetBackground nodes - Sets the background image of the scene.
- SetDialogue nodes - Plays dialogue and sets up the related actor sprite and position in the scene.
- WaitForInput nodes - Waits for the players input before continuing the graph execution.
A graph can contain only one Start node. If the user adds multiple instances, only the first one is used. Any others are flagged with a warning.
WaitForInput nodes can be added to the graph to wait for player input after a background image change. Using a SetDialogue node will implicitly wait for input after the dialogue is completed.
The tool also includes an example custom runtime. The runtime includes a runtime graph ScriptableObject that contains the runtime data and a VisualNovelDirector component that's responsible for executing the runtime graph.
For simplicity's sake the sample plays a linear visual novel with no decisions, branching or conditions.
The sample tool includes a BasicVisualNovelCanvas prefab that includes all the UI elements needed to display the visual novel with the right references set up for the VisualNovelDirector. The prefab includes:
- A background image - This is the image that is displayed in the background of the scene.
- A character layer - This is the layer that displays the character sprites, with multiple child images to display a character sprite in different locations.
- A dialogue box - This is the box that displays the dialogue text.
- A speaker name box - This is the box that displays the name of the character speaking.
The general end-user flow of the tool is as follows:
- The user creates a new visual novel graph, creates nodes as required and connects them.
- The user saves the graph. This builds the runtime asset (on import) and sets up the runtime asset to be part of the same asset on disk.
- The user drags the graph asset into the scene onto a
VisualNovelDirector. - The user configures the
VisualNovelDirectorcomponent with the other UI component references in the scene to drive runtime behaviour. - Enter play mode and watch the visual novel scene play out.
Some ideas for extending this sample and getting more familiar with Graph Toolkit:
- Add more nodes to the graph, such as a SetMusic node (would require an audio source in the scene).
- Implement choices and branching in the graph with its related runtime representation.