Sample: Join voice chats in rooms
You can use this sample to join the voice chat inside a room.
Prerequisites
Before you use the this sample, you must have the following:
- An installed Presence package
- An installed Vivox package
- An installed Identity package
- An installed Storage package
- A valid Unity ID
- A Unity Cloud scene associated with your Unity ID
- Used the monitor and join rooms sample
Note: While the Presence service doesn't depend on the Storage and Identity services directly, they are used in the sample to control the authentication flow.
Overview
If you want to build a sample that uses voice, you need to set up the Microphone Usage Description option.
- Inside your Unity project Window, go to Edit > Project Settings.
The Project Settings window opens. - In the Project Setting window, select Player > Other Settings.
- In Other Settings, scroll to the Mac Configuration section until you reach the Microphone Usage Description* field.
- In the Microphone Usage Description* field, enter your description.
Installation
To install this sample, see the following steps:
- Inside your Unity project window, go to Package Manager > Unity Cloud Presence.
- Expand the Samples section and select Import next to the Voice sample.
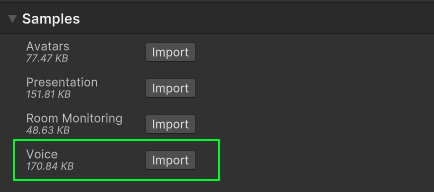
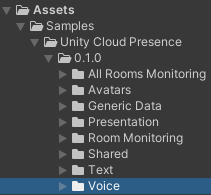
After the import process is complete, you can view your imported assets under the Assets/Samples/Unity Cloud Presence folder.
Join a voice chat in a room
This sample shows you how to join a voice chat in a specific room.
For a better user experience, you can join a room from multiple clients. To join a room from multiple clients, see the following steps:
- Run the sample on two machines and join the same room
- Build the sample scene and run the build at the same time as the sample in the Editor
- Run the sample in two instances of the Unity Editor at the same time
Launch the sample
To launch the sample, see the following steps:
- Go to
Assets/Samples/Unity Cloud Presence/<package-version>/Voice/Scenes/VoiceSample.unityand run the scene. If this is your first time launching the sample, make sure to sign in with your Unity ID account and that you have a Unity Cloud scene created. For more information on creating a Unity Cloud scene, see the Storage package documentation. - Select and join a room as demonstrated in the Monitor and Join Rooms sample.
Join a voice chat in the sample
To join a voice chat, select Join Voice inside a room. You are added to the participant list and your voice chat updates as you speak.
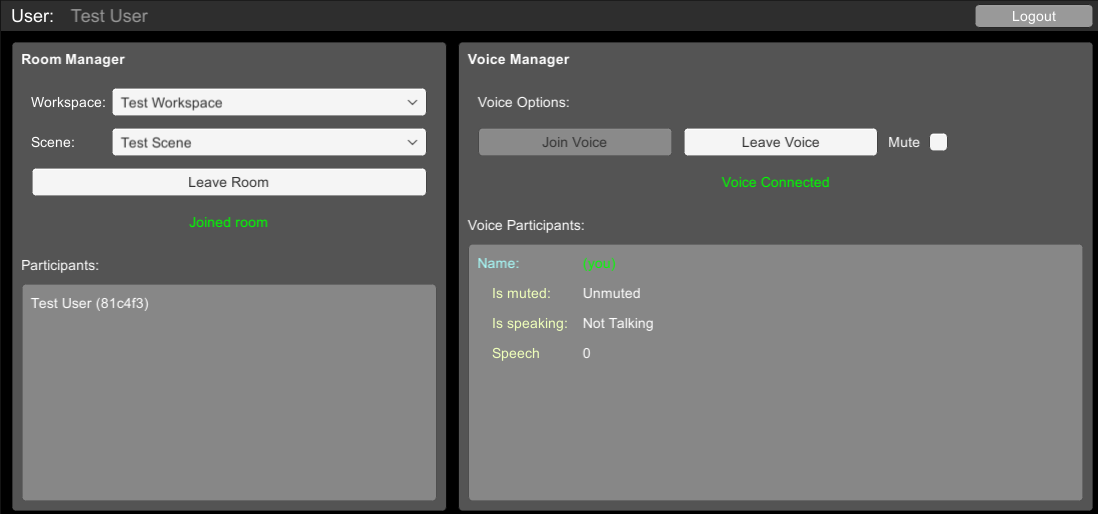
You can mute yourself to stop broadcasting your voice. As other participants join the voice chat, you can speak to them directly.
Main components
This section describes the scripts that make up the main components of this sample.
Voice manager script
The VoiceService script shows you how to do the following:
- Interact with the
VoiceServiceclass to join or leave the voice chat, and to synchronize your muted flag - Register the
VoiceServiceto receive events from other voice participants in the room
To open the VoiceManager sample script, go to your Assets/Samples/Unity Cloud Presence/<package-version>/Voice/Scripts/VoiceManager.cs file.
Troubleshoot
The automatic browser redirection doesn't work
If you run the sample in the Unity Editor, you should see the following page after you successfully login through your browser.
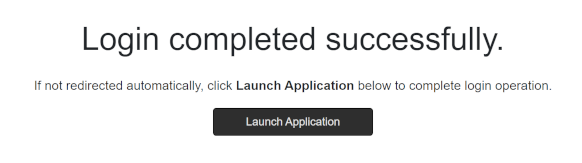
If you aren't automatically redirected to the Editor and nothing happens when you select Launch Application, return to the Editor. This should continue the authentication process.
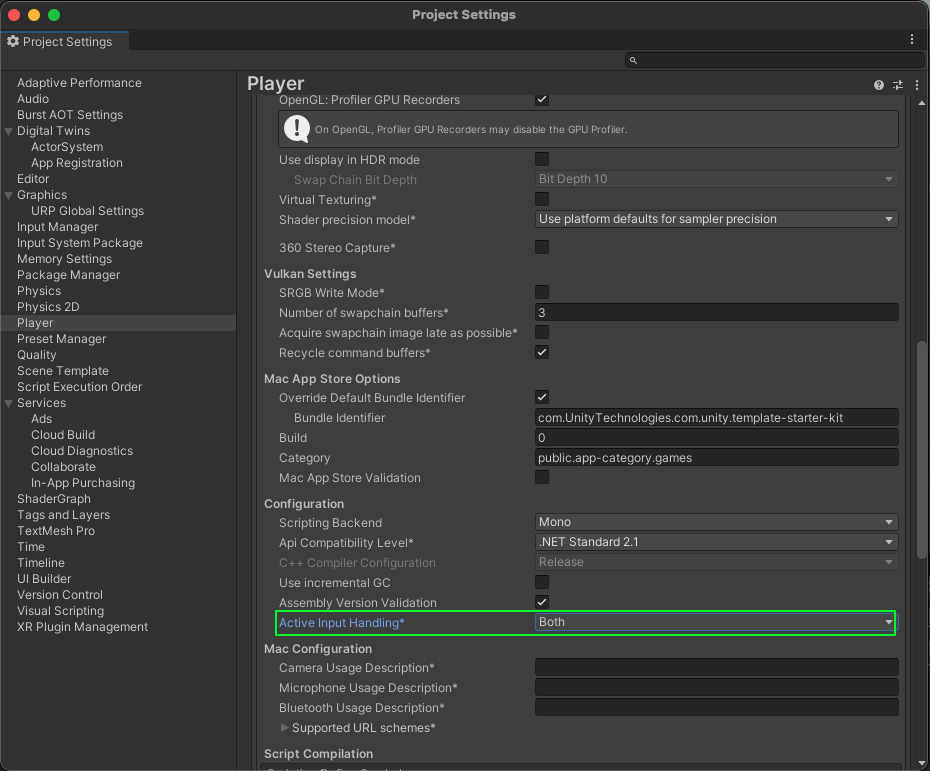
Mouse input isn't registered
This sample isn't created to run with the Input System package. If you are using this package in your project, your mouse selections may not be detected.
To fix this, set your project to support both the built-in input system as well as the Input System package: go to Edit > Project Settings > Player and set Active Input Handling to Both.
Missing dependency to com.unity.services.vivox package
As mentioned at the top of this page, the Voice sample has a dependency on the Vivox package.
To fix this, follow the Install Vivox section of installation guide.