Sample | Exchange generic data between participants in Unity Cloud scenes
You can use this sample to exchange generic data (team information) between participants in a Unity Cloud scene.
Prerequisites
To use the sample, you require the following:
- An installed Presence package
- An installed Vivox package
- An installed Identity package
- An installed Storage package
- A valid Unity ID
- A Unity Cloud scene associated with your Unity ID
- Knowledge of how to join rooms
Note: While the Presence package doesn't depend on the Storage and Identity packages, they're used in the sample to control the authentication flow.
Installation
To install the sample, follow these steps:
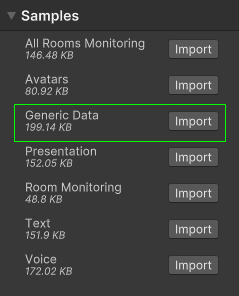
- In your Unity project, go to Window > Package Manager > Unity Cloud Presence.
- Expand Samples and select Import beside the Generic Data sample.
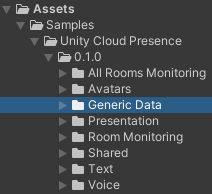
After the import process completes, you can view the imported assets under the Assets/Samples/Unity Cloud Presence folder.
Run the sample
Note: If you don’t have at least two participants, do one of the following to join a room from multiple clients:
- Run the sample on two machines and join the same room.
- Build the sample scene and run the build while you run the sample in the Unity Editor.
- Run the sample in two instances of the Unity Editor at the same time.
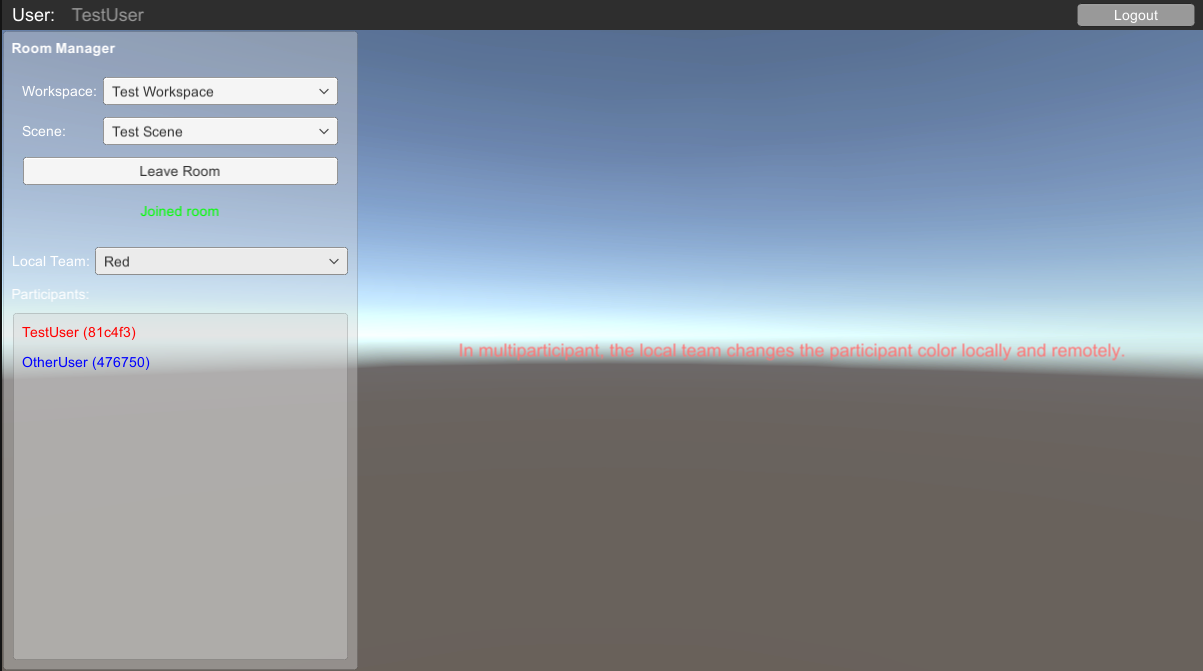
At least two participants must join the room to exchange generic data (the team color). To run the sample, follow these steps:
- In your Unity project, go to File > Open Scene.
- Go to
Assets/Samples/Unity Cloud Presence/<package-version>/Generic Data/Scenes/GenericDataSample.unityand run the scene. - In the Game view, select Login if you are logged out. Log into the browser window that launches with your Unity ID account and then return to the sample scene. > Note: If you've previously logged in, the sample automatically logs you in so you can proceed to the next step.
- Select and join a room. All participant's names appear in the Participants section.
Select a different local team color in the Local Team dropdown. The color of your participant's name changes based on the selected team in the Participant's section.
Main components
This section describes the scripts that make up the main components of this sample.
Member manager sample script
The MemberManager script interacts with the INetcodeService class to notify you when a new INetcodeParticipant is added or removed. Each INetcodeParticipant represents a participant.
To open the member manager sample script, go to the Assets/Samples/Unity Cloud Presence/<package-version>/GenericData/Scripts/MemberManager.cs file.
Member sample script
The Member script shows you how to do the following:
- Subscribe to
GenericDataHandler.GenericDataUpdatedthrough theINetcodeParticipantclass - Process generic data updates
- Set generic data so it's exchanged with others participants
To open the member sample script, go to the Assets/Samples/Unity Cloud Presence/<package-version>/GenericData/Scripts/Member.cs file.
Troubleshoot
This section describes issues you might have while using the sample.
Automatic browser redirection doesn't work
If you run the sample in the Unity Editor, you should see the following page after you successfully login through your browser.
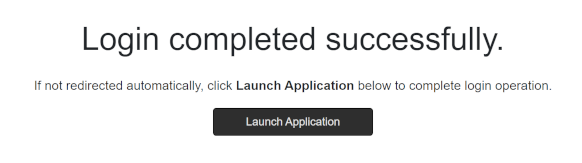
If you aren't automatically redirected to the Editor and nothing happens when you select Launch Application, return to the Editor. This should continue the authentication process.
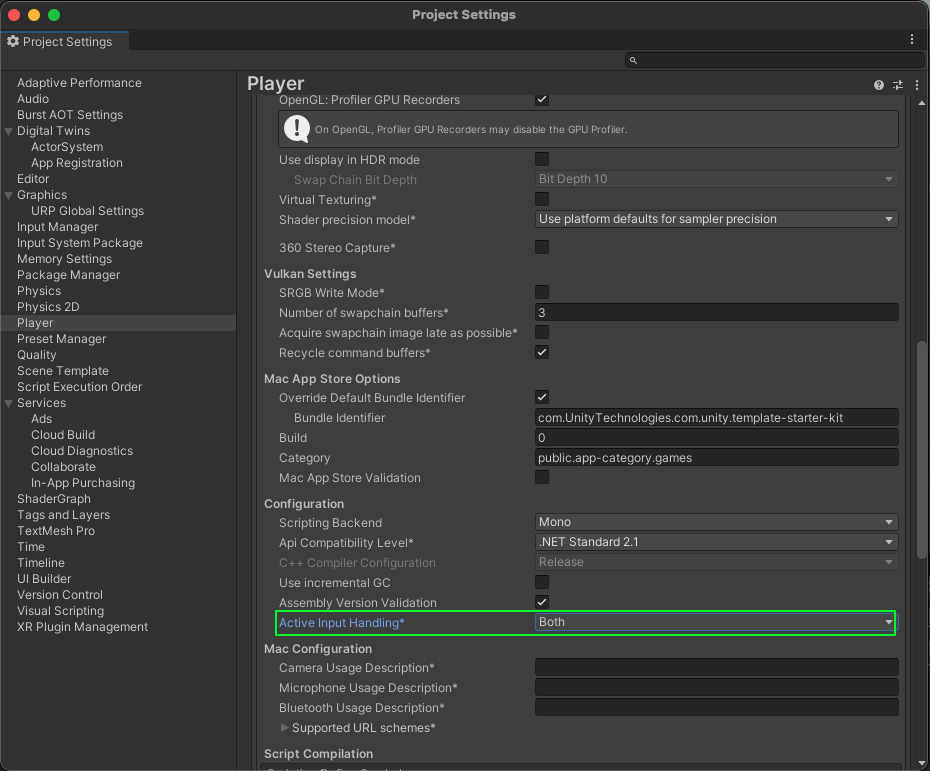
Mouse input isn't registered
This sample isn't created to run with the Input System package. If you're using this package in your project, your mouse selections may not be detected.
To fix this, set your project to support both the built-in input system and the Input System package: go to Edit > Project Settings > Player and set Active Input Handling to Both.