Generate a new sprite
Create a new sprite using generative AI.
Follow these steps:
To create a new sprite that doesn't contain an image and is ready for generating sprites, from the main menu select Create > 2D > Sprite > Generate Sprite.
Unity create a fully transparent sprite, with 1024x1024 resolution and 1024 pixels per unit (PPU). It occupies exactly 1 unit in the scene.
Select the sprite in the Assets folder.
In the Inspector window, select Open Sprite Editor.
In the Modes overlay, select the Generate (
 ) mode.
Use the Image Generation window to add prompts and settings, and generate the sprite. For more information, refer to the Generate window documentation in the Generators package.
Use the Results window to select the sprite you want to use. The new sprite replaces the existing one, but you can reselect the original sprite from the Results window.
Edit a sprite
To edit a sprite, follow these steps:
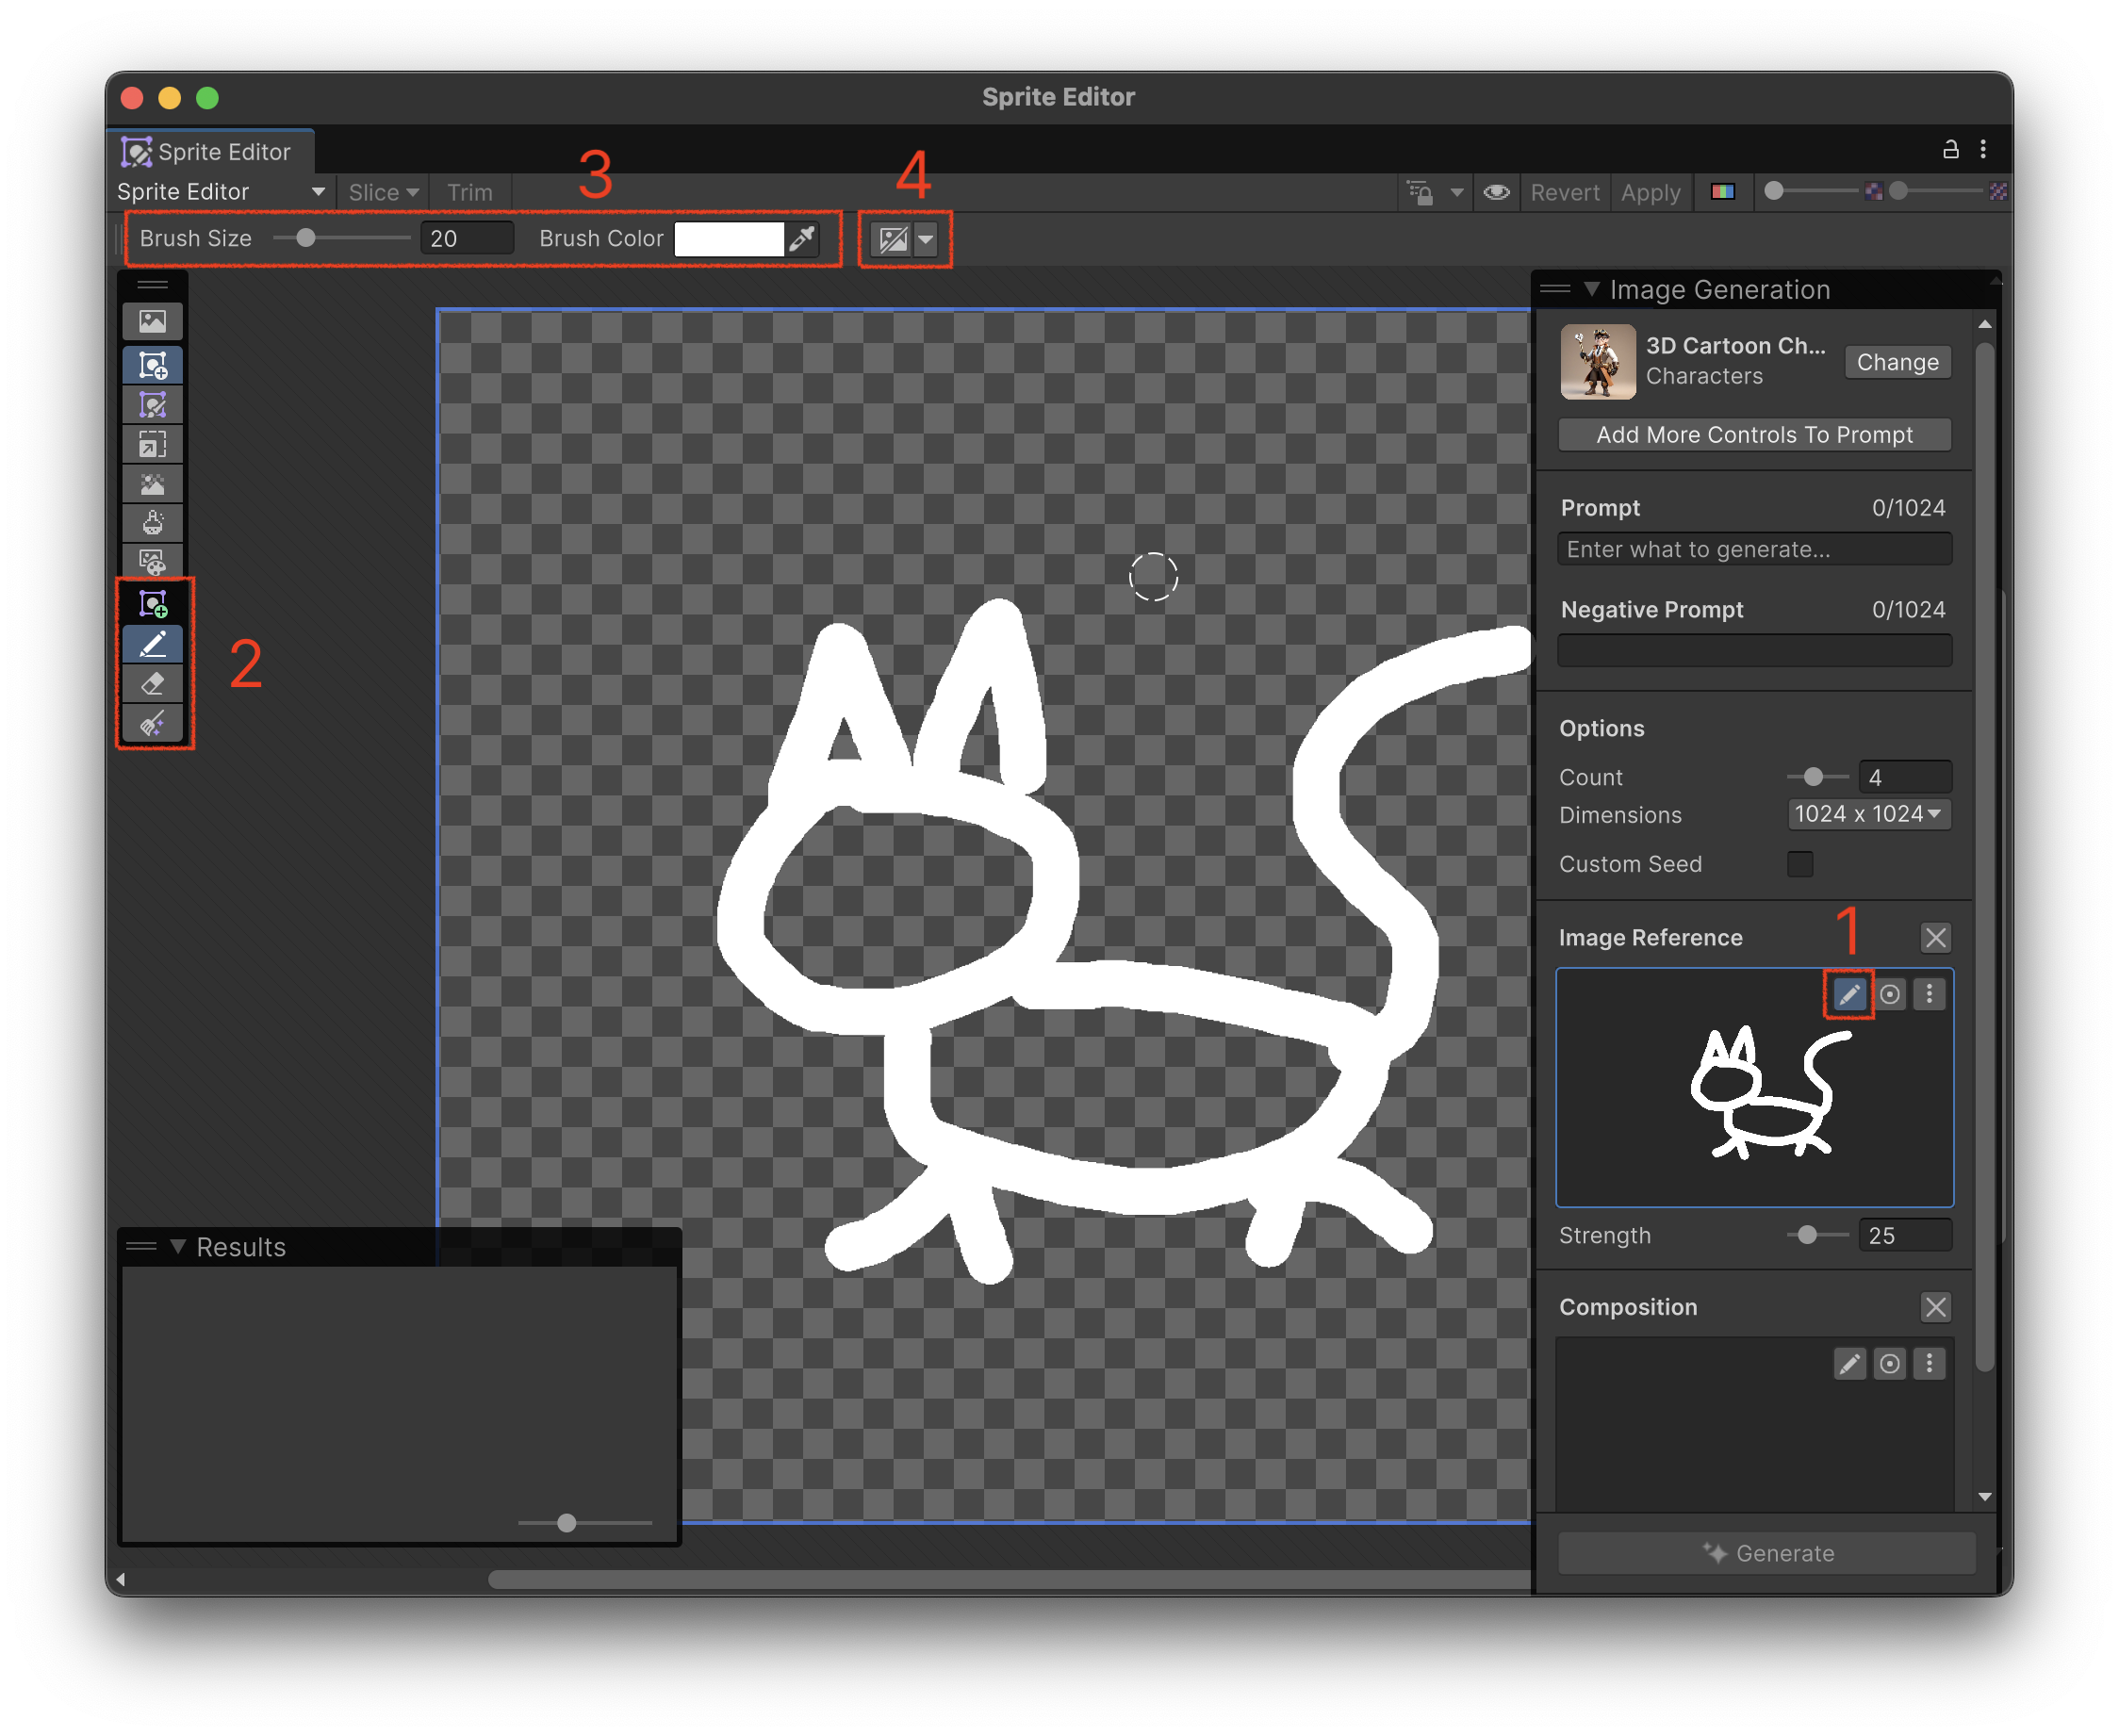
- In the Image Generation window, in the Image Reference section, select the Edit button.
- In the Tools overlay, select a tool.
- In the settings at the top, adjust the brush size and color if needed.
- To hide the sprite underneath the edited image, select Hide Sprite.