Occlusion Area (Pro Only)
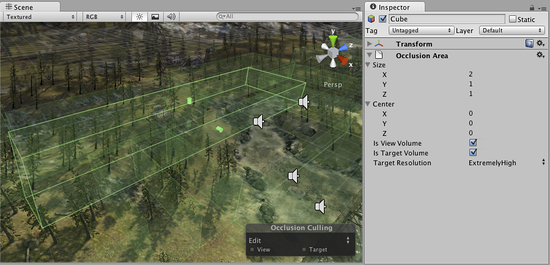
Switch to ScriptingTo apply occlusion culling to moving objects you have to create an Occlusion Area and then modify its size to fit the space where the moving objects will be located (of course the moving objects cannot be marked as static). You can create Occlusion Areas by adding the Occlusion Area component to an empty game object ( in the menus).
After creating the Occlusion Area, check the Is Target Volume checkbox to occlude moving objects.
| Property: | Function: |
|---|---|
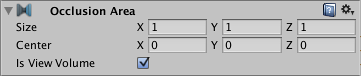
| Size | Defines the size of the Occlusion Area. |
| Center | Sets the center of the Occlusion Area. By default this is 0,0,0 and is located in the center of the box. |
| Is View Volume | Defines where the camera can be. Check this in order to occlude static objects that are inside this Occlusion Area. |
| Is Target Volume | Select this when you want to occlude moving objects. |
| Target Resolution | Determines how accurate the occlusion culling inside the area will be. This affects the size of the cells in an Occlusion Area. NOTE: This only affects Target Areas. |
| Low | This takes less time to calculate but is less accurate. |
| Medium | This gives a balance between accuracy and time taken to process the occlusion culling data. |
| High | This takes longer to calculate but has better accuracy. |
| Very High | Use this value when you want to have more accuracy than high resolutions, be aware it takes more time. |
| Extremely High | Use this value when you want to have almost exact occlusion culling on your moveable objects. Note: This setting takes a lot of time to calculate. |
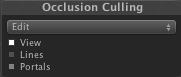
After you have added the Occlusion Area, you need to see how it divides the box into cells. To see how the occlusion area will be calculated, select and toggle the button in the Occlusion Culling Preview Panel.
Testing the generated occlusion
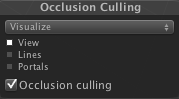
After your occlusion is set up, you can test it by enabling the Occlusion Culling (in the Occlusion Culling Preview Panel in Visualize mode) and moving the Main Camera around in the scene view.
As you move the Main Camera around (whether or not you are in Play mode), you’ll see various objects disable themselves. The thing you are looking for here is any error in the occlusion data. You’ll recognize an error if you see objects suddenly popping into view as you move around. If this happens, your options for fixing the error are either to change the resolution (if you are playing with target volumes) or to move objects around to cover up the error. To debug problems with occlusion, you can move the Main Camera to the problematic position for spot-checking.
When the processing is done, you should see some colorful cubes in the View Area. The blue cubes represent the cell divisions for Target Volumes. The white cubes represent cell divisions for View Volumes. If the parameters were set correctly you should see some objects not being rendered. This will be because they are either outside of the view frustum of the camera or else occluded from view by other objects.
After occlusion is completed, if you don’t see anything being occluded in your scene then try breaking your objects into smaller pieces so they can be completely contained inside the cells.