About ProBuilder
Build, edit, and texture custom geometry in Unity. Use ProBuilder for in-scene level design, prototyping, collision meshes, all with on-the-fly play-testing. Advanced features include UV editing, vertex colors, parametric shapes, and texture blending. With ProBuilder's model export feature it's easy to tweak your levels in any external 3D modelling suite.
Important Note The ProBuilder API is currently considered to be in beta - it will change before the final release.
Requirements
ProBuilder is compatible with Unity 2018.1 and later.
Help and Support
Need to report a bug, or just ask for advice? Post on the support forum.
For general questions and info, email us at contact@procore3d.com.
Installing ProBuilder
Unity 2018.1 and later (recommended)
To install this package, follow the instructions in the Package Manager documentation.
Verify that ProBuilder is correctly installed by opening Tools > ProBuilder > About.
Upgrading from ProBuilder 2.9.8
To upgrade a Unity project with ProBuilder 2.9.8 or later, follow these instructions.
- Open the project in Unity 2018.1 or later.
- Install ProBuilder as described aboved.
- Follow the Convert to Package Manager utility instructions.
If the Convert to Package Manager utility does not automatically open, you can manually start the process by opening Tools > ProBuilder > Repair > Convert to Package Manager.
Unity 2017.3 and earlier
Important - The Asset Store version of ProBuilder will only receive critical bug fixes going forward. New features are available in the 2018.1 Package Manager version of ProBuilder.
- Open your Unity project and ensure you have no persistent errors (red-colored text) in the Console.
- From the top menu, choose
Window > Asset Store. - In the Asset Store window type "ProBuilder" into the search bar.
- Click the "ProBuilder" icon in the search results.
- Click the blue "Download" button, and wait for the download to complete.
- After Unity has downloaded the package, click "Import."
- An "Import Unity Package" window will appear. Click "Import" at the bottom-right.
- After the import process completes, choose
Tools > ProBuilder > ProBuilder Windowfrom the top menu to begin using ProBuilder.
Using ProBuilder
Browse the complete ProBuilder documentation online at procore3d.com/docs/probuilder.
The ProBuilder Toolbar
All of ProBuilder's editing functions are available via the ProBuilder Toolbar, which dynamically adapts to your Edit Mode and selection.

Each Toolbar button will display detailed information about it's use, options, and keyboard shortcuts when hovered over. Viewing tooltips is a great way to start learning about ProBuilder's functionality.
More Info: [ProBuilder Toolbar](http://procore3d.github.io/probuilder2/toolbar/overview-toolbar)
Creating a New Mesh
Press CTRL K on your keyboard to spawn in a new ProBuilder-editable cube.
Note: ProBuilder can only work on meshes that it creates, or that are converted into a format it understands. To convert an existing mesh to a ProBuilder one use the ProBuilderize action.
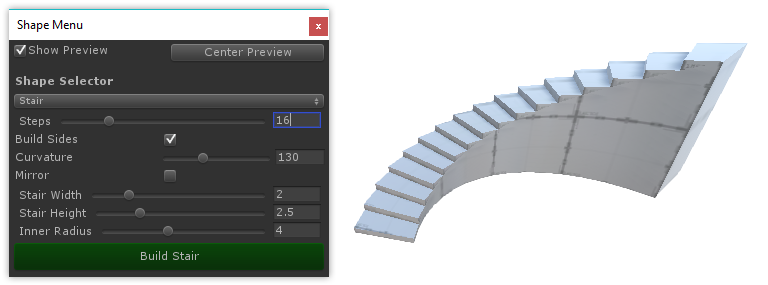
ProBuilder also includes a library of shapes to begin modeling with. All shapes include a set of parameters that you can modify to create exactly the shape you want.

More Info: [Shape Tool](http://procore3d.github.io/probuilder2/toolbar/tool-panels/#shape-tool)
Object vs Element
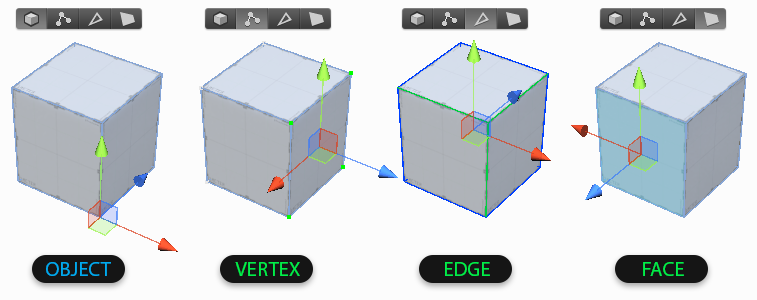
Object Mode is how Unity behaves by default - select GameObjects and move, rotate, scale, etc.
Elements are the individual parts that make up a mesh: Vertices, Edges, and Faces. If it helps, you can think of these like levels of detail on a map. For example, city, state, country. Click in the Edit Mode Toolbar to change Mode, or use it's shortcut keys.

- Vertex Editing: Select and edit vertices for detailed editing and functions like vertex splitting and connecting.
- Edge Editing: Select and edit edges for geometry editing, and edge loop modeling techniques.
- Face Editing: Select and edit faces on an object, performing tasks like deleting faces and extruding.
Element Selection and Manipulation
First, choose which Element type you'd like to edit by clicking it's button in the Edit Mode Toolbar.
Then, use any of the standard Unity selection methods (click, drag, etc) and manipulation controls (move, rotate, scale).
Building and Editing Complex Meshes
ProBuilder follows many of the same conventions as other 3D modeling applications, so experienced 3D artists will likely be able to jump right in after reading the ProBuilder Toolbar section.
If you are new to 3D modeling, ProBuilder is a great way to get your feet wet. Now would be a good time to check out ProBuilder Tutorial Videos.
Texturing and UVs

Applying Materials
You can apply any material (including Substance) to ProBuilder meshes using the Material Palette.
Materials can also be applied to individual faces of a ProBuilder mesh. While in face element mode select the faces you want to texture and click the "Apply" button in the Material Editor.
More Info: [Material Tools](http://procore3d.github.io/probuilder2/toolbar/tool-panels/#material-tools)
Editing UVs
ProBuilder includes both Auto UVs (default), and a complete Manual UV Editing and Unwrapping system.
Auto UV mode lets you tweak basics like Offset, Tiling, and Rotation, while ProBuilder handles the complex UV work automatically.
Manual UV mode enables complete control of the UVs, including Projection Mapping, UV Stitching, and more, similar to UV editors in major tools like 3DS Max, Blender, etc.
You may use whichever you prefer, or a mix of both, even on the same mesh.
More Info: [Texturing and UVs](http://procore3d.github.io/probuilder2/texturing/overview-texture-mapping)
More Info
Browse the complete ProBuilder Documentation online at: procore3d.com/docs/probuilder
Document Revision History
| Date | Reason | Version |
|---|---|---|
| Jan 31, 2018 | Installation instructions updated, minor tweaks to wording. | 3.0.0 |
| Nov 9, 2017 | Document created. | 2.9.8 |
