Setting Up Analytics
To get started with Unity Analytics, you must first link your game to a Unity Services Project ID. A Unity Services Project ID is an online identifier which is used across all Unity Services (Ads, Multiuser, IAP, etc). These can be created within the services window itself, or online on the Unity Services website. The simplest way is to use the Services window within Unity, as follows.
Step 1. Link your project with a Unity Services Project ID.
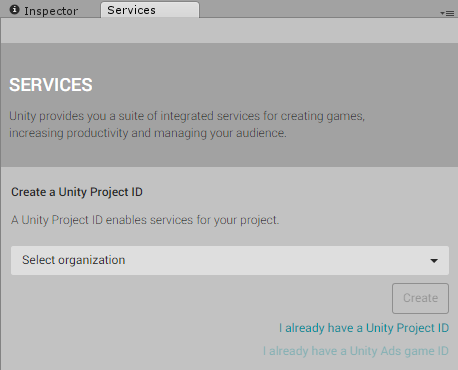
Open the Services Window, by going to the menu: Window > Unity Services, or click the cloud button in the toolbar. 
You will be given the option to create a new Project ID or select an existing one.
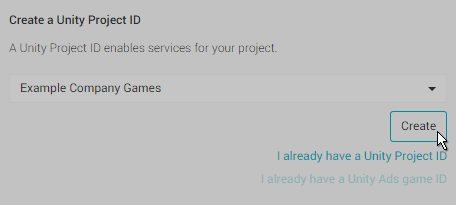
If this is the first time you are connecting your project to Unity Services, you’ll neet to create a new project ID. The organization is typically your company name. The project name for the new Services ID will automatically be taken from the name of the Unity Project you’re currently working on.
Although the name for new Unity Services Project IDs are automatically picked from the project’s name, you can change the name later if you like. This can be done in the Settings section of the services window.
Alternatively, if you have already set up a Unity Services Project ID for this project you can select the organisation and project name from your list of existing projects here. You may have already set up a Unity Services Project ID if you have used one of the other Unity services with this project already, such as Unity IAP, Multiplayer, Ads, or Cloud Build.

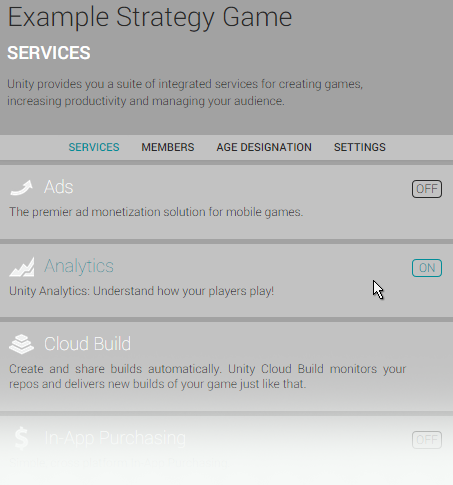
Step 2. Enable Analytics for this project.
In the Services window, select “Analytics” and then click the “Off” button to toggle it On. If you haven’t already done so, at this stage you will need to complete the mandatory Age Designation field for your project. (Again, you may have already done this for a different Unity Service, such as Ads). This age designation selection will appear in the Services window.
Step 3. Hit Play in your project to validate the analytics link.
The Unity Editor can act as a test environment to validate Analytics integration. When you press the Play button, the Editor sends data (an “App Start” event) to the analytics service. This means you can test your analytics without having to build and publish your game.
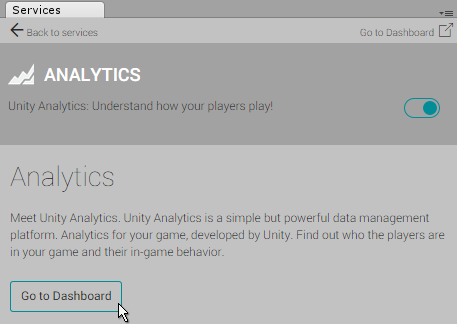
Once you have pressed play, you can check that your project was validated by going to the Analytics Dashboard for this project. To get there, in the services window, click Services -> Analytics -> Go To Dashboard.
The dashboard opens in a web browser. You’ll see three headings under your project’s name: Overview, Basic Integration and Advanced Integration. Click “Basic Integration”, then directly underneath, click step 3: “Play to Validate”. If your project was set up correctly, you should see a table containing an entry showing an “appStart” event, along with the date and time, as well as your current editor platform and version number.
